Lens aberration is an aberration (misalignment, distortion, etc.) caused by a lens. This section describes the lens aberrations that are generated by an optical lens.
Lens Aberration Types
The “Five Seidel Aberrations” of “Spherical aberration/Coma aberration/Astigmatism/Curvature of field/Distortion” are famous for lens aberration types. However, this section explains shading (peripheral dimming), chromatic aberration at magnification (color shift in peripheral areas), and distortion that can be corrected during RAW development.
Shading (Peripheral Brightness Reduction)
If you take a photograph with the digital camera near the aperture release of the lens, the four corners of the screen may dim. This is caused by the characteristics of the lens and image sensor in the case of digital cameras, also known as “shading.”

Cause of Shading
Shading means that the area around the lens as it appeared dark. First, see the figure below.
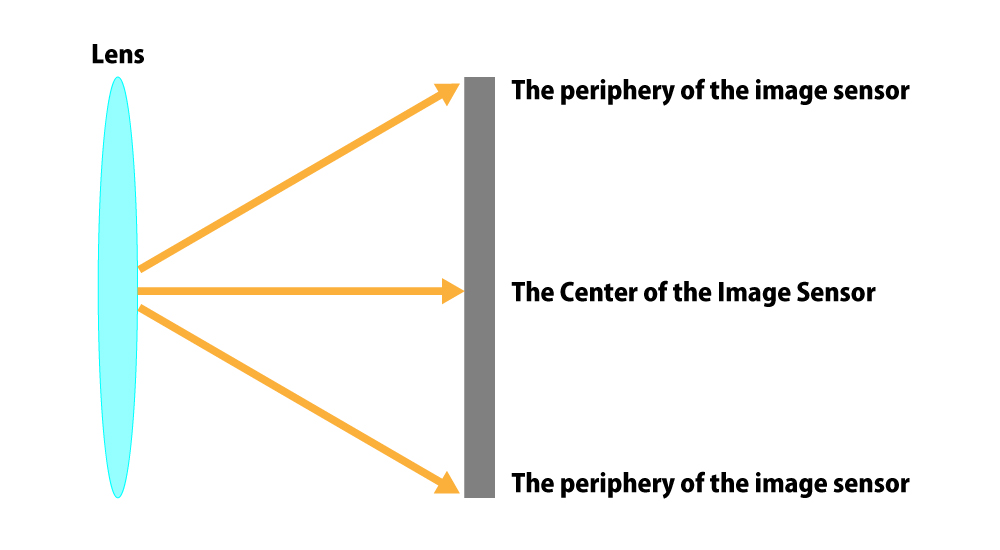
The blue area is the image sensor for digital cameras called “CMOS” or “CCDs.” At the periphery of the lens, the light is hitting the sensor at an angle.
The Center of the Image Sensor
The figure below shows an enlarged view of the center of the image sensor.
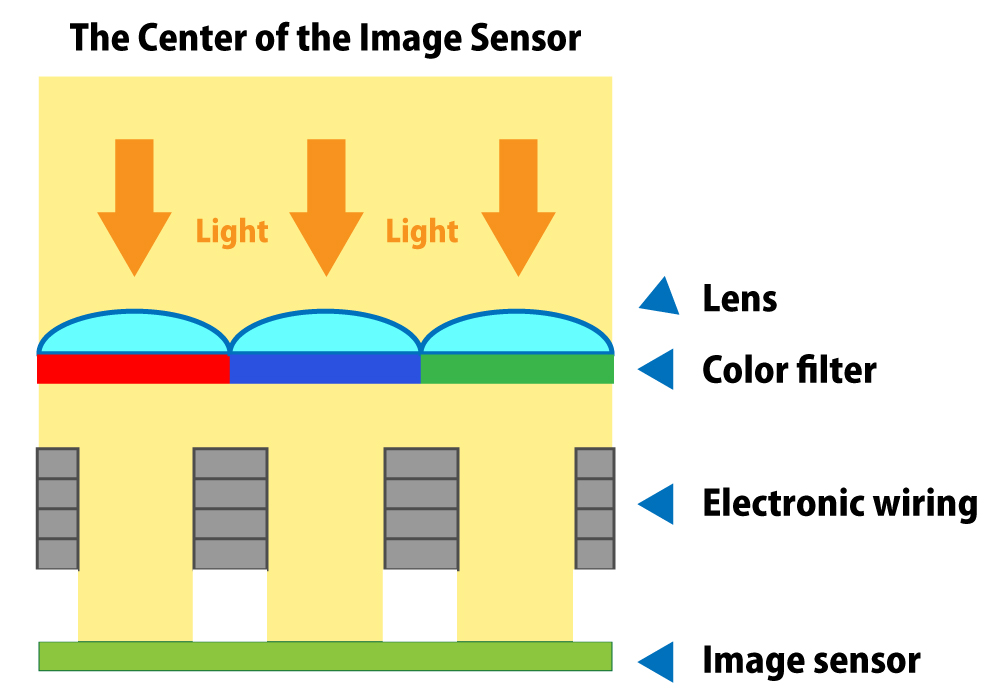
Since the light is incident straight, it reaches the image sensor located at the back of the sensor as it is. There is wiring in front of the light receiving unit, but the effect of this is minimal.
The periphery of the image sensor
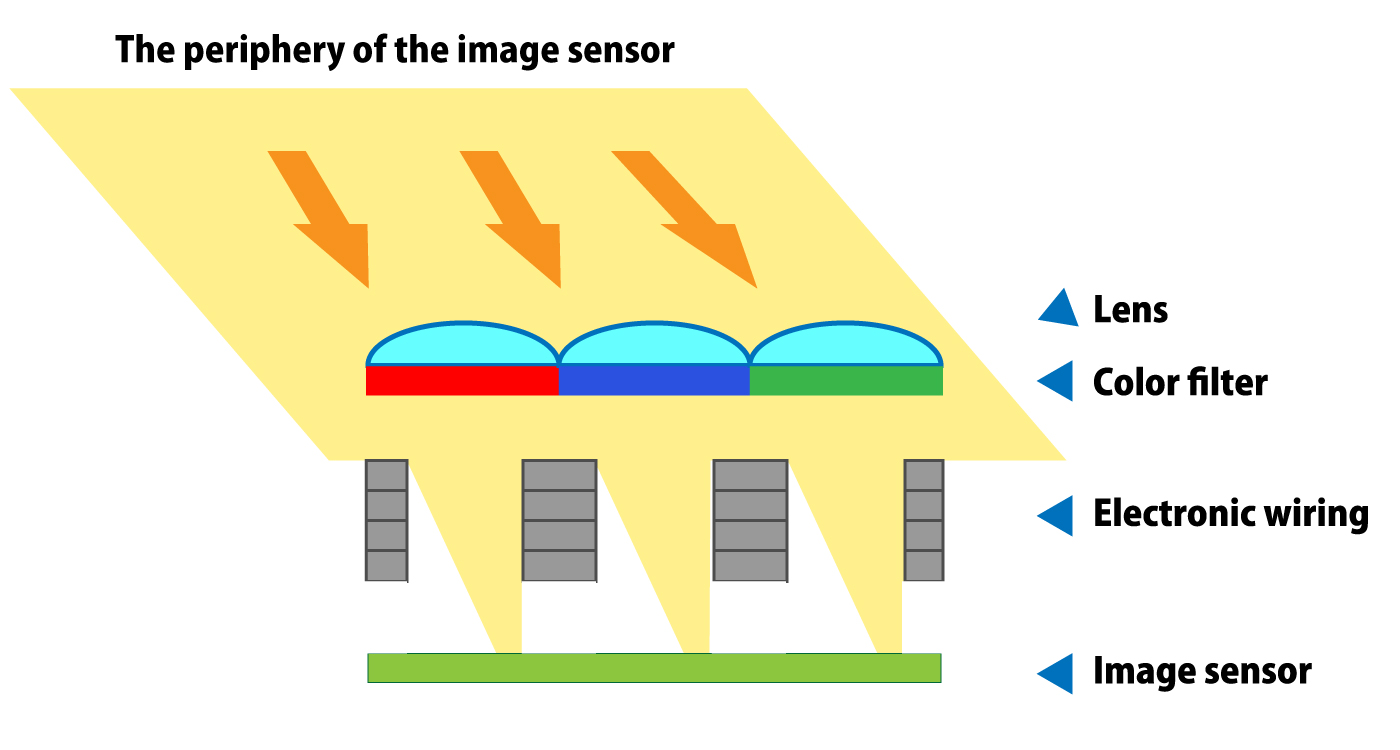
Since light hits the image sensor at an angle around the image sensor, it will be blocked by the wiring, reducing the amount of light reaching the light-receiving portion at the back. The stronger the angle, the darker it will be, so if you look at it in the photograph, the darker it will become. This is the cause of shading. In film photographs, there was no obstruction to light, such as the electronic wires of the image sensor, so we didn’t care much, but it has become noticeable since it became a digital photograph.
Shading Correction
Shading (Peripheral Brightness Reduction) can be corrected using photo editing software or RAW development software.
Example of using RAW development software SILKYPIX series

To correct shading with SILKYPIX, you can use the “Shading (Peripheral Light Intensity)” in the “Lens Aberration Controller.” See here for SILKYPIX.
After shading correction


Photographs that Take Advantage of Shading
If you don’t have shading, you may find it good because the lens’s performance is good proof. However, some photos have the effect of focusing the viewer’s perspective on the center, so it may be better not to correct the image or to reduce the ambient light.
Example of leaving shading (peripheral light intensity)

This is because Instagram, photograph conversion applications, etc. have a function to reduce the ambient light even as an “effect.”
Chromatic Aberration
“Chromatic aberration” is an aberration where a red or green color shift occurs at the edge of the screen.
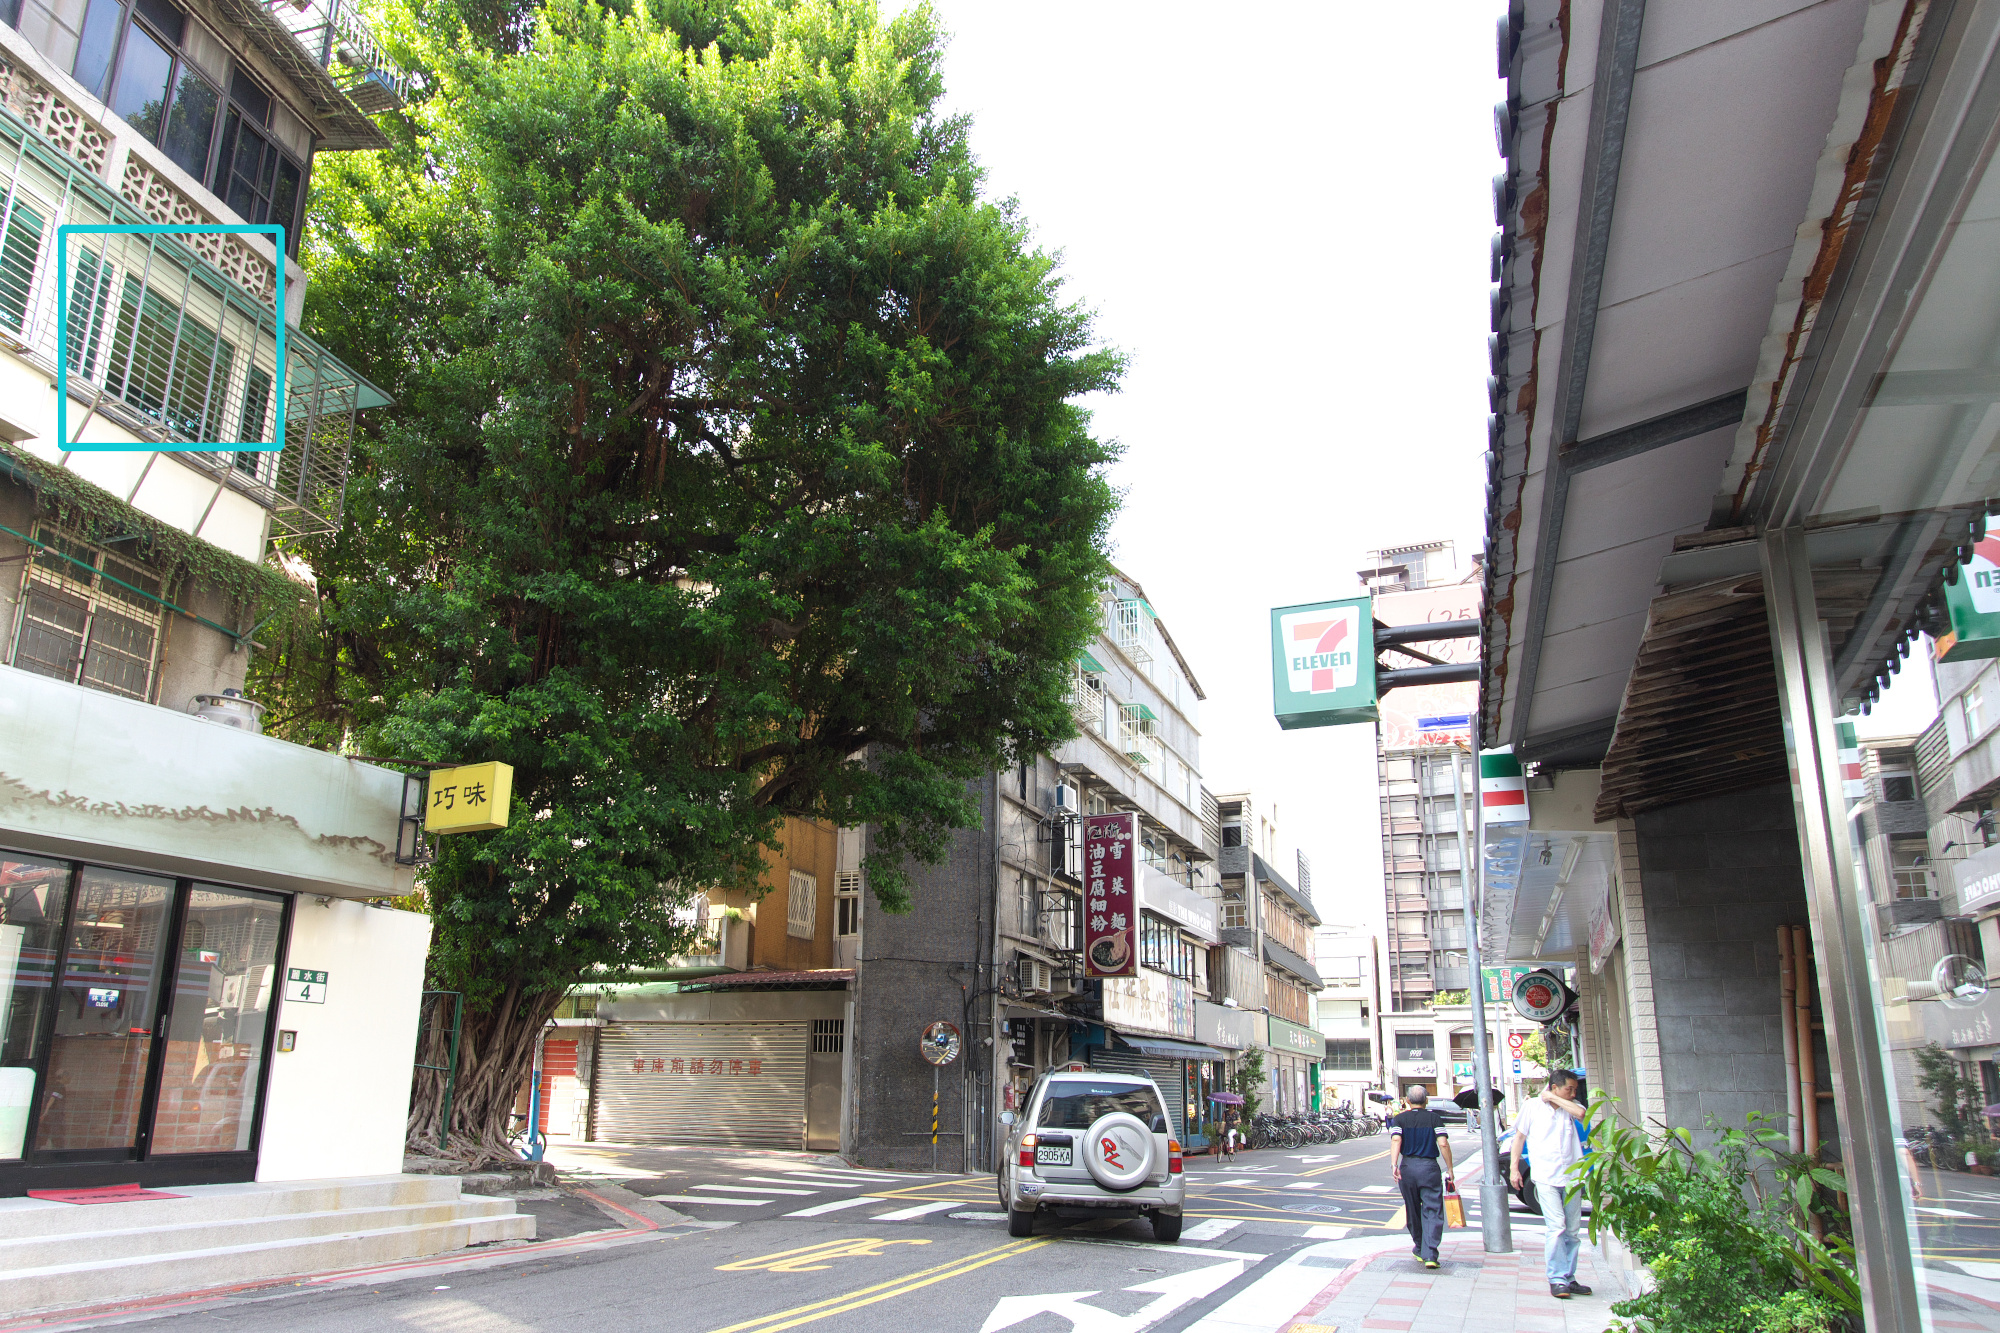
The chromatic aberration is not very familiar with film photography, but it may appear stronger in the corners of the wide-angle lens screen after it becomes digital and may be noticeable.
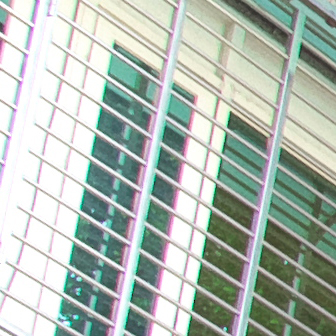
This may also occur when shooting with a lens that is not digitized.
The reason for this aberration is that the position of the image to be imaged for each wavelength of each RGB color is different before the light passing through the lens hits the image sensor. Please see the figure below.

Suppose you shoot an object like this. If the lens has less chromatic aberration, the photo will be taken as it is. The light passed through the lens is decomposed into RGB (red, green, blue) and imaged at the same position on the image sensor.
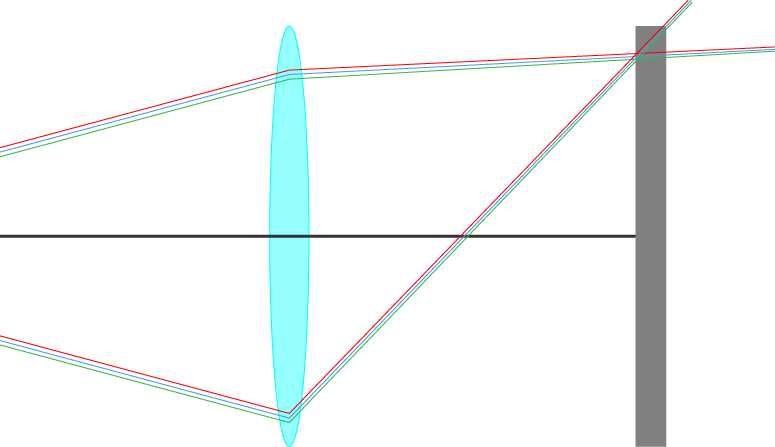
If the lens has a magnification chromatic aberration, the image will be recorded on the image sensor as shown in the figure below.

For lenses with large chromatic aberration, the image formation position is shifted at the peripheral part of the screen as shown in the figure below, and the result appears as an edge of the outline part.

Chromatic Aberration Correction
The chromatic aberration can also be corrected using photo editing software or RAW development software.
Example of using RAW development software SILKYPIX series

To correct the chromatic aberration with SILKYPIX, use the “Chromatic aberration” in the “Lens Aberration Controller” to adjust it.
After chromatic aberration correction
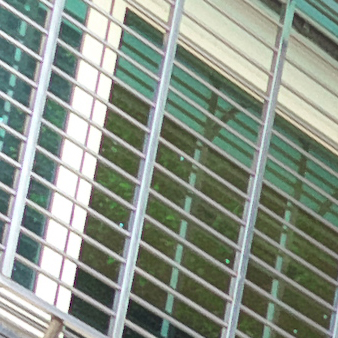
Distortion
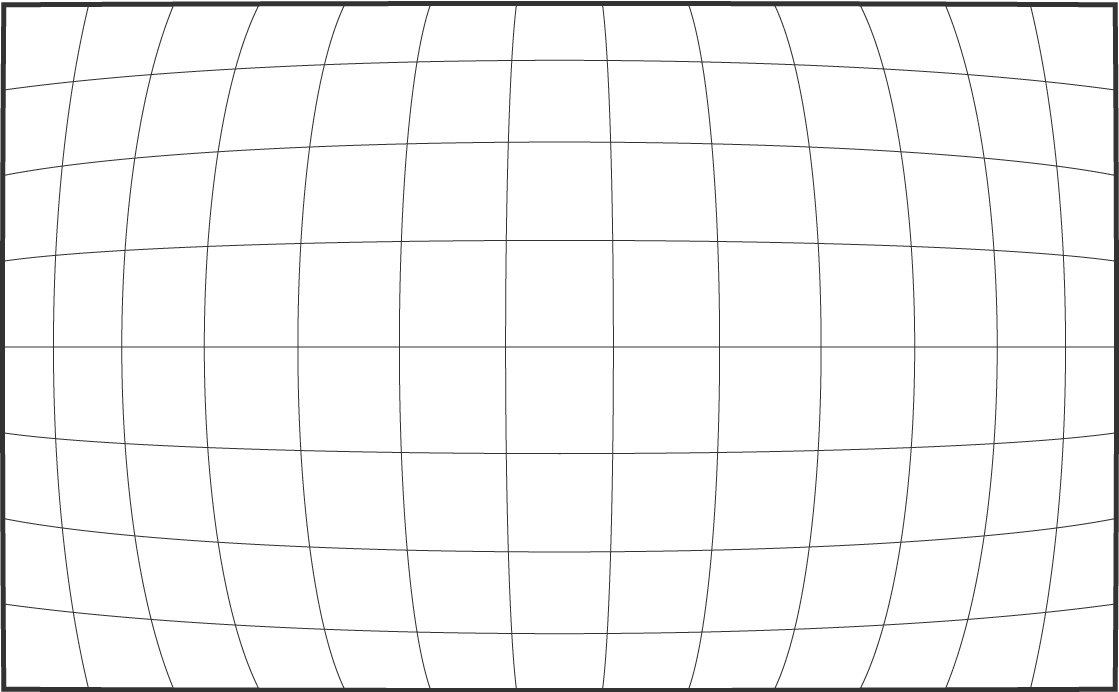
Distortion refers to the distortion of the lens. It is well known for “barrel shape,” which is commonly found in wide-angle lenses, and “pincushion shape,” which is found in telephoto lenses.
Barrel Shape
Pincushion Shape
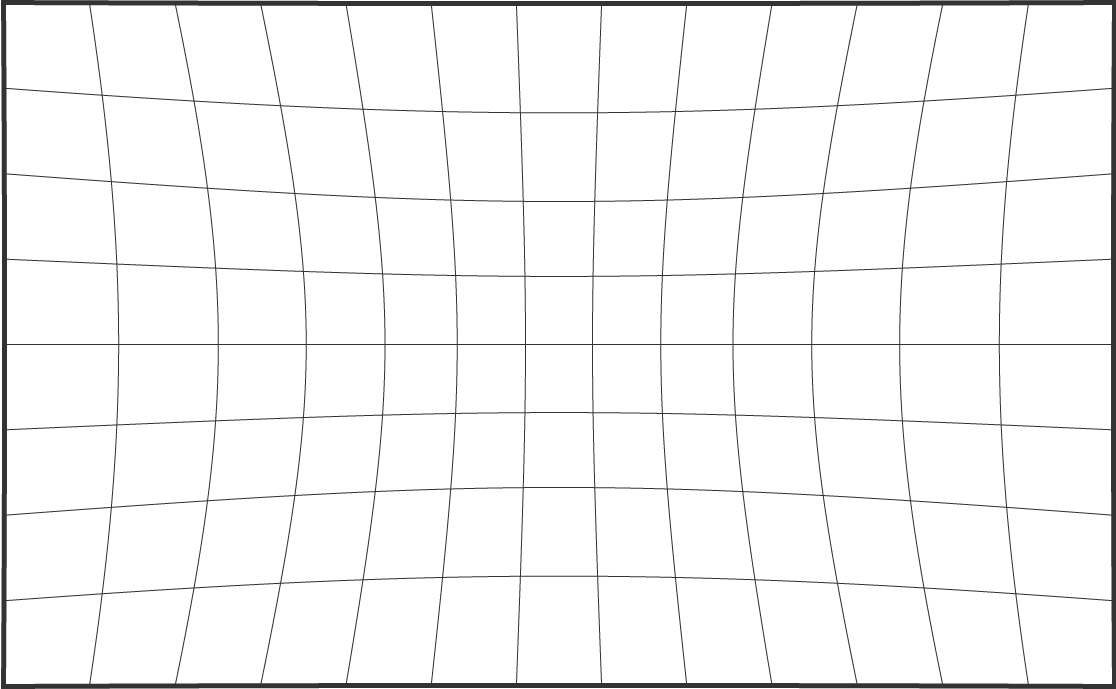
If you shoot a straight subject with a lens with this aberration, the line may be distorted, resulting in an unnatural appearance.
Distortion Correction
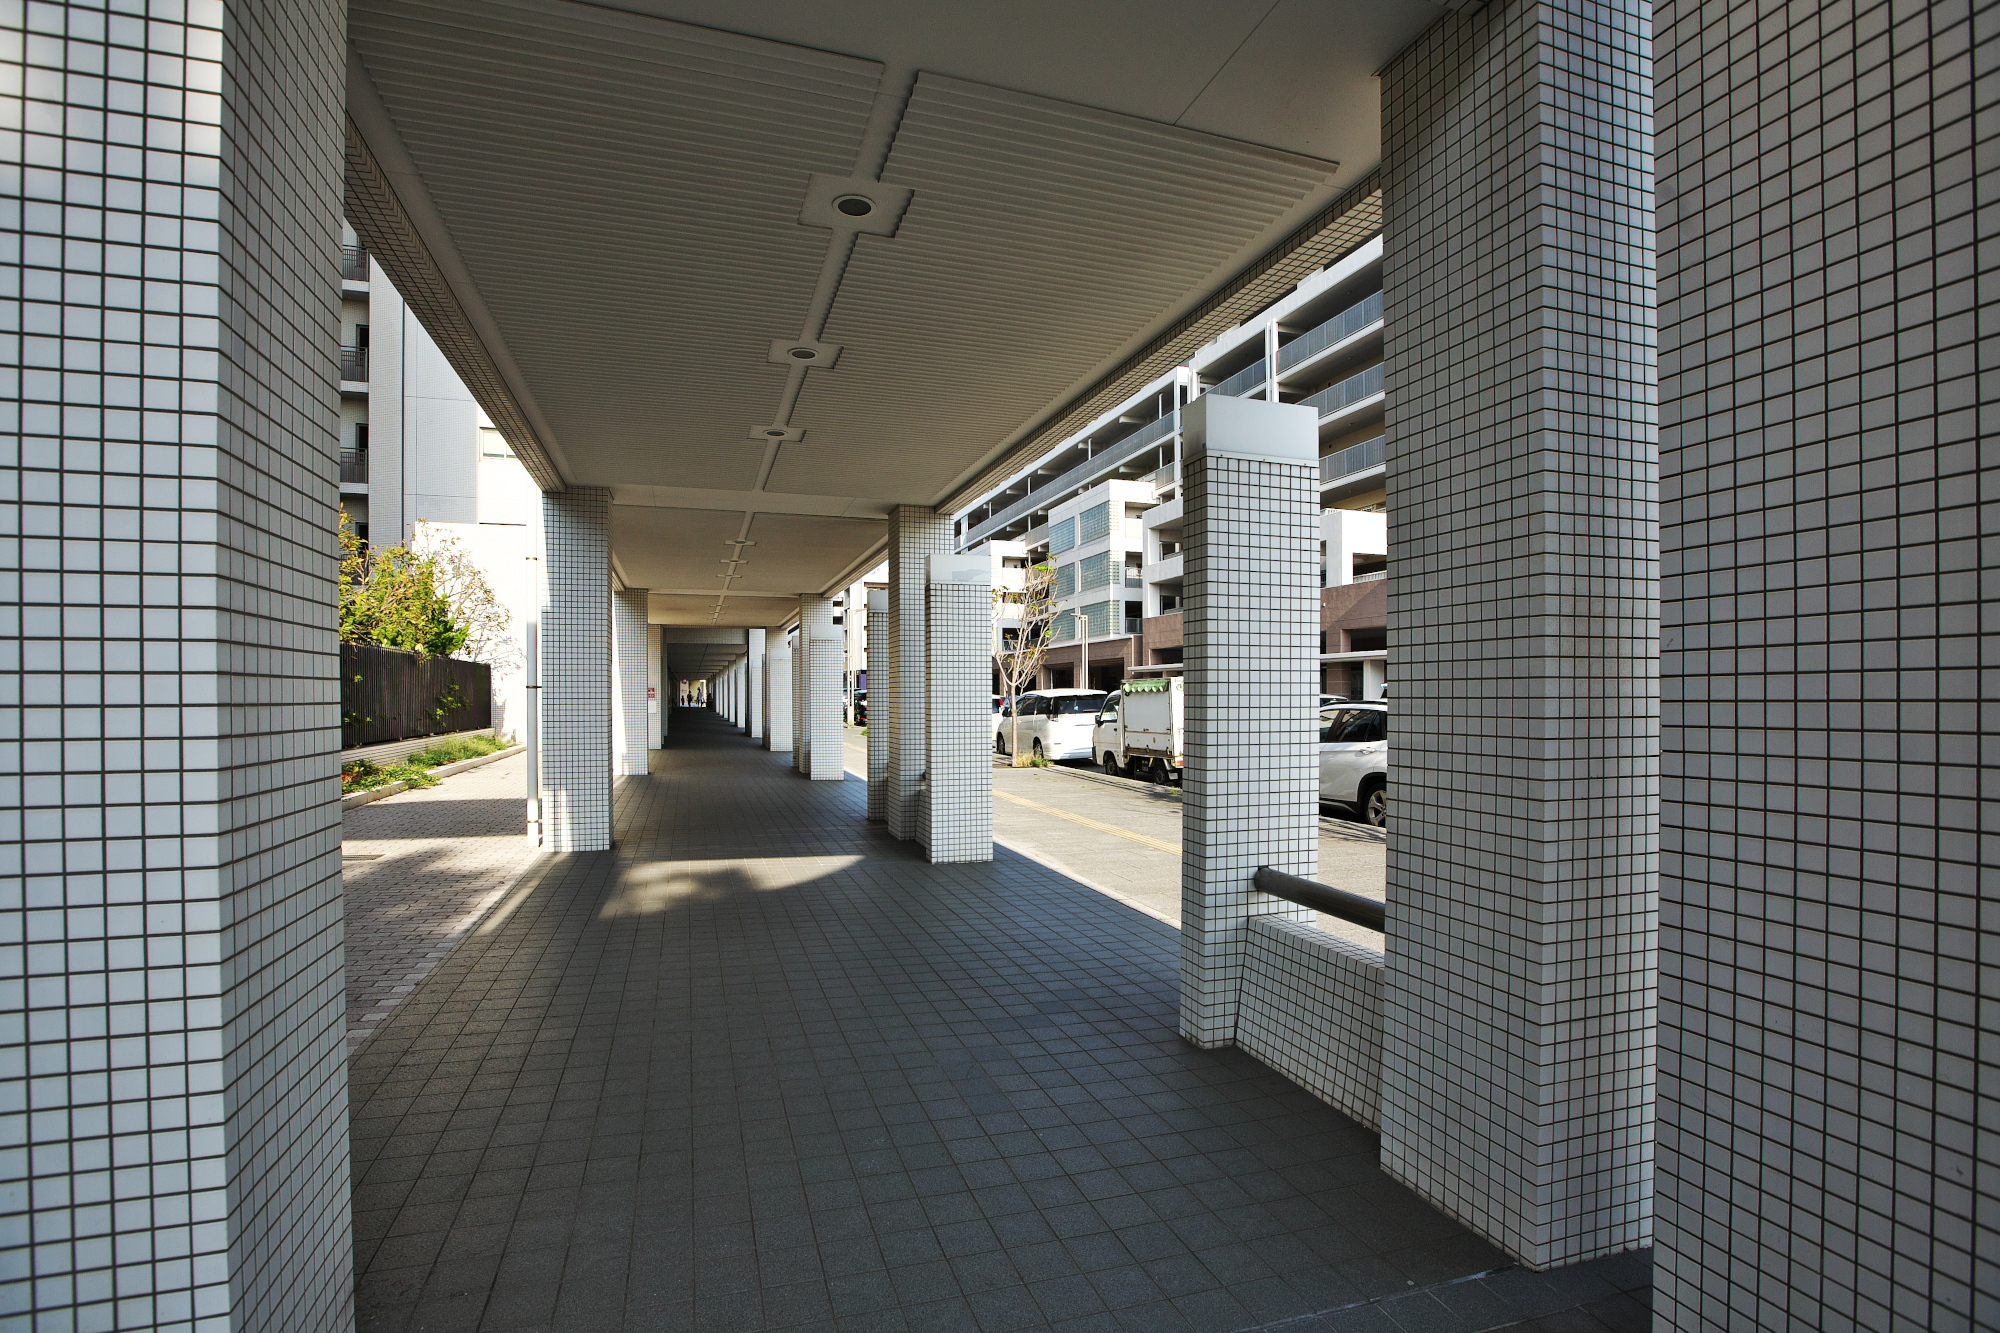
The distortion can also be corrected using photo editing software or RAW development software.
Example of using RAW development software SILKYPIX series

To correct for distortion in SILKYPIX, adjust the “Distortion” in the “Lens Aberration Controller.”
Before Distortion Correction
After Distortion Correction
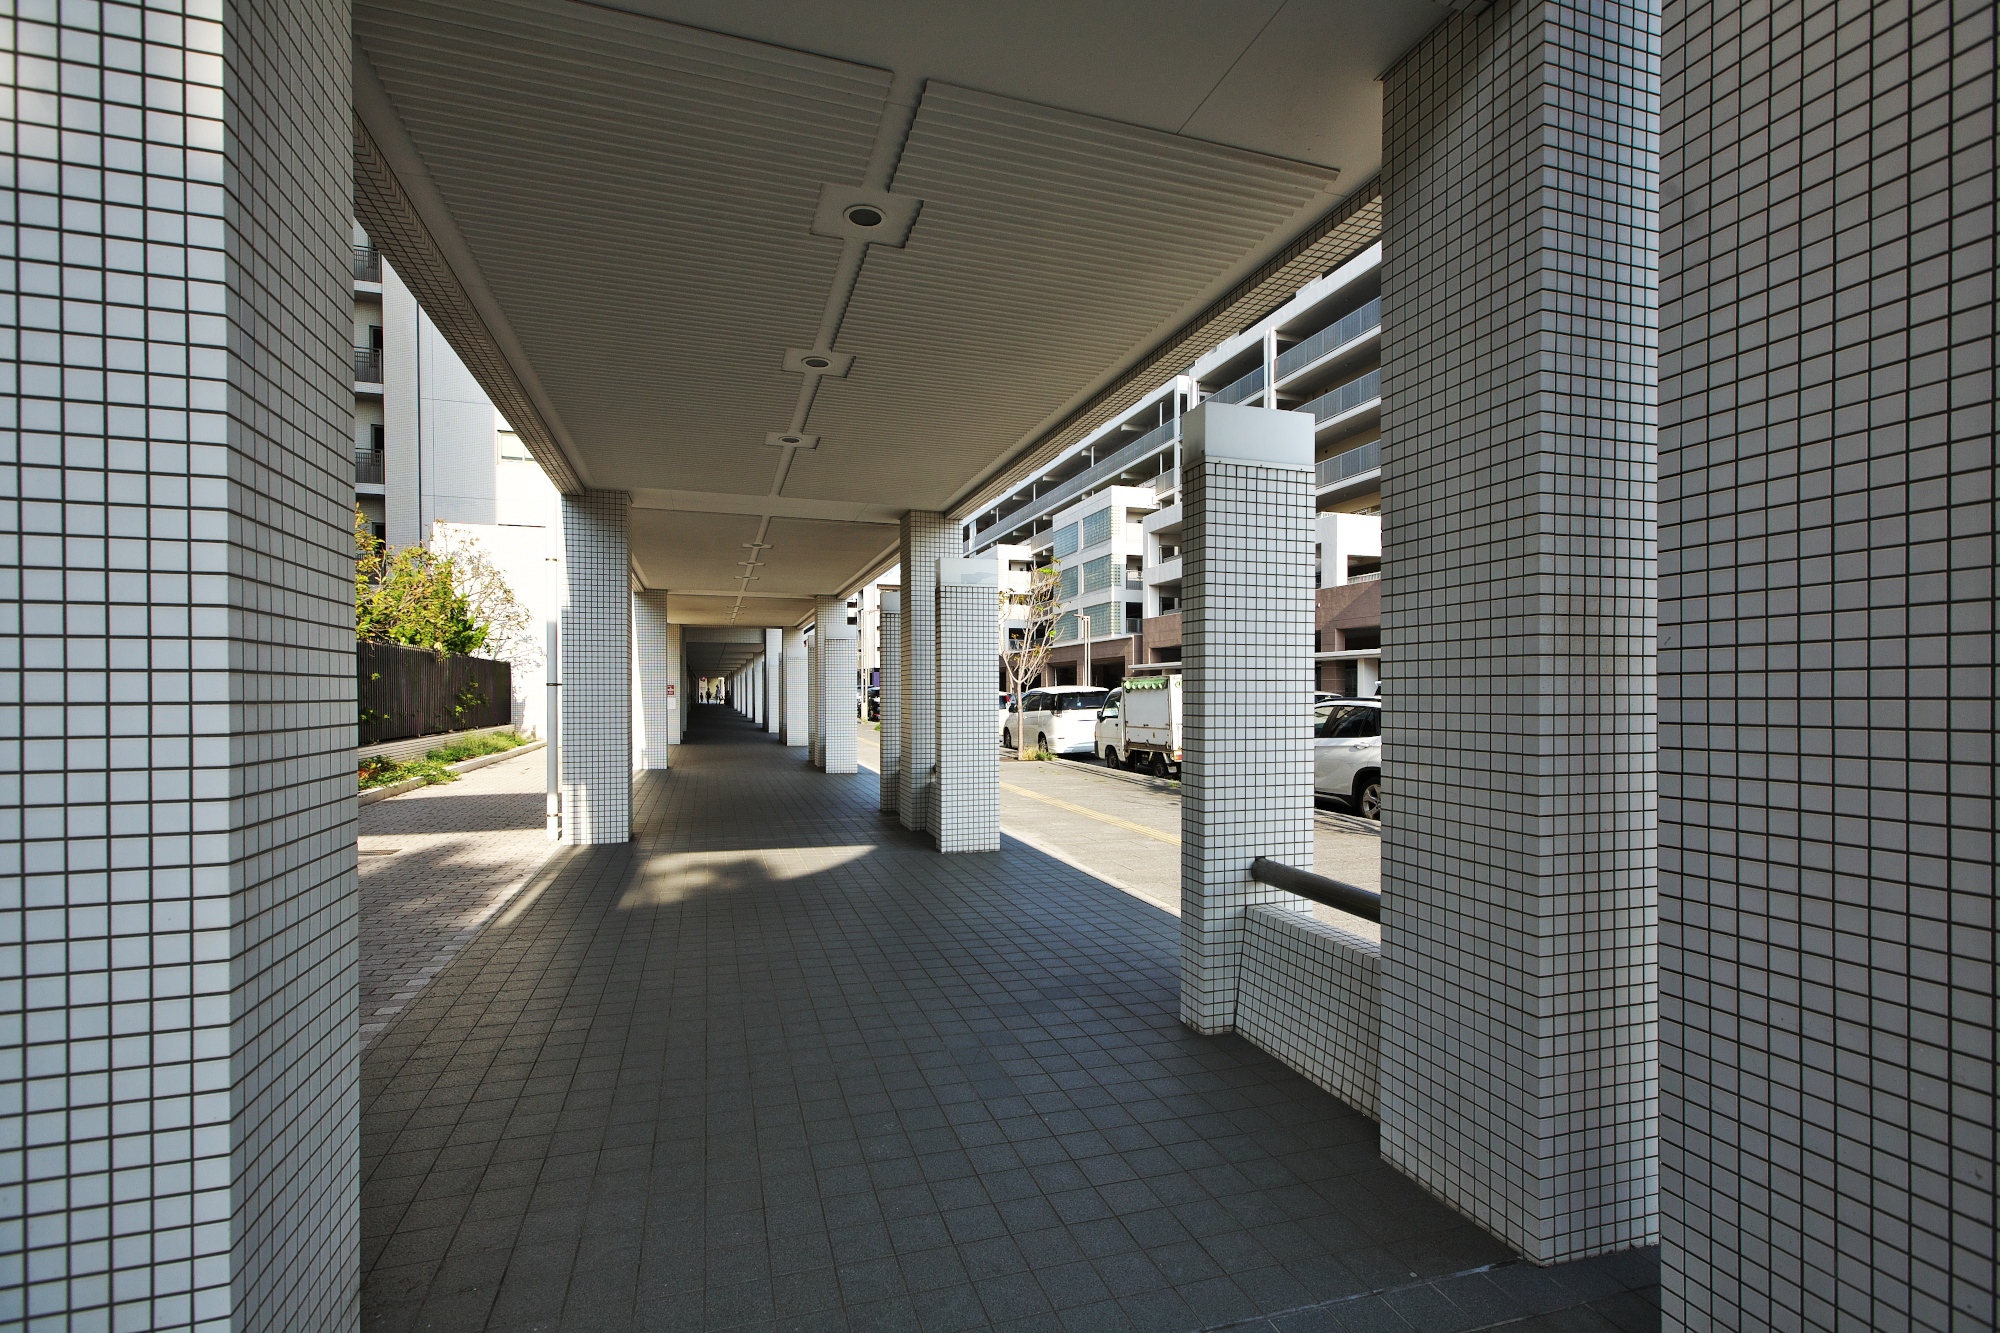
Distortion is generally more pronounced with zoom lenses than with monofocal lenses, and distortion and curvature vary depending on the focal length and shooting distance of the zoom lens. Therefore, it is necessary to correct the distortion differently for each shooting condition.
Incidentally, SILKYPIX is equipped with a “Lens Profile” function that automatically corrects this distortion based on the shoot data of EXIF. Please see here for details.
In this way, the lens aberration is annoying depending on the subject, but you can enhance the quality of your work by correcting it according to the situation.
SILKYPIX
The SILKYPIX series is a series of RAW Development software produced in Japan that enables high-quality editing of RAW images taken with digital cameras to produce beautiful pictures. This product is compatible with the RAW files* of camera manufacturers.
It is also supported by many professional photographers and photographers.
In addition, many camera manufacturers have also adopted the software packaged with cameras.
* For more information about supported cameras, please refer to the details of each product.
Check out the video for basic operation instructions!
Useful Information
