If you have recently started a film camera, used film cameras in the past, or enjoying film cameras now, would you like to convert the photographs of negative film to digital photos and finish them as work?
You can easily use the “Negative film inversion tool” to perform a positive reverse, and you can adjust it yourself and finish it as work, just like a digital photo.
We think you are enjoying taking photos using a film selected from 35 mm format, Medium Format film, Large format (9×12 cm or larger), etc. In Analog photography, there is fun in choosing a film and just shooting with a film camera. However, should be more enjoyable than ever when you have finished your artwork!
It’s easy to digitally archive images of the negative film that you’ve stored, so it’s also a good idea for you who used film cameras in the past!
This time, we will introduce the function “Negative film inversion tool” that makes film cameras more enjoyable, and the recommended functions after inversion.
![]()
If you haven’t tried SILKYPIX Pro10 yet, you can use it for free for 30 days!
Convert photos of negative film to positive images
So, let’s use SILKYPIX to invert the negative film images into positive images.
When shooting a negative film with your digital camera, be sure to also shoot “unexposed areas” around it. How to shoot a negative film is introduced at the end of Function Introduction [The Negative film inversion tool]. Please read it as a reference by all means.
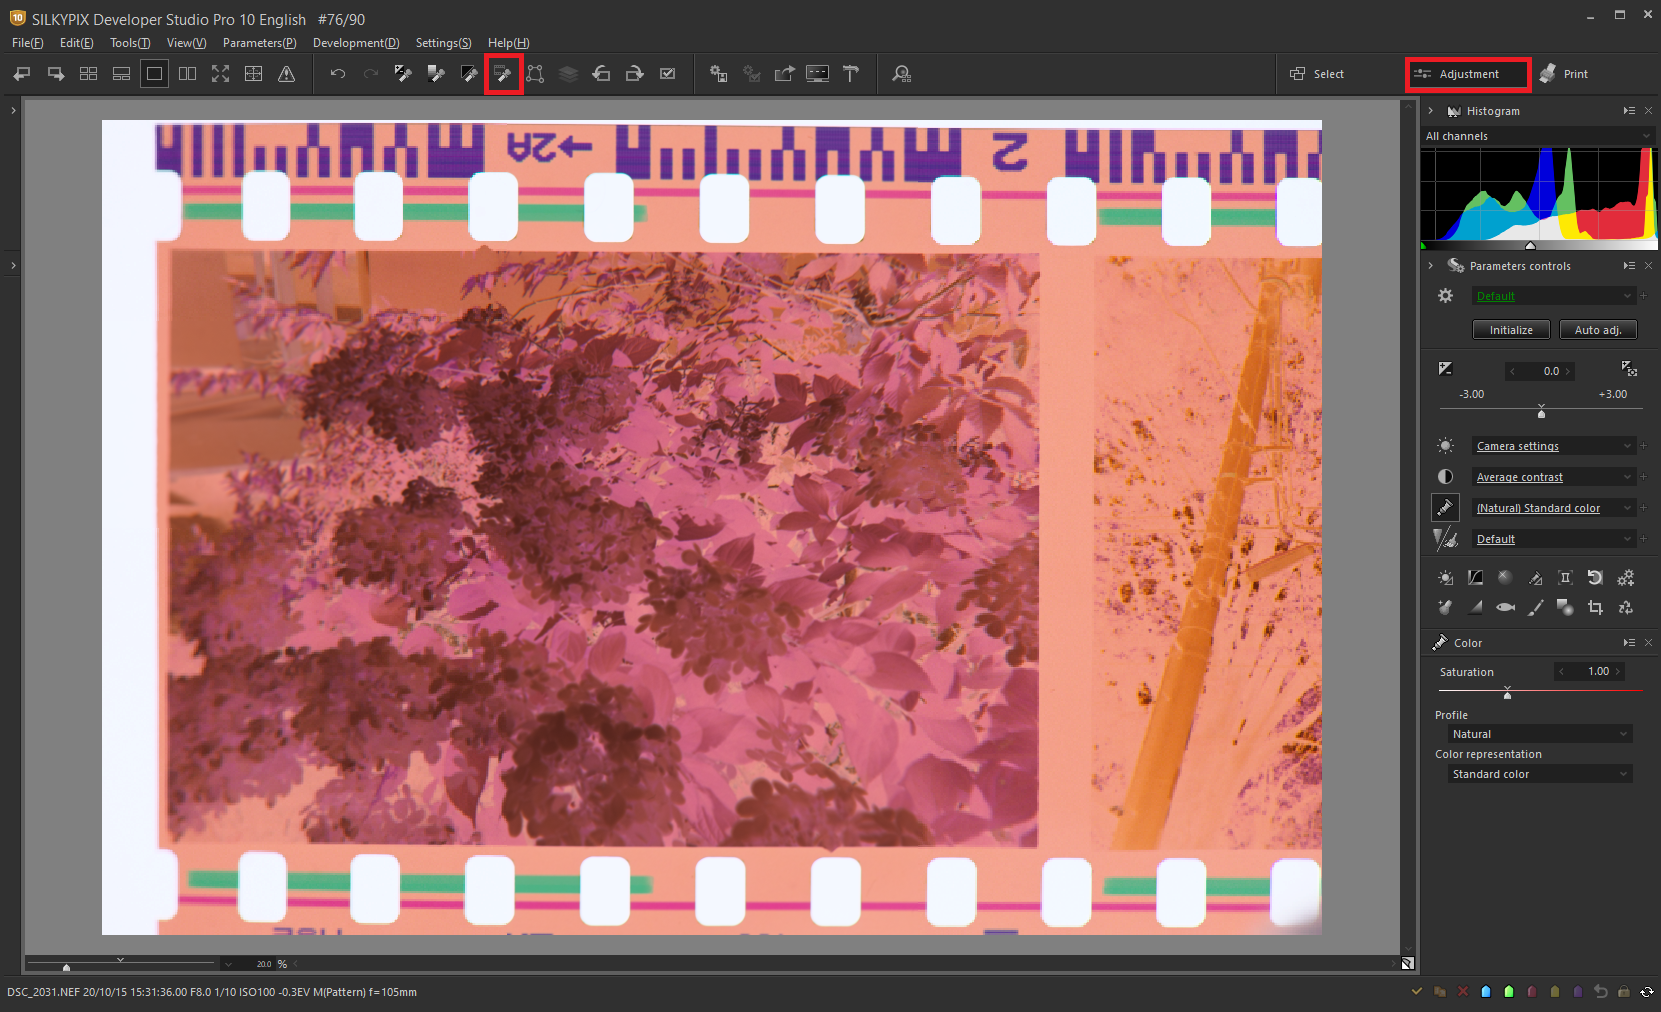
If you’re new to SILKYPIX, you start in the Select section, which allows you to select images. So, You can go to the Adjustment section to adjust your images by clicking Adjustments in the upper right corner. For each section, click here.
When you’re ready, click the Negative film inversion tool in the toolbar above.
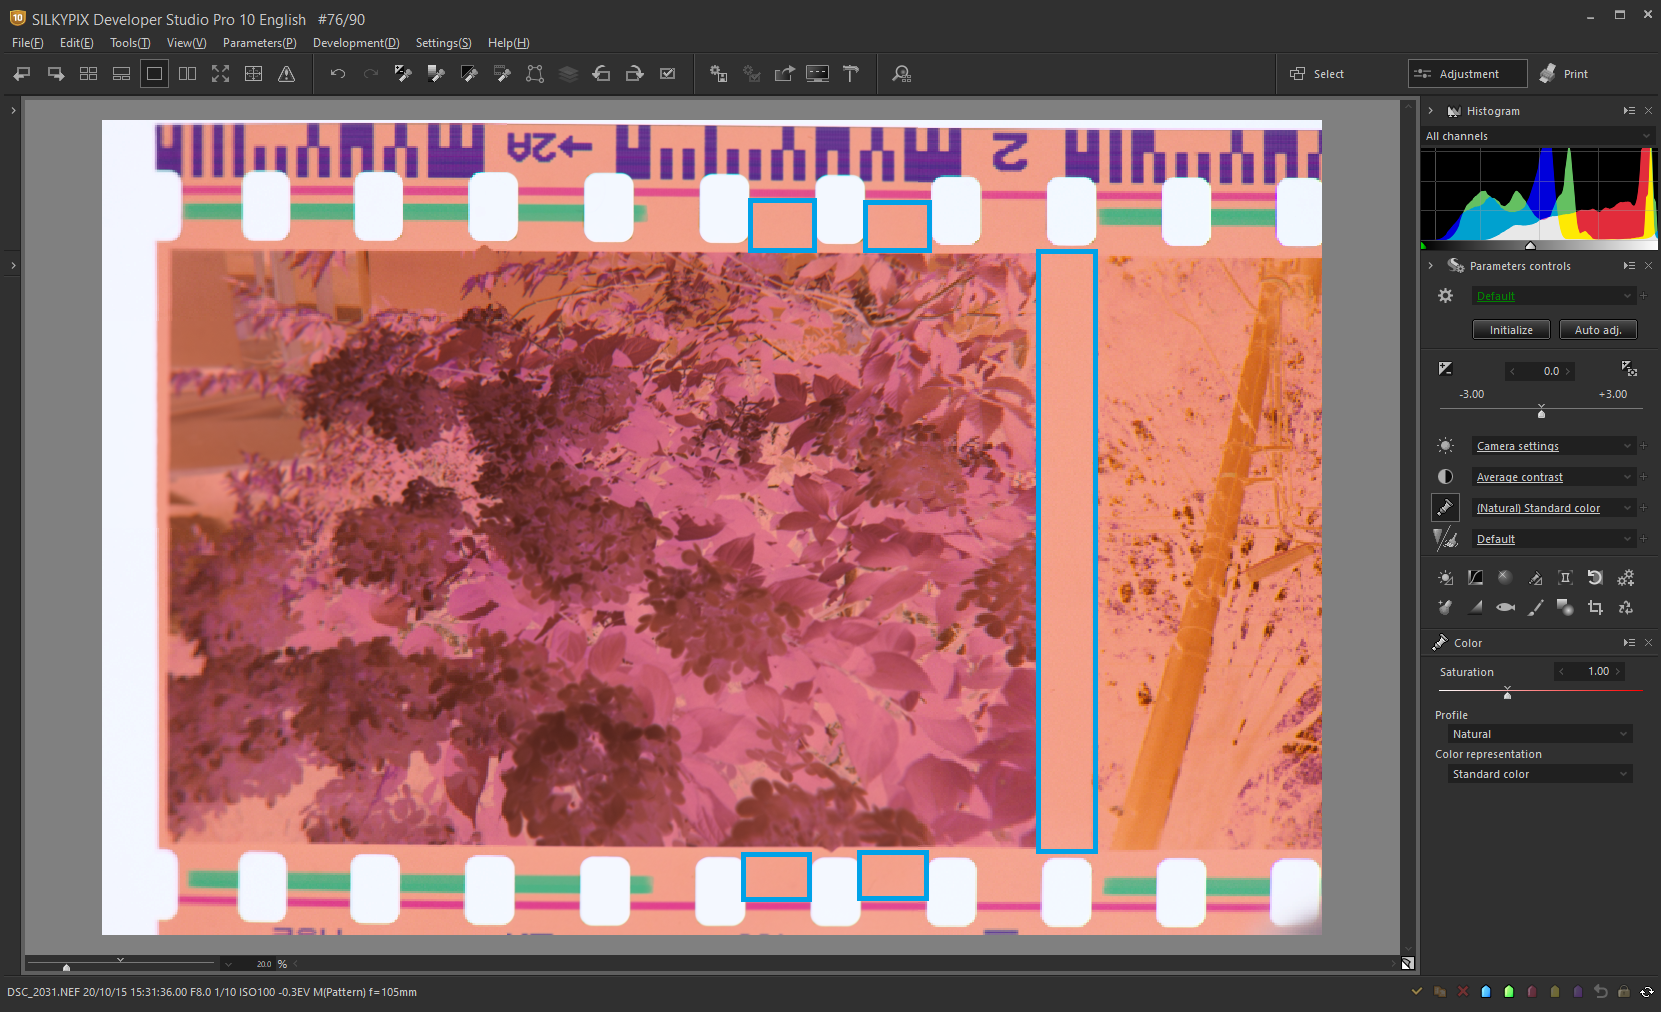
When you click the icon, the cursor turns into an eyedropper. Click on the unexposed area (the area of the film surrounded by a blue frame).
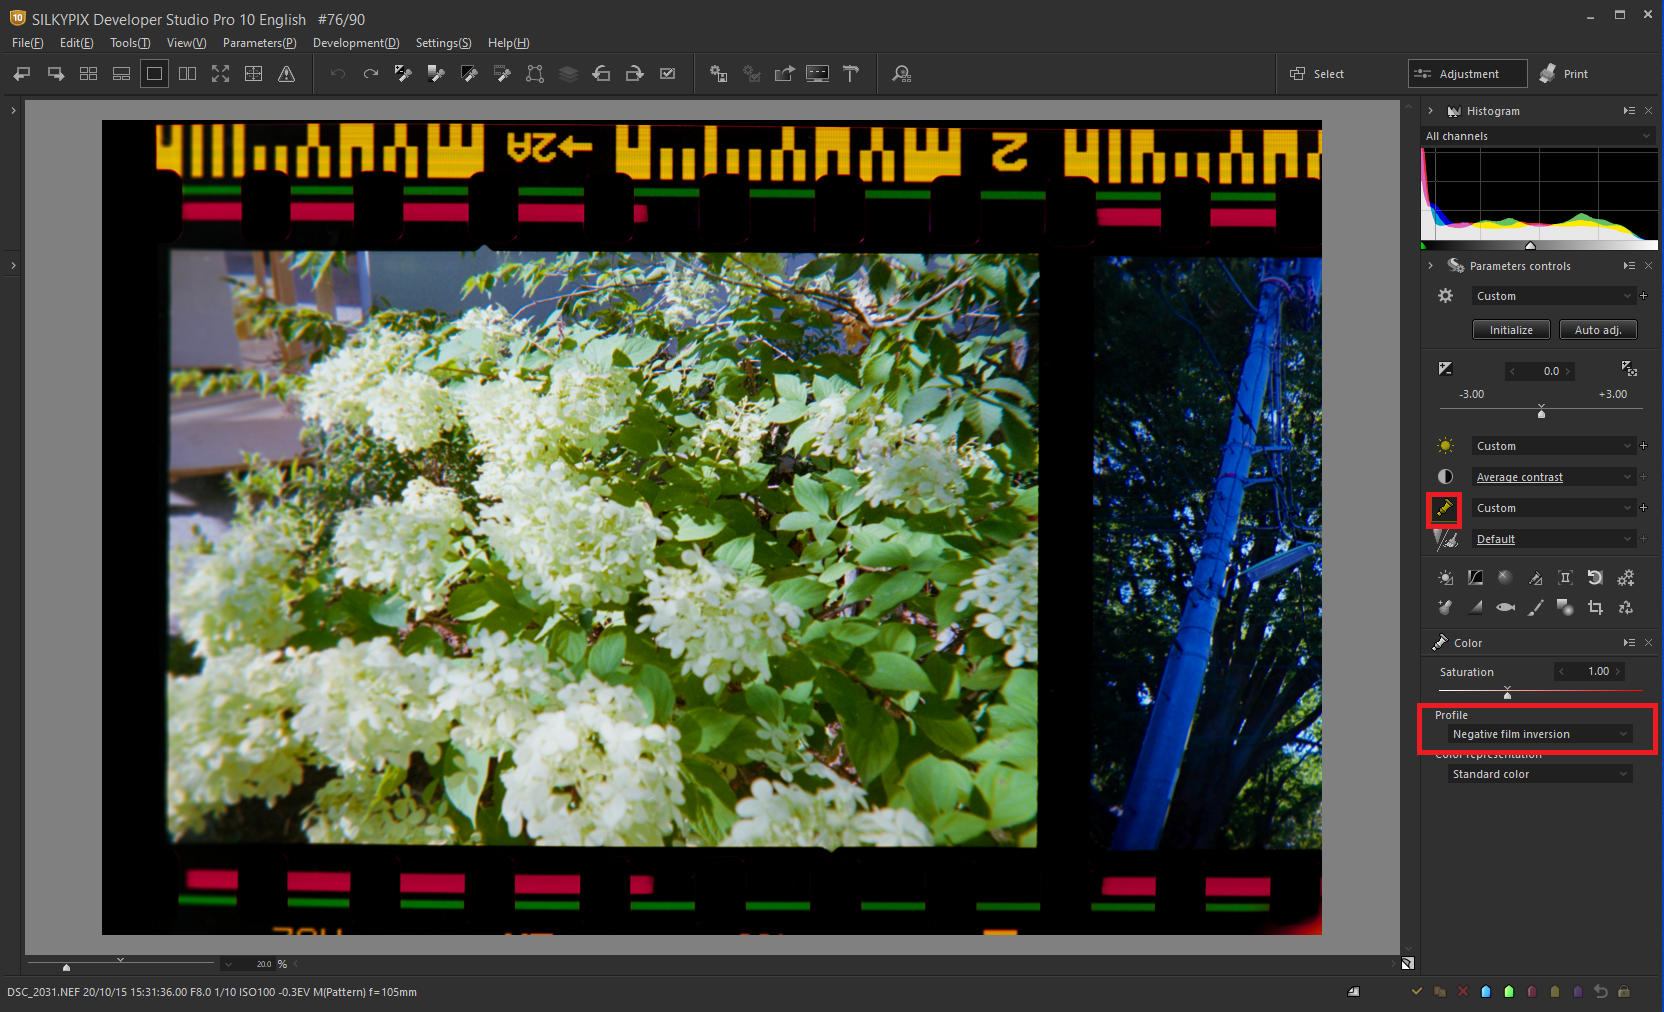
The conversion to a positive image is complete. When the conversion is performed, the Color profile is set to Negative film inversion.
In this way, you can use the Negative film inversion tool to convert a negative image to a positive image with one click! After converting, you can adjust and finish the image just like any other digital photo.
You can also use the Tone curves to perform the negative-positive inversion. However, it is recommended that you use the Negative film inversion tool to invert Exposure, White balance, and other adjustments because when converted with Tone curves, it is inverted.
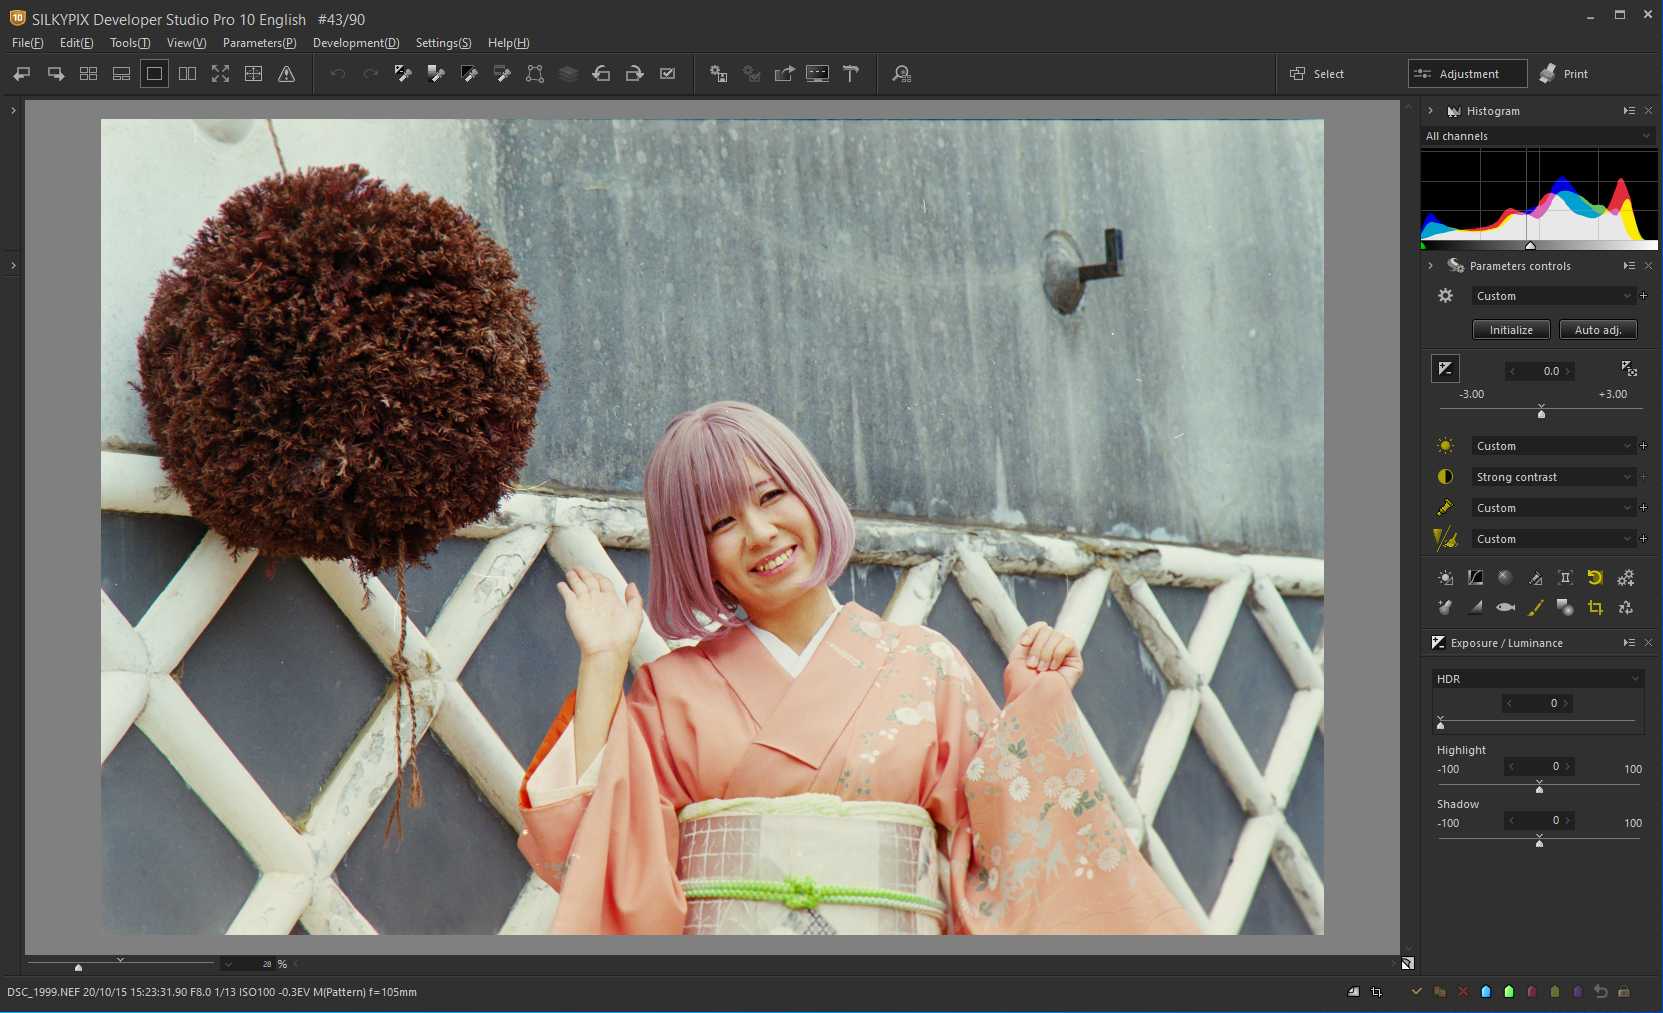
Introduction to Functions Useful in Adjust Positive Images
This section describes the functions that are useful when you have adjusted a positive image that has been flipped.
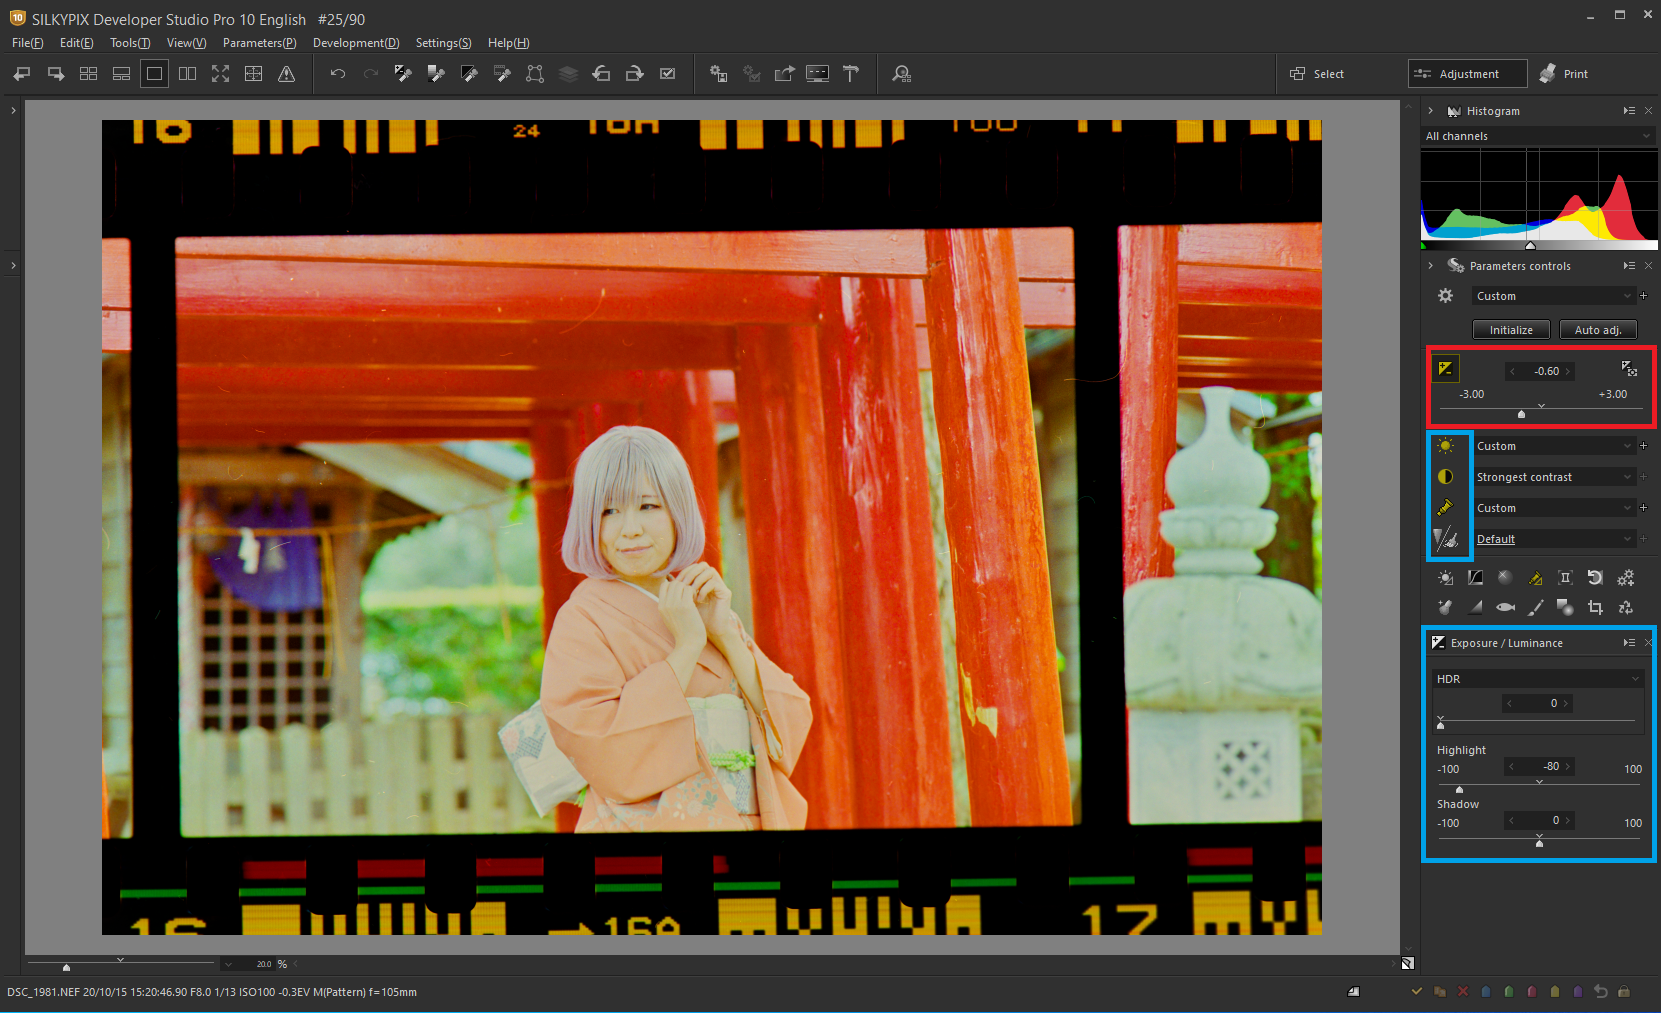
The basic adjustment functions in SILKYPIX are arranged in order from the top in the following order: Exposure (Luminance), White balance (Tint), Tone (Contrast), Color (Saturation)…
You can adjust the brightness of the image with the Exposure corrector slider surrounded by a red frame. Exposure, White balance, Contrast, Tone, Saturation, and Sharpening/Noise reduction parameters surrounded appear in the blue frame when you click the icon, so you can adjust them there.
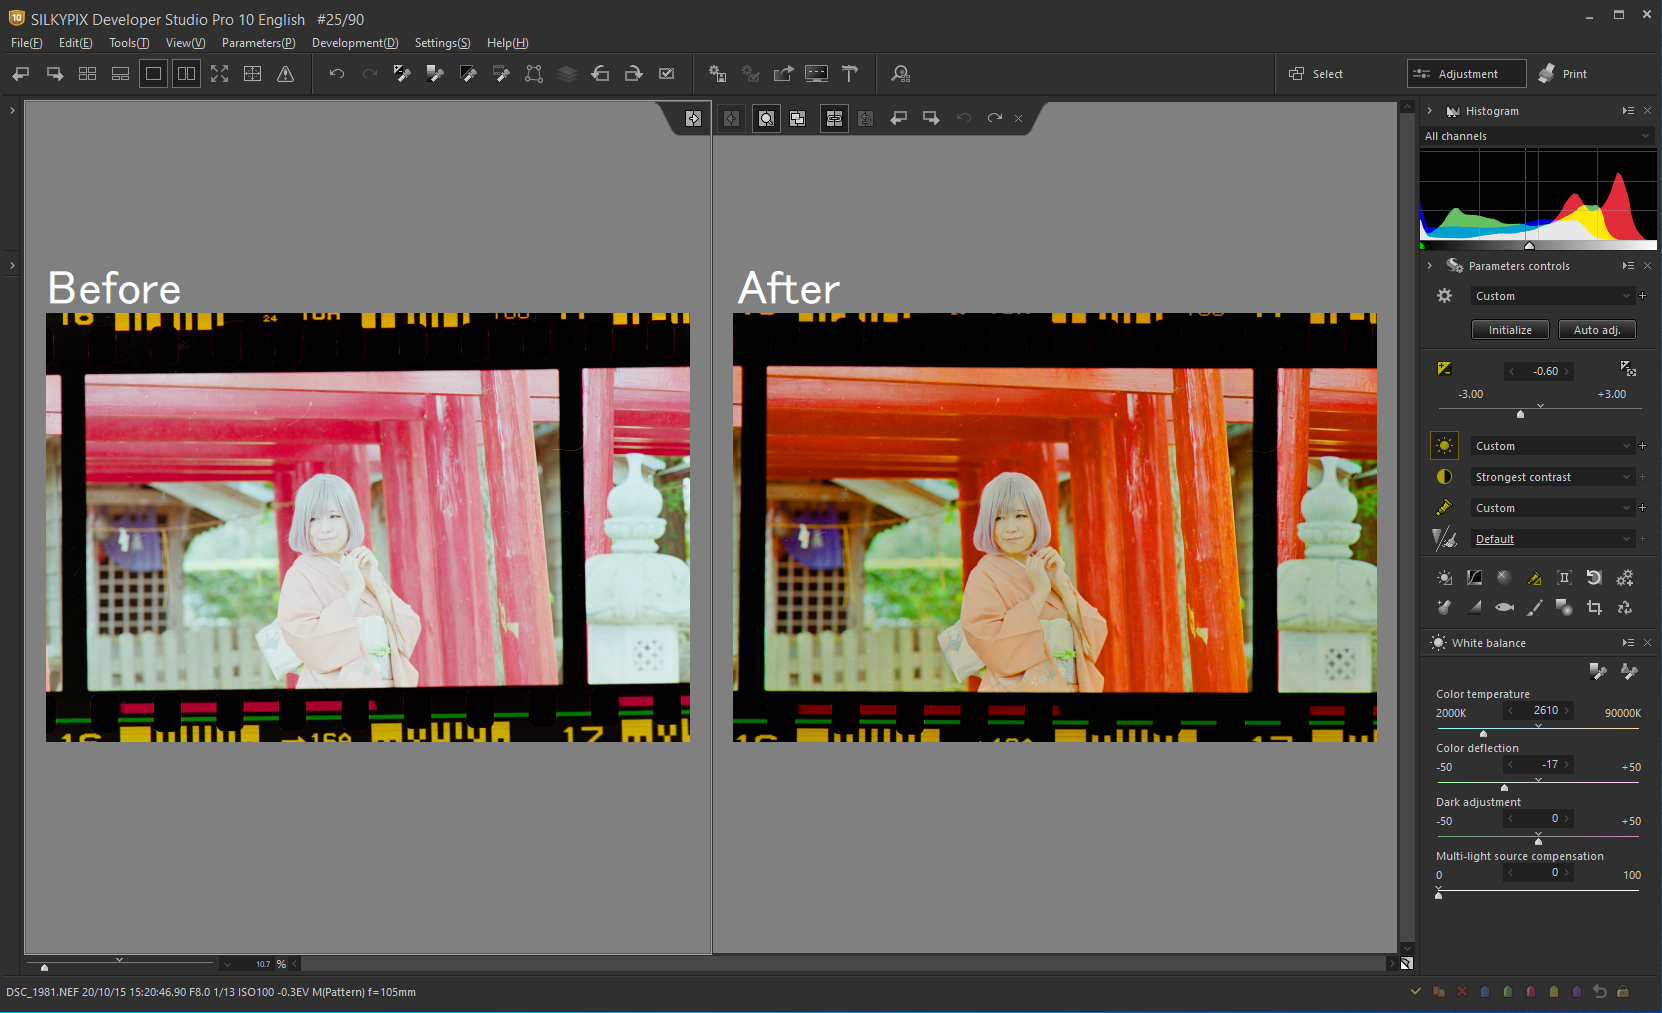
Simply adjust Exposure, White balance, Tone, and Color in order from the top to change the photos! If you open the pull-down next to each icon, there are several presets available, so it’s also a good idea to use the preset, too.
Next, we introduce the functions that are recommended after the Basic adjustment.
Tilt correction by the Rotation/Shift lens effect
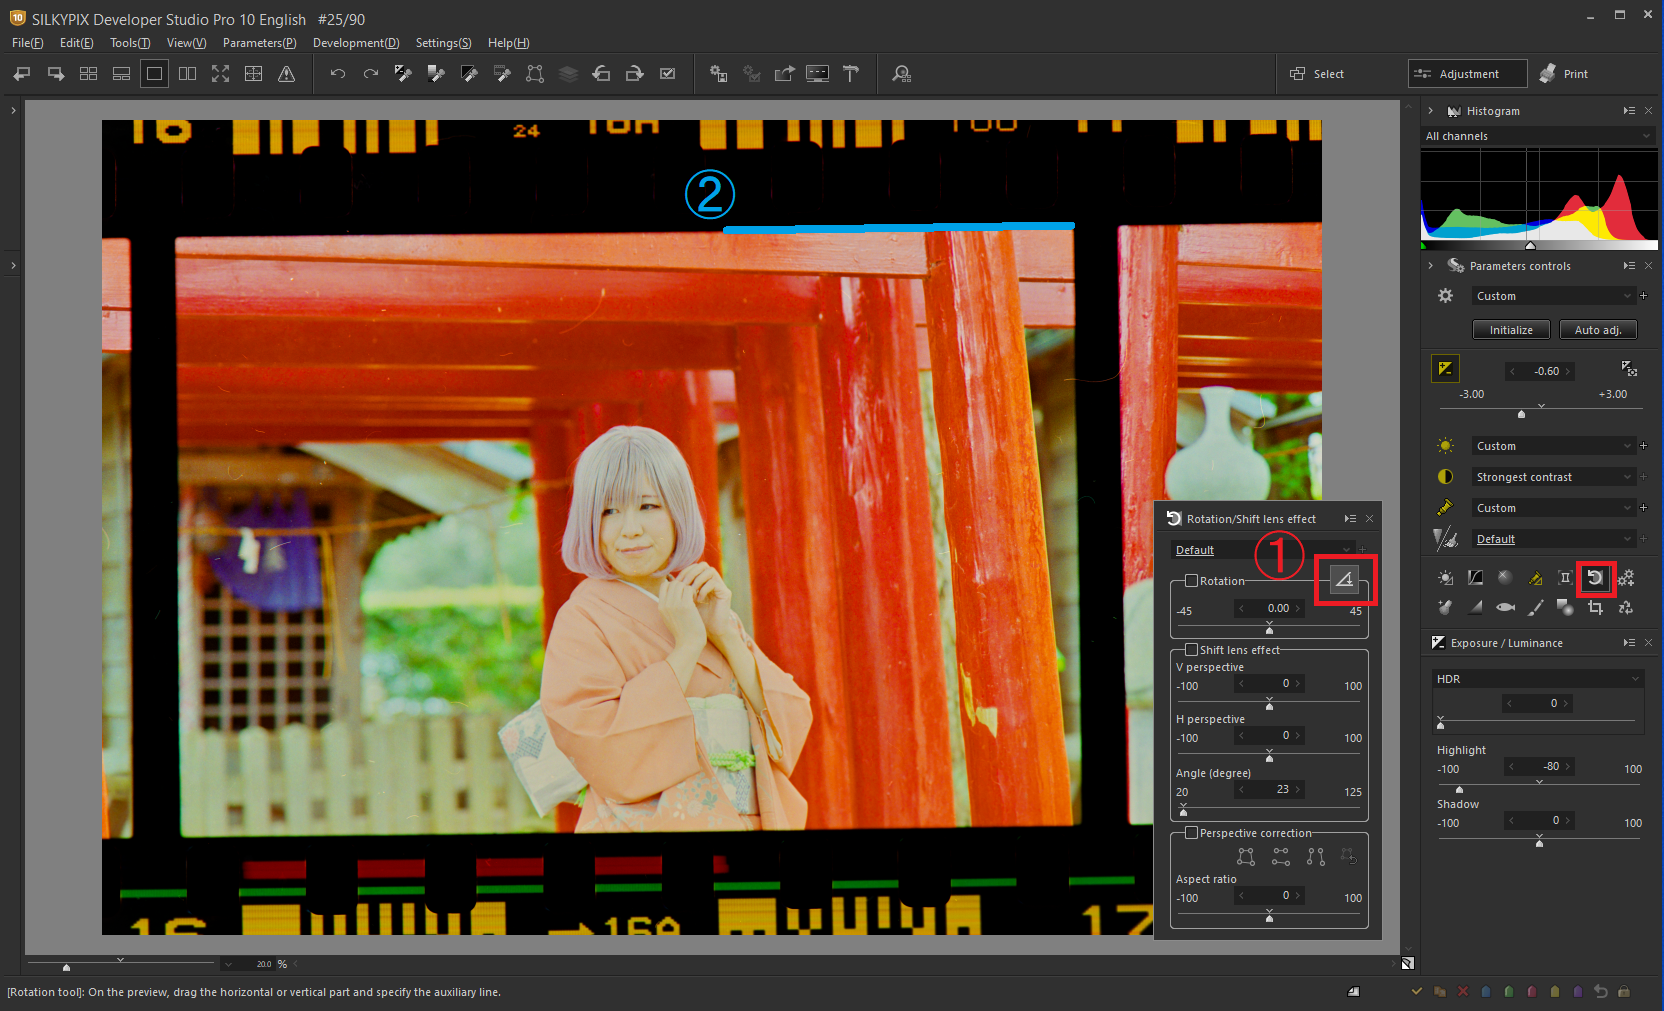
Even if the negative film is slightly tilted when you shoot it, SILKYPIX can easily correct the tilt!
You can use the Rotation/Shift lens effect to correct distortion. This time, we use the Rotation tool, which automatically adjusts the tilt by tracing the straight line.
Clicking the Rotation/Shift lens effect in the left sub-control will bring up the window. (1) Click the Rotation tool icon in the panel. When the cursor changes to the Rotation tool, trace (2) where you want it to be straightened.
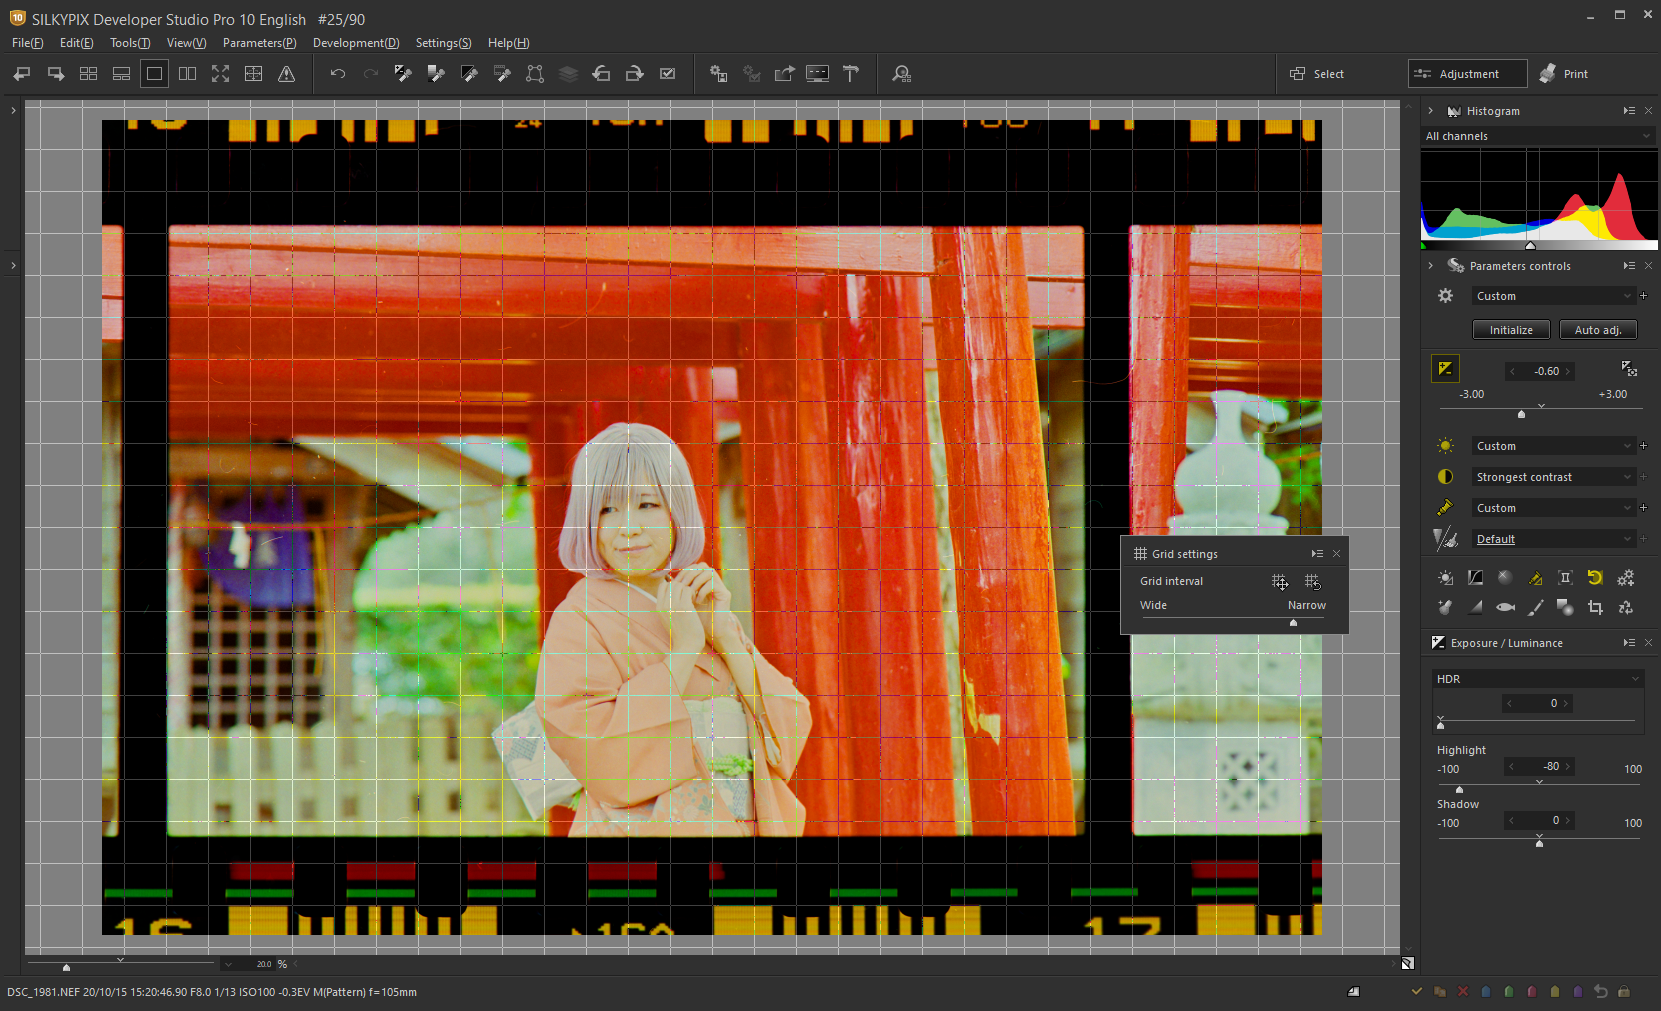
Drag the outline of the image to compensate. If you press [Ctrl] and [G] at the same time, a straight line that intersects horizontally and vertically, called a grid line, can be displayed at regular intervals. Please use it.
Cropping an image by the “Crop tool”
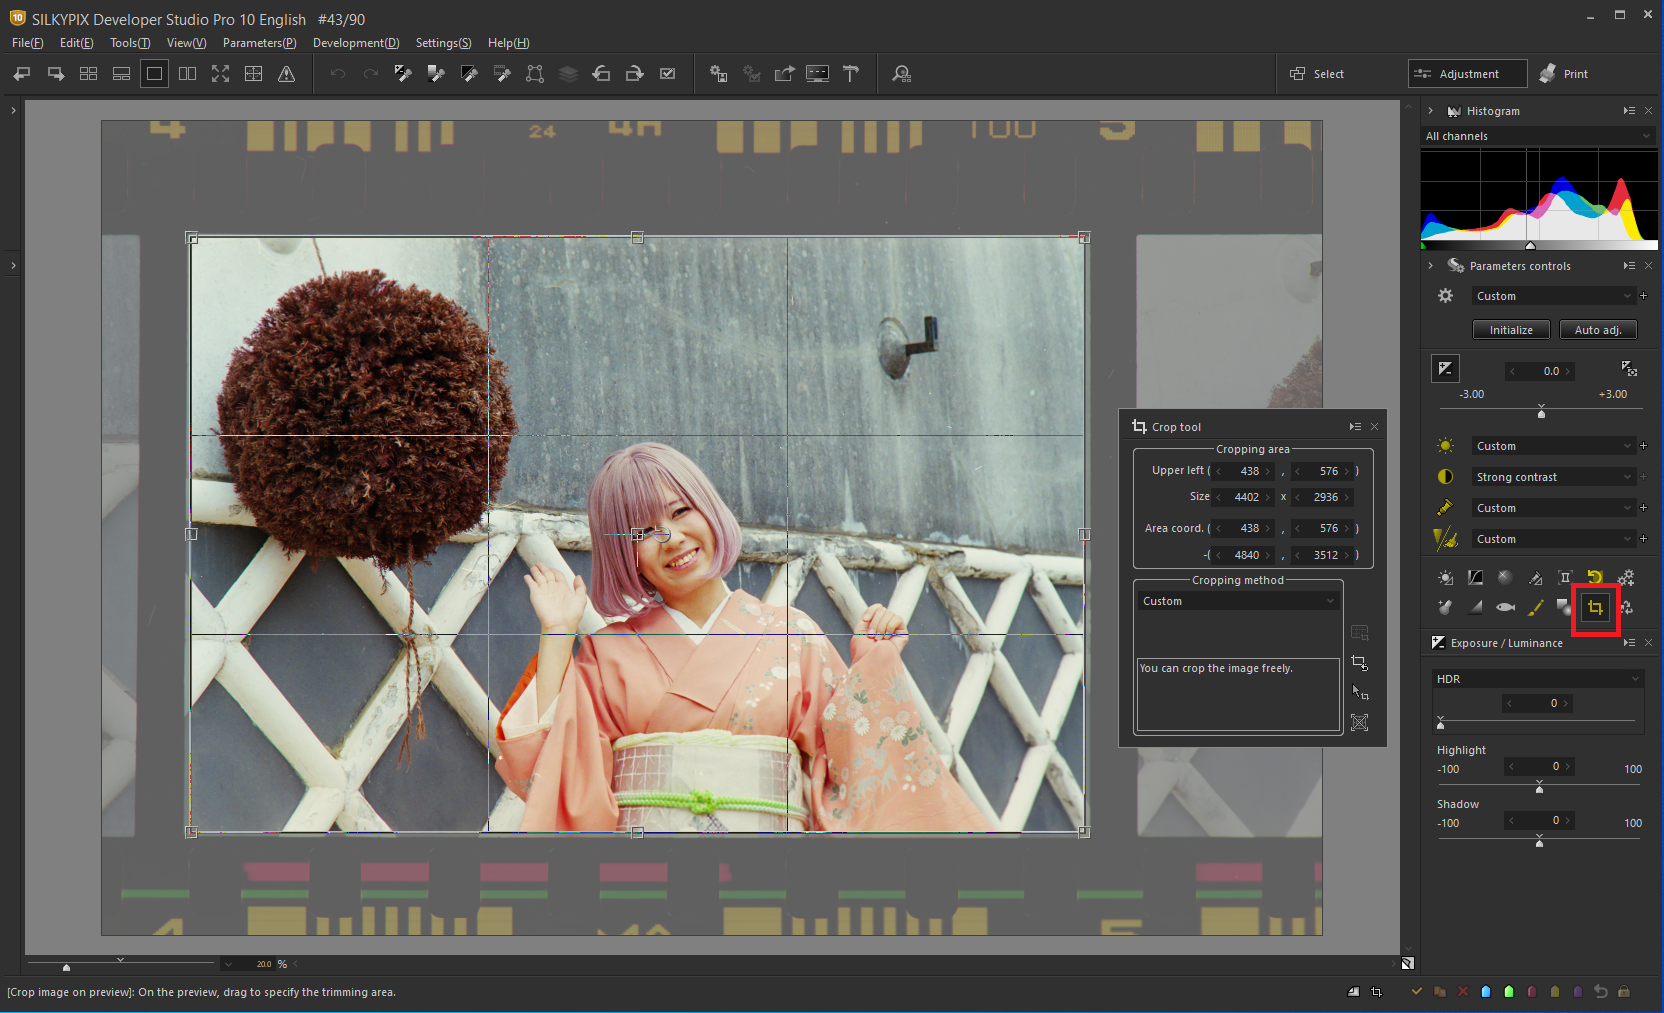
The Negative film inversion tool needs to shoot the outer frame together when shooting, so crop the outer frame by crop tool after the tilt correction.
Click the “Crop tool” in the sub-control icon. If you select an area, you can create a cropped version of the image. Cropping is performed when you close the Crop tool window.
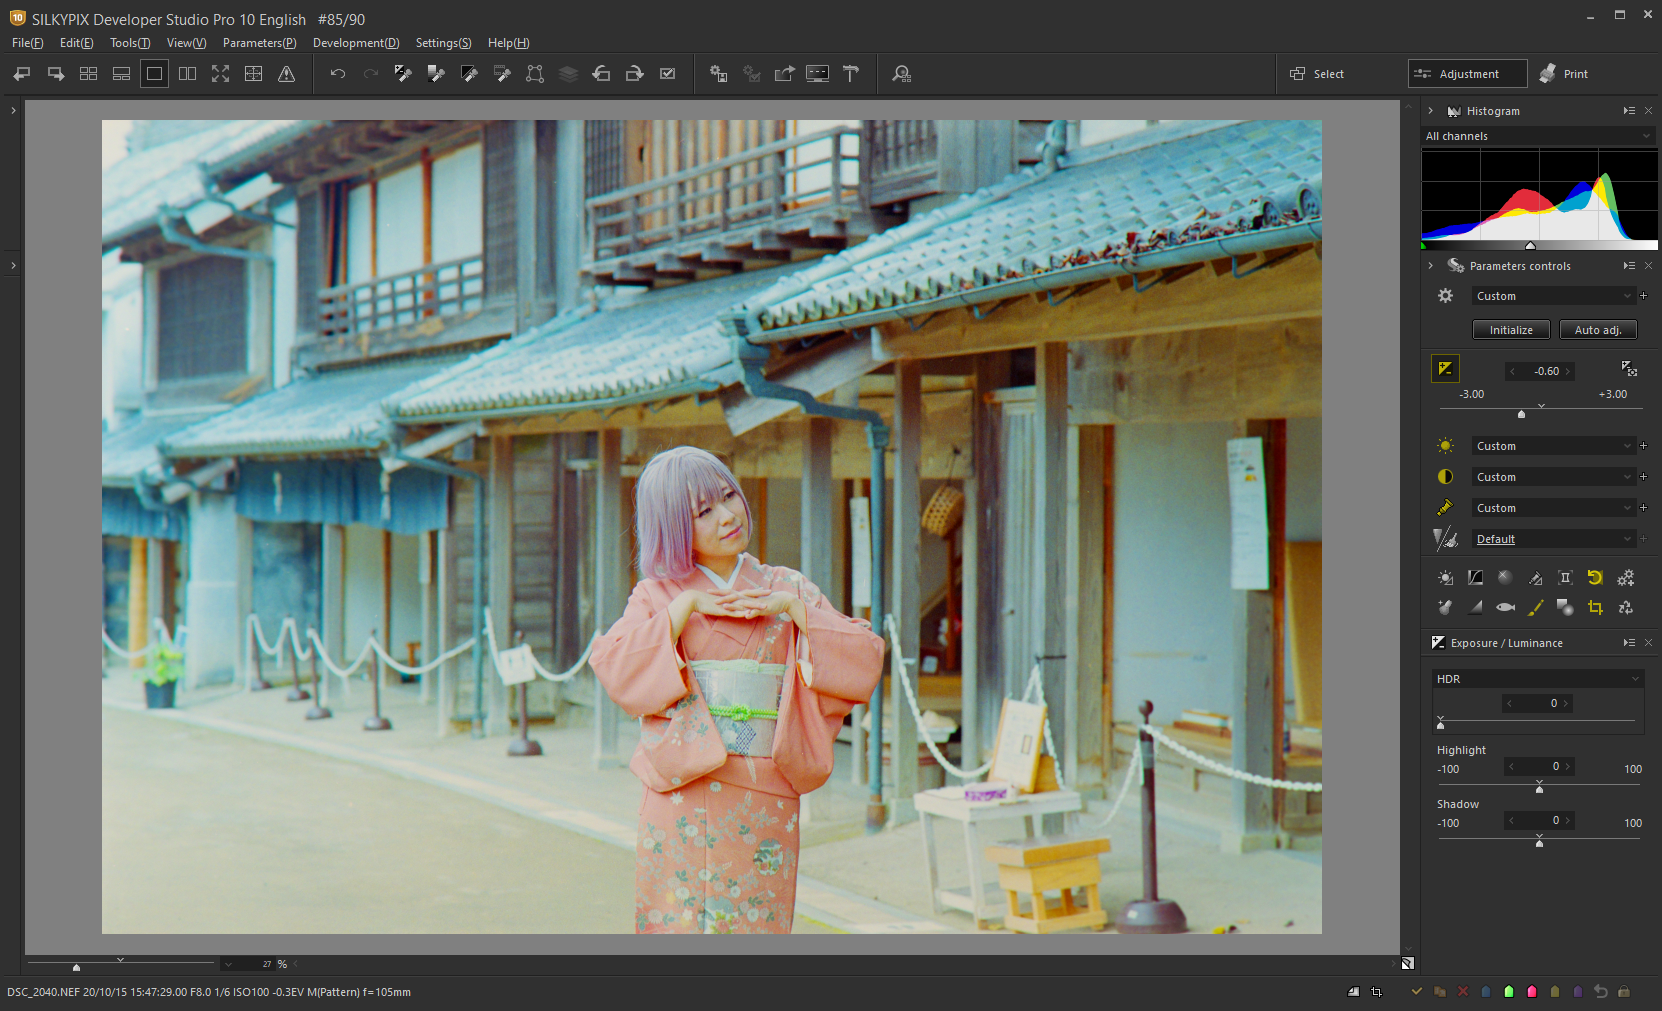
Cropping is complete! Finally, we will introduce you to the function to remove dust that appeared when the negative film was shot.
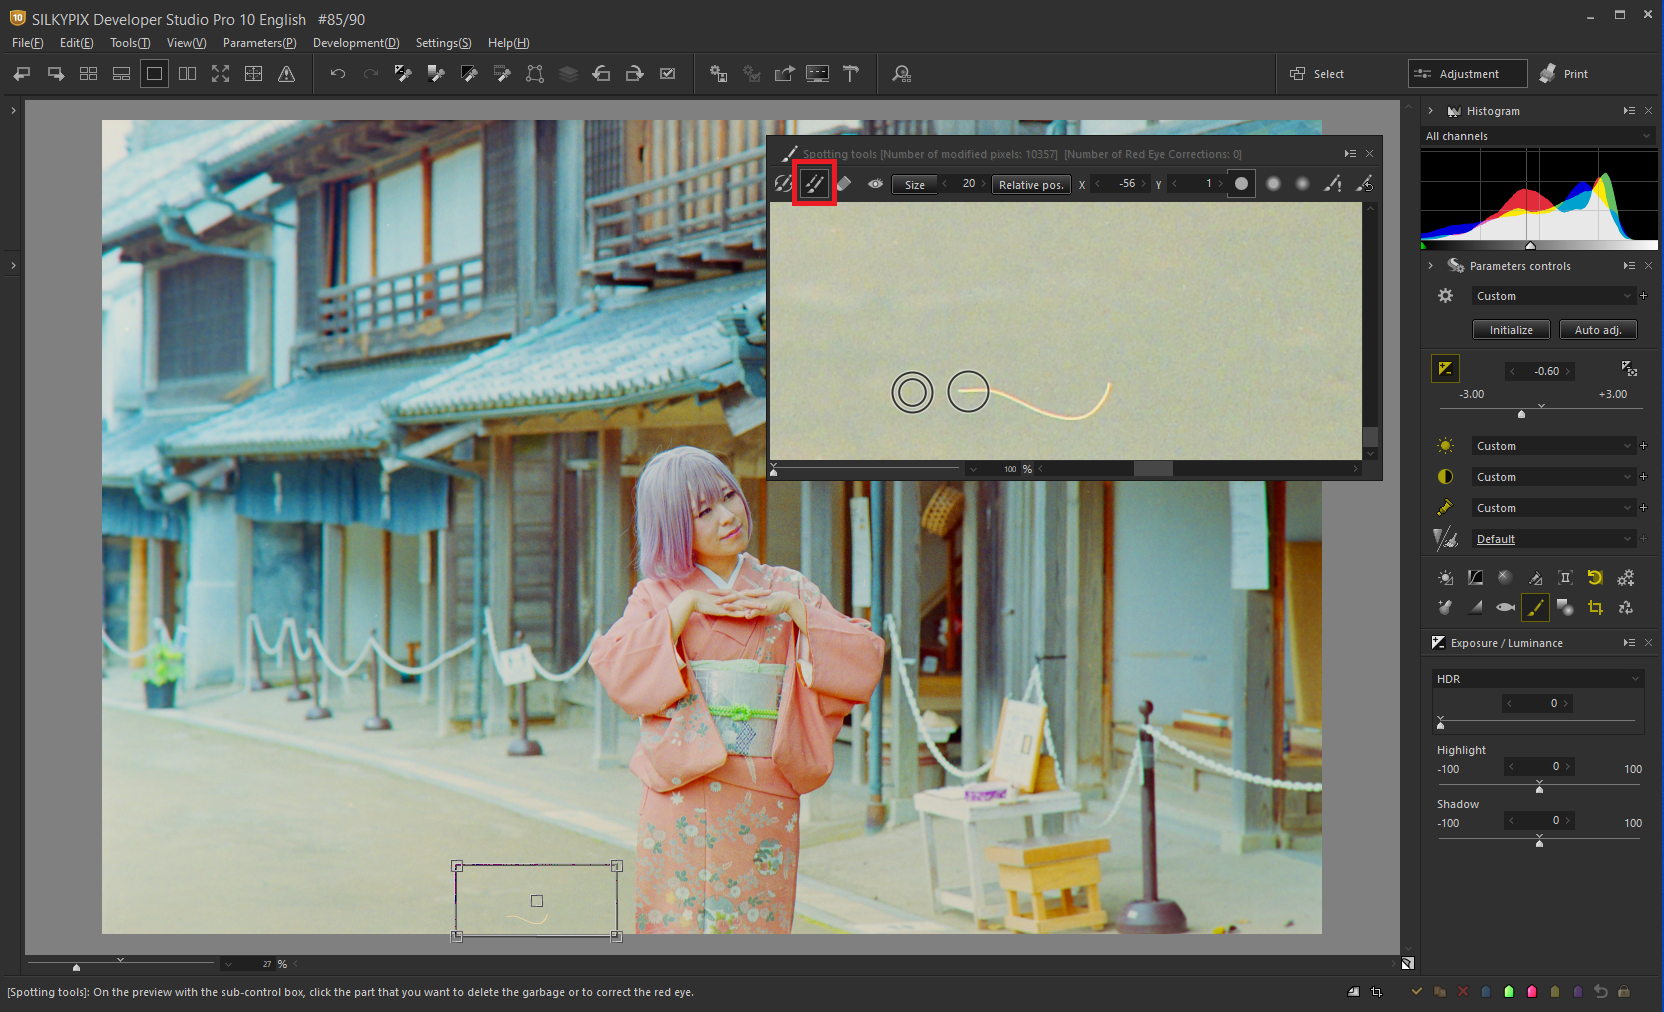
Removing dust from images by the “Spotting tools”
Sometimes dust will be in photos of the film. However, in such cases, you can use Spotting tools to remove dust!
If you select the “Spotting tools” in the sub-control icon, it will enter the Spotting tools mode.

First, move the frame on the preview to the top of the dust. This will enlarge the image in the Spotting tools window. Select the size of Spotting tools or the blur of the rounded edges according to the size of the dust.
There are two Spotting tools modes: “Auto Erase” and “Copy”. Now that I’m in the leftmost “Auto Erase” mode, clicking on the dust will automatically erase the dust.

The point is a slightly larger size than the dust. The dust has disappeared beautifully.
Click the second icon from the left to enter “Copy mode.” Initially, a double circle and a circle move together.
First, after placing the double circle in the area you want to copy, press [Ctrl] to set the double circle. The area in the double circle becomes the copy source. As long as you hold down [Ctrl], the double circle does not move. Move circle over the dust and click on the dust to paste the copied area.

Repeated copying several times to remove dust. Make full use of the two modes to match the size and shape of the dust.
Try it first! You can try a free trial for 30 days!

RAW Development software “SILKYPIX Developer Studio Pro10” can be downloaded from the SILKYPIX website. For 30 days after installation, you can try All functions for free as Experience Mode, so please try it out with your photos.
You can use the Negative film inversion tool on SILKYPIX to enjoy film cameras and film photographs more than ever.
![]()
The “SILKYPIX JPEG Photography 10” has the same functions as SILKYPIX Developer Studio Pro10. If you are shooting in JPEG, please consider this as well.
![]()