We will introduce the features of new professional edition “SILKYPIX Developer Studio Pro10”, which released on February 19, 2020 (JST)! In this topic, you can know the newly adopted “main window section switching” along with the explanation of display.
Introduce the new feature “main window section switching”
You can now switch the display of the main window to three sections in SILKYPIX Developer Studio Pro10. There are the Select section, the Adjustment section, and the Print section.
- The Select section, you can quickly view images and select the images you want to adjust.
- The Adjustment section, you can adjust the images. (Conventional SILKYPIX window)
- The Print section, you can check the finished image firmly.
With SILKYPIX Developer Studio Pro10, you can quickly view and switch between images by the Select section. It allows you to select your favorite images or images that you want to adjusts. Workflow efficiency is improved with the optimum display according to the work. See more details is click here.
First, let’s check SILKYPIX Developer Studio Pro10 display.
SILKYPIX Developer Studio Pro10 display
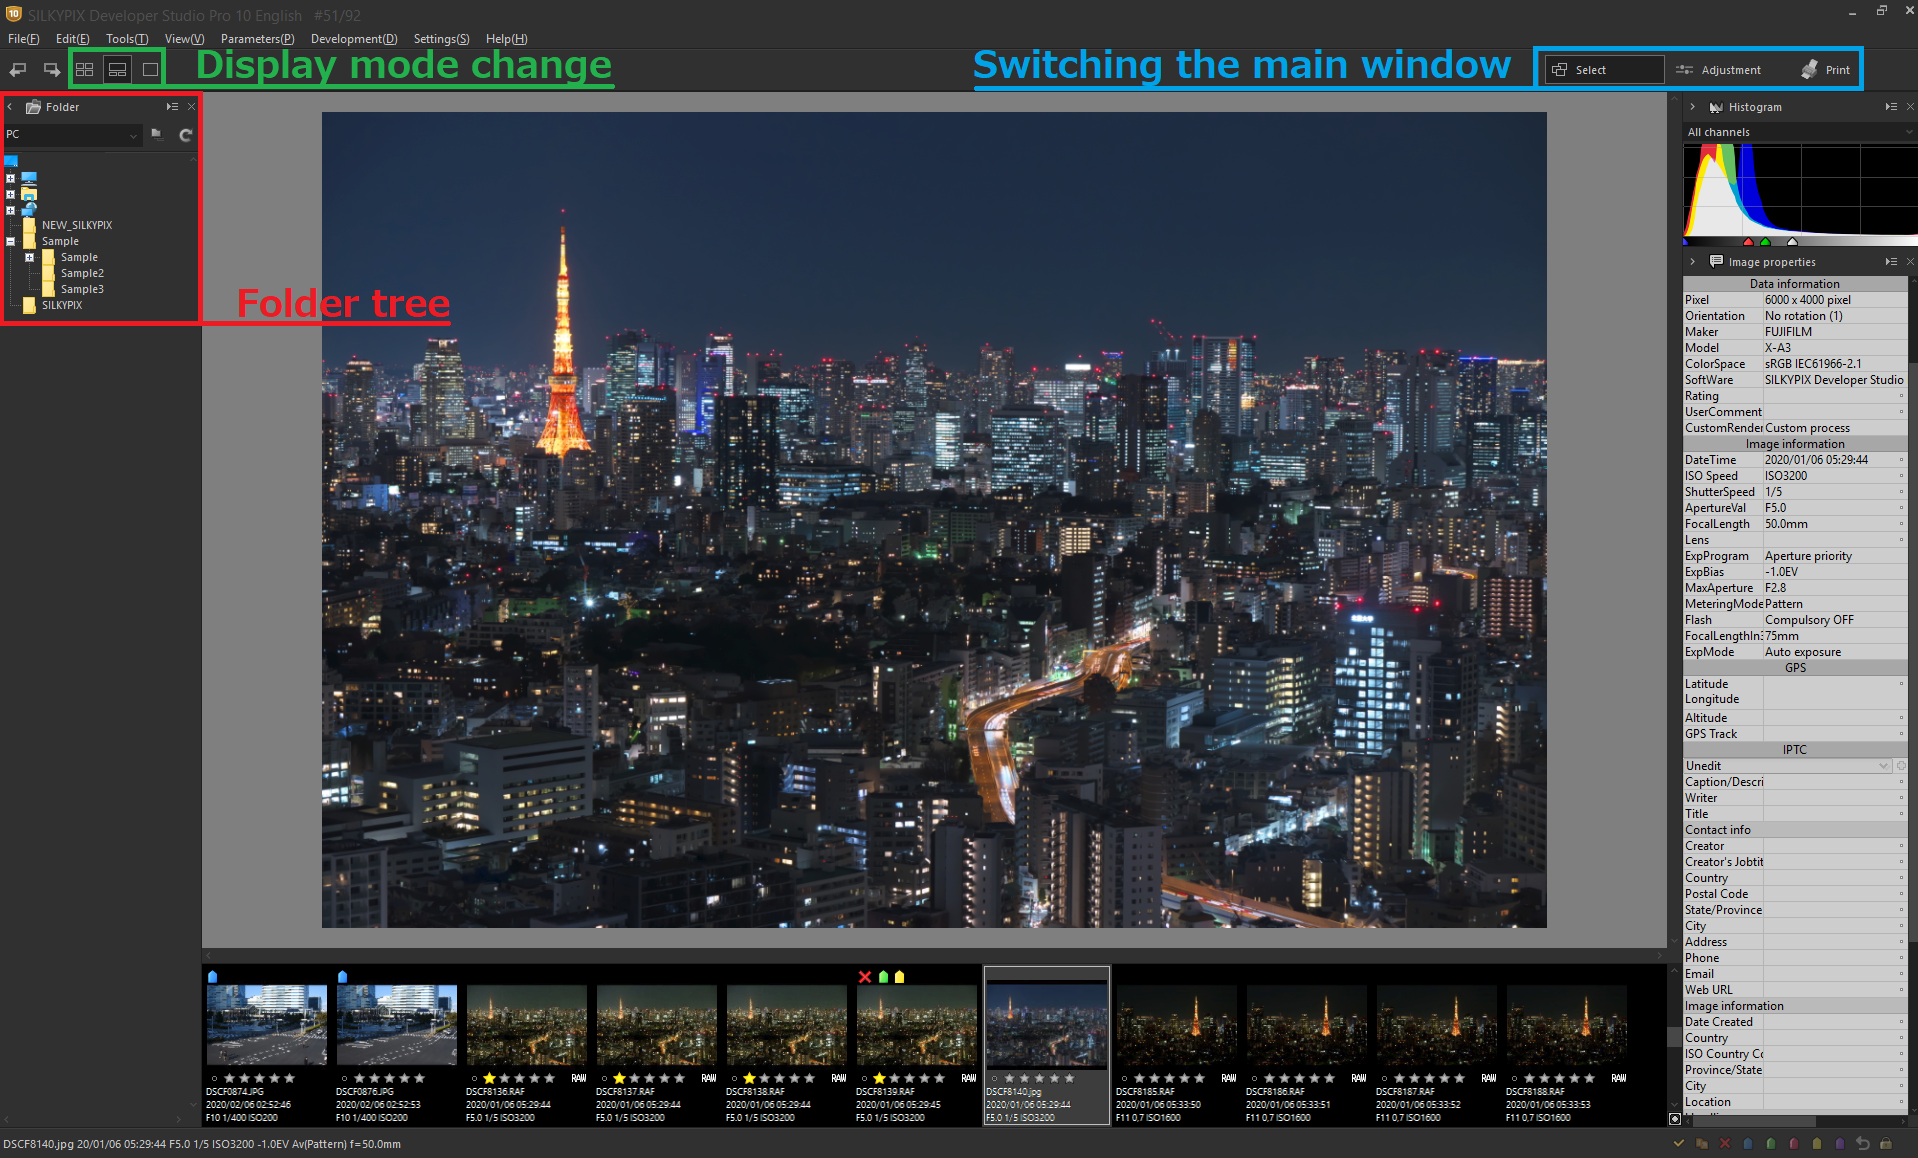
When you open SILKYPIX Pro10, it is displayed the Select section by default.
*You cannot adjust the image in the Select section.
Select the folder containing images to be adjusted from the folder tree on the left of the display. When selected, the image in the folder is displayed on the preview window in the middle.
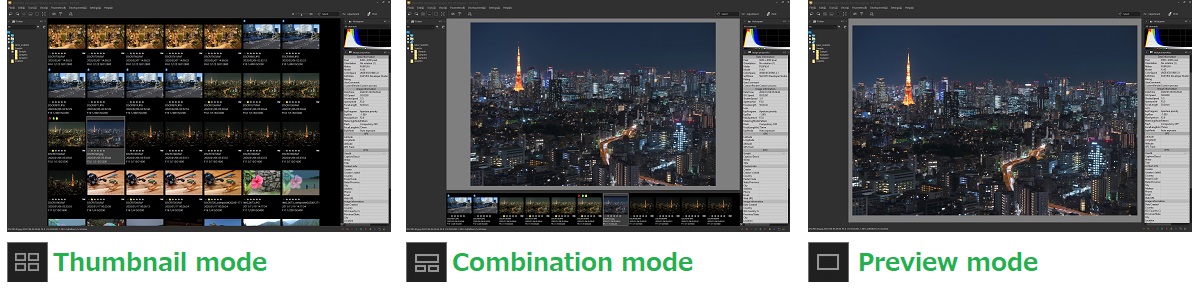
This display mode can be changed. You can switch the display mode by selecting the icons in the upper left. This display mode is the same in the Adjustment section.
Next, in the upper right of the display is the new section switch button.
Switching the main window
The Select section
The Select section allows thumbnails and images switching at the highest speeds in SILKYPIX series.
*The Select section uses the preview images (thumbnails) included in the image data for high-speed display. Image data that does not have a preview image cannot be displayed.
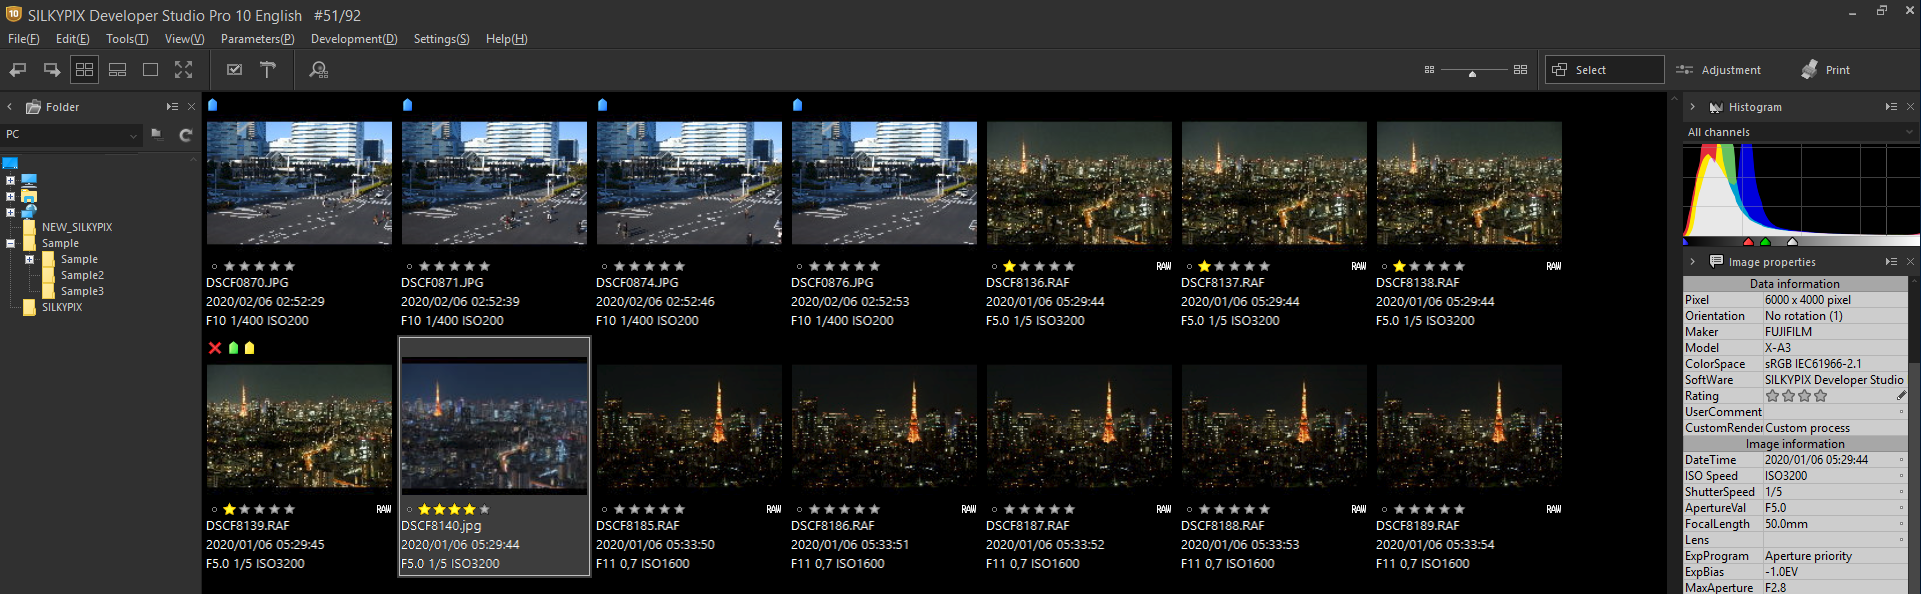
The Select section displays images quickly, so you view them without stress. In addition, you can easily see the images you want to adjust by marking the images, such as ratings or user marks. Because when you go to the Adjustments section, you can also display only the marked images. See more about Use User color marks is click here.
Double-click the image you want to adjust and move to the Adjustment section.
The Print section
The Print section allows you to review the final image and designate the print settings. In addition, Pro10 allows you to include any texts in the margin.
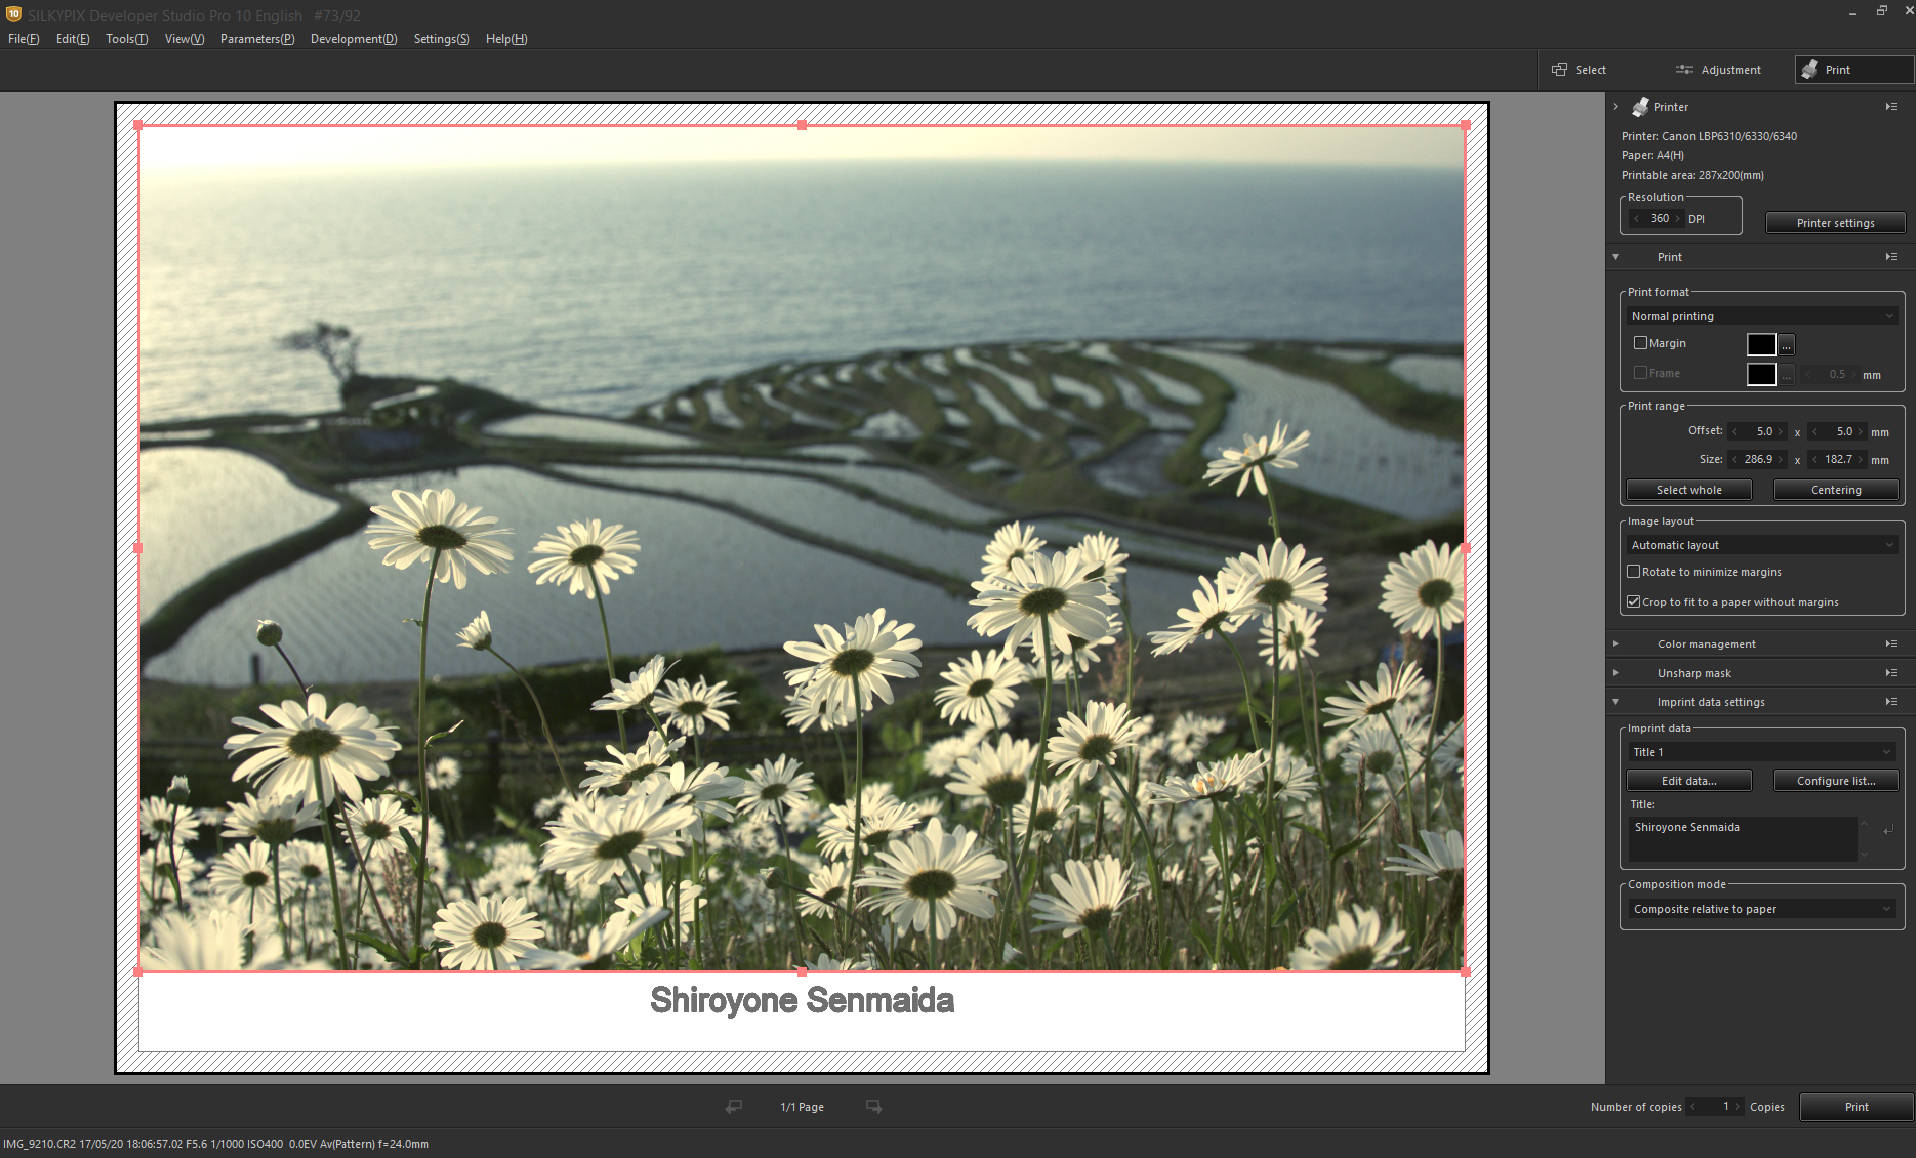
Finally, here’s how to include any texts into the margin.
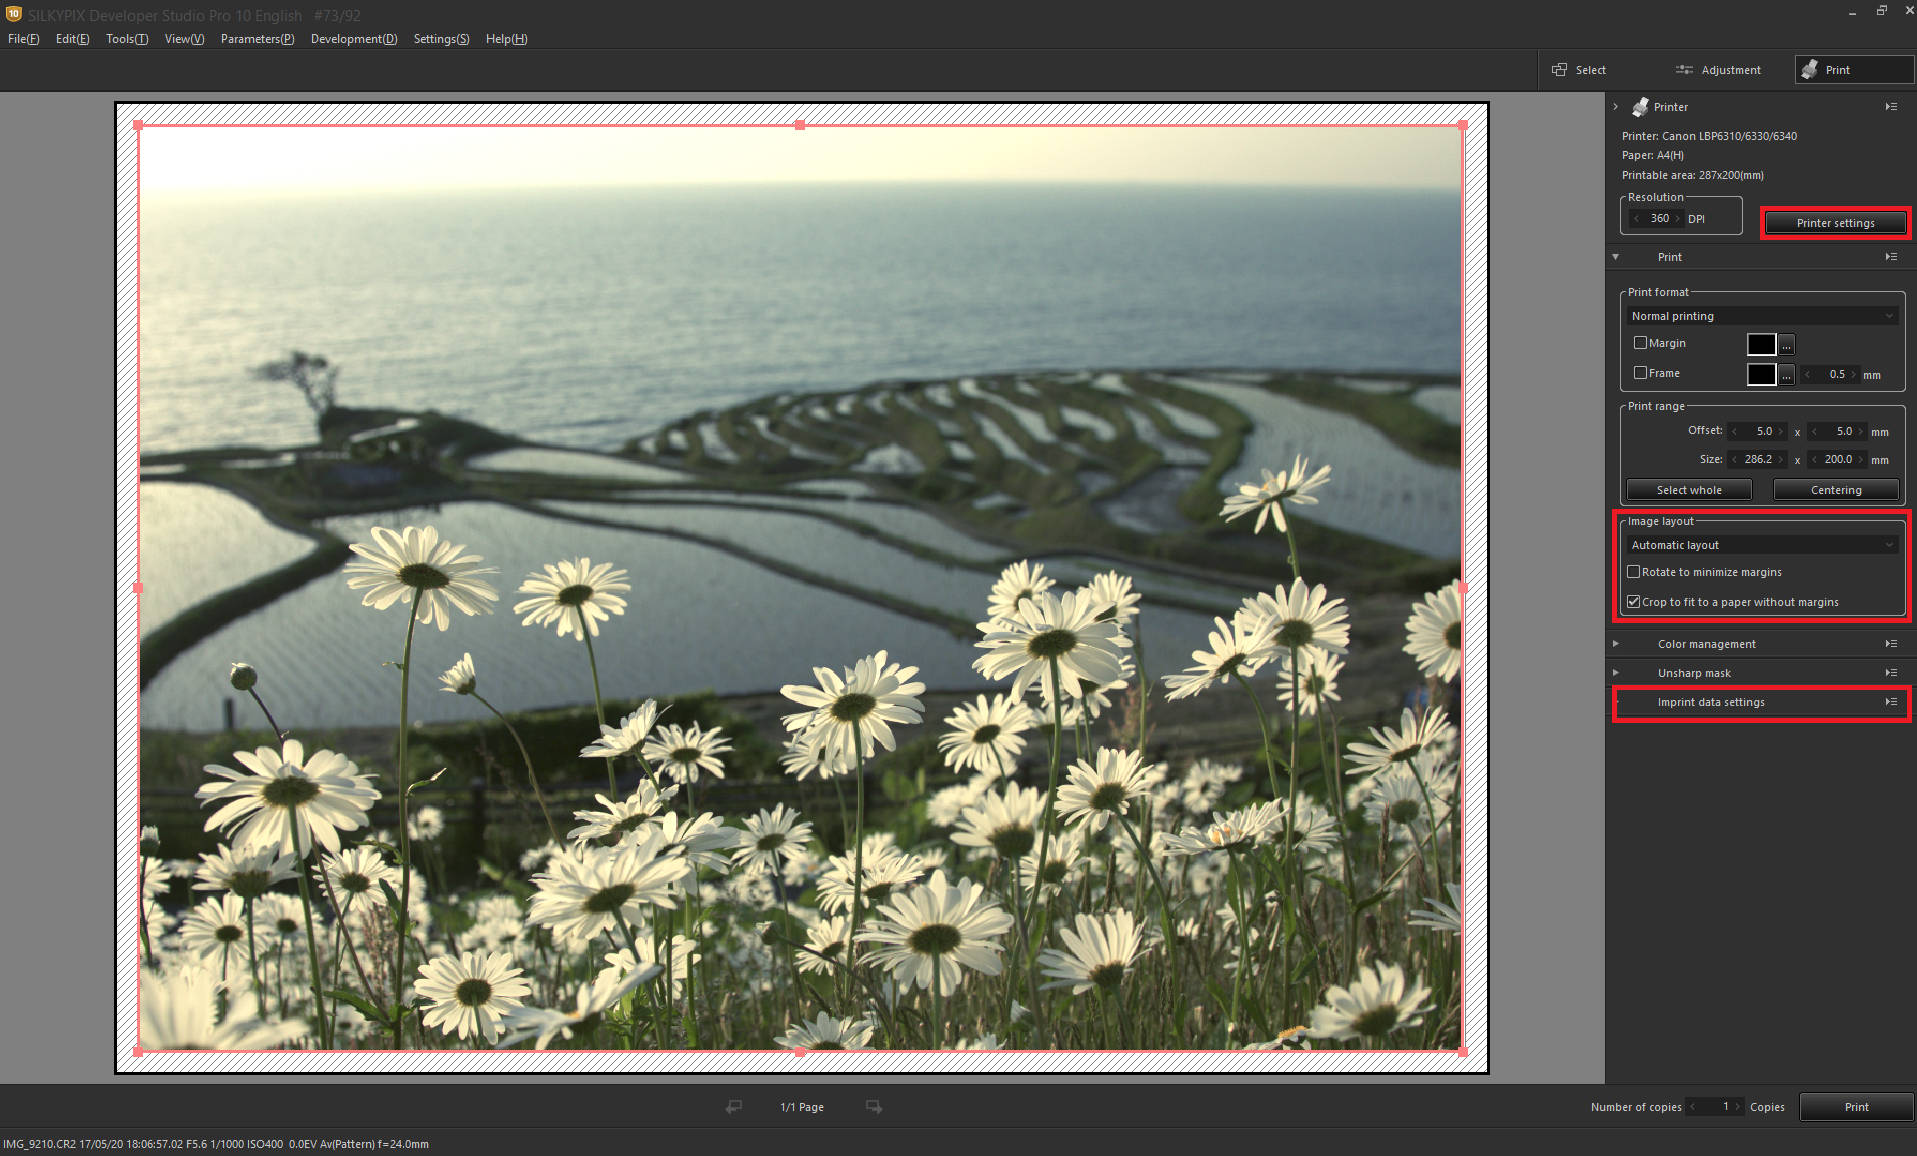
If necessary, adjust the paper orientation in [Printer settings]. And, adjust the layout in [Image layout]. Any texts into the margin can be set in [Imprint data settings].
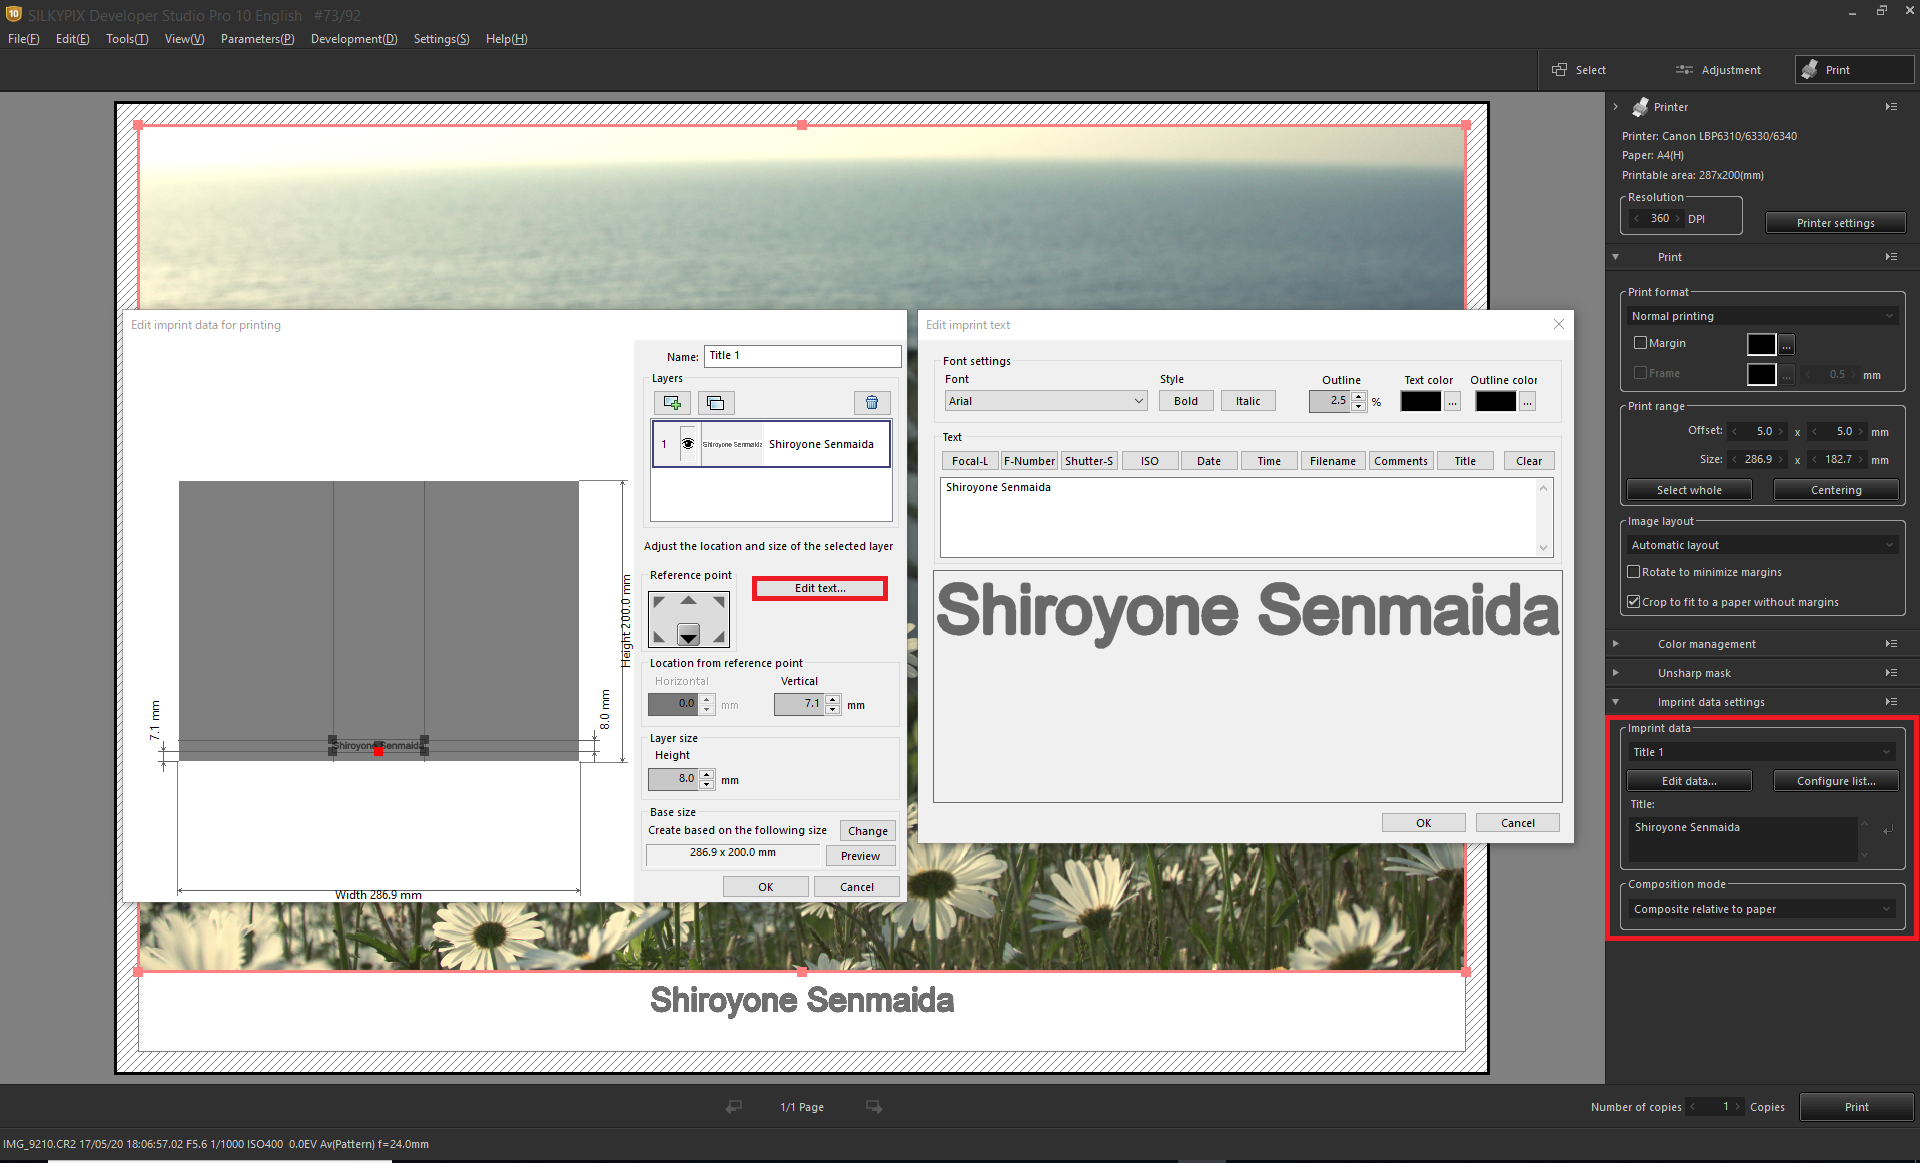
You set Imprint data template to [Title], and enter any texts in the title box. In the [Edit data…], You can select texts position, font type, color, etc. Then, select [Composite relative to paper] for Composition mode.
If some overlap between the image and texts, you adjust the red border around the image to make margin for the texts.
Please try the evolved SILKYPIX Developer Studio Pro10!
The SILKYPIX Developer Studio Pro10, you can experience all the new features for free for 30 days. Download it from below and try it. Get a 30 day Free Trial is clik here!
See more the SILKYPIX Developer Studio Pro10’s new features is click here.
![]()