Introduce the Negative film inversion tool

You can use SILKYPIX’s Negative film inversion tool to convert negative films into positive images by clicking on the unexposed part of the film. It is easily reverse the negative film photos with a single click, so let’s use this function for your precious photographs you shot with the film cameras!
If you don’t know how to shoot negative film photos, or if you don’t have a film scanner, but want to try it, we will also introduce you how to shoot the negative film photos at the end of this page. There are many ways to shoot images, so you can refer to them for reference.
So, we introduce you to the Negative film inversion tool in SILKYPIX Developer Studio Pro10!
To use the Negative film inversion tool
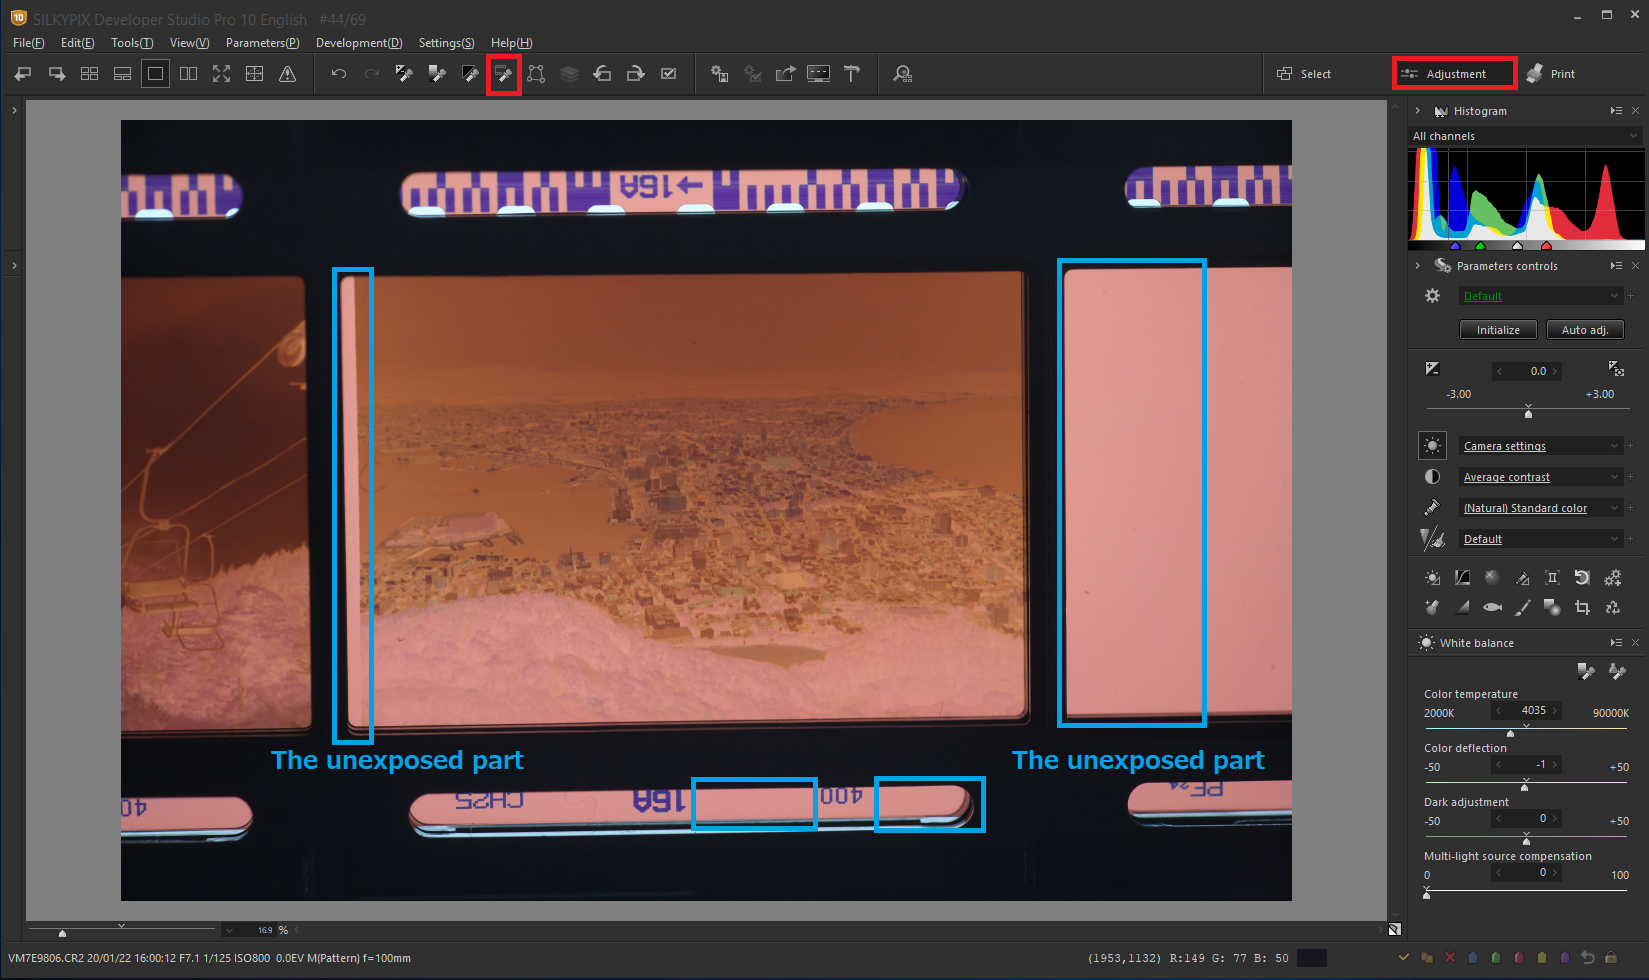
Make sure that the section of the main window is the “Adjustment” section. Click here for Main window section switching.
The Negative film inversion tool is located in the toolbar. When you click the icon, the cursor becomes a dropper. Click on the unexposed part area.
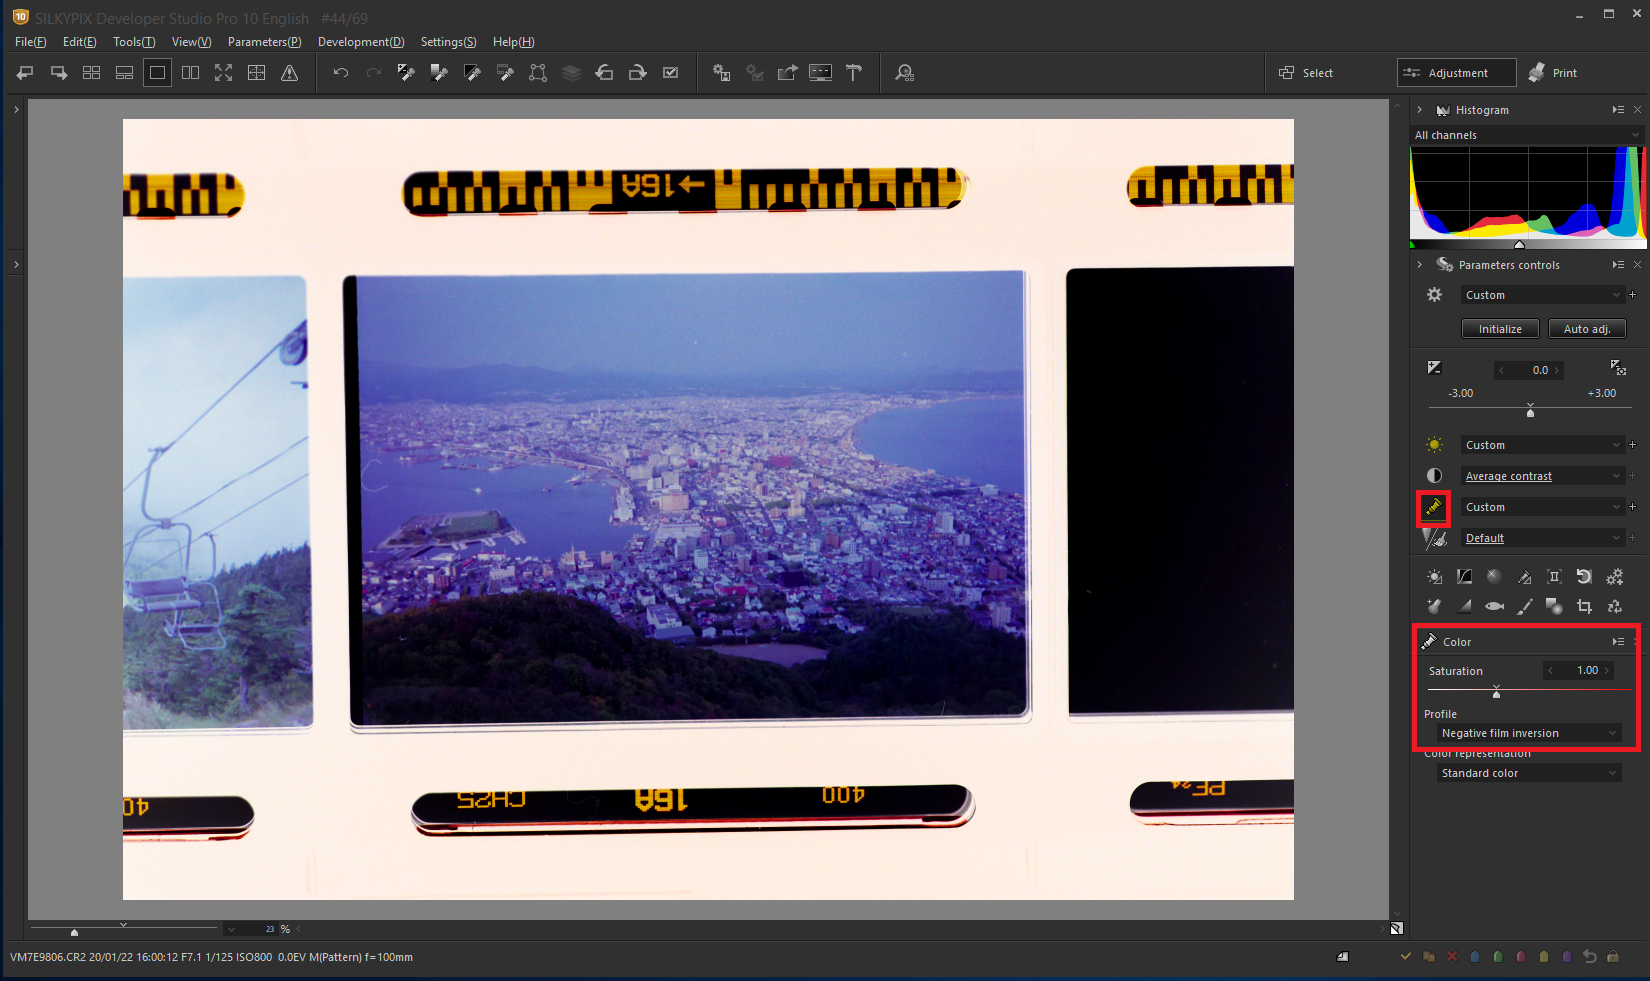
You can easily convert to the positive image with a single click.
When the inversion process is performed with this tool, the Profile of the “Color” sub-control will be “Negative film inversion”. To cancel the Inverse, select a profile other than “Negative film inversion”.

You could achieve the same effect by using the tone curve, but the adjustment effects such as exposure and white balance have been reversed. However, by inverting with this tool, you can make adjustments such as exposure bias and white balance as with ordinary images.


Notes on the Negative film inversion tool
Whether you are just starting to shoot with your film camera or experienced photographers, this function makes it easy to convert to positive images and make adjustments. SILKYPIX’s Negative film inversion tool is a function that makes it easier for you to print yourself, post to SNS. So, it will be made you enjoy taking pictures with film cameras!
However, Negative film inversion tool is not available for RAW data shot with the following cameras. When the image of the target RAW data is selected, this tool is disabled.
- Fujifilm
- X10, X-S1, XF1, FinePix S2Pro, S3Pro, S5Pro, HS20EXR, HS22EXR, HS30EXR, HS33EXR, HS35EXR, HS50EXR, F505EXR, F550EXR, F600EXR, F605EXR, F770EXR, F775EXR, F800EXR, F805EXR, F900EXR, S100FS
- Microsoft/Nokia
- Lumia 930, 1020, 1520
- SIGMA
- DP1, DP1s, DP1x, DP2, DP2s, DP2x, SD14, SD15
Shooting Negative Film photos
There are many ways to take negative film photos with your digital cameras without a film scanner! As an example, here is how we shot this pages examples.
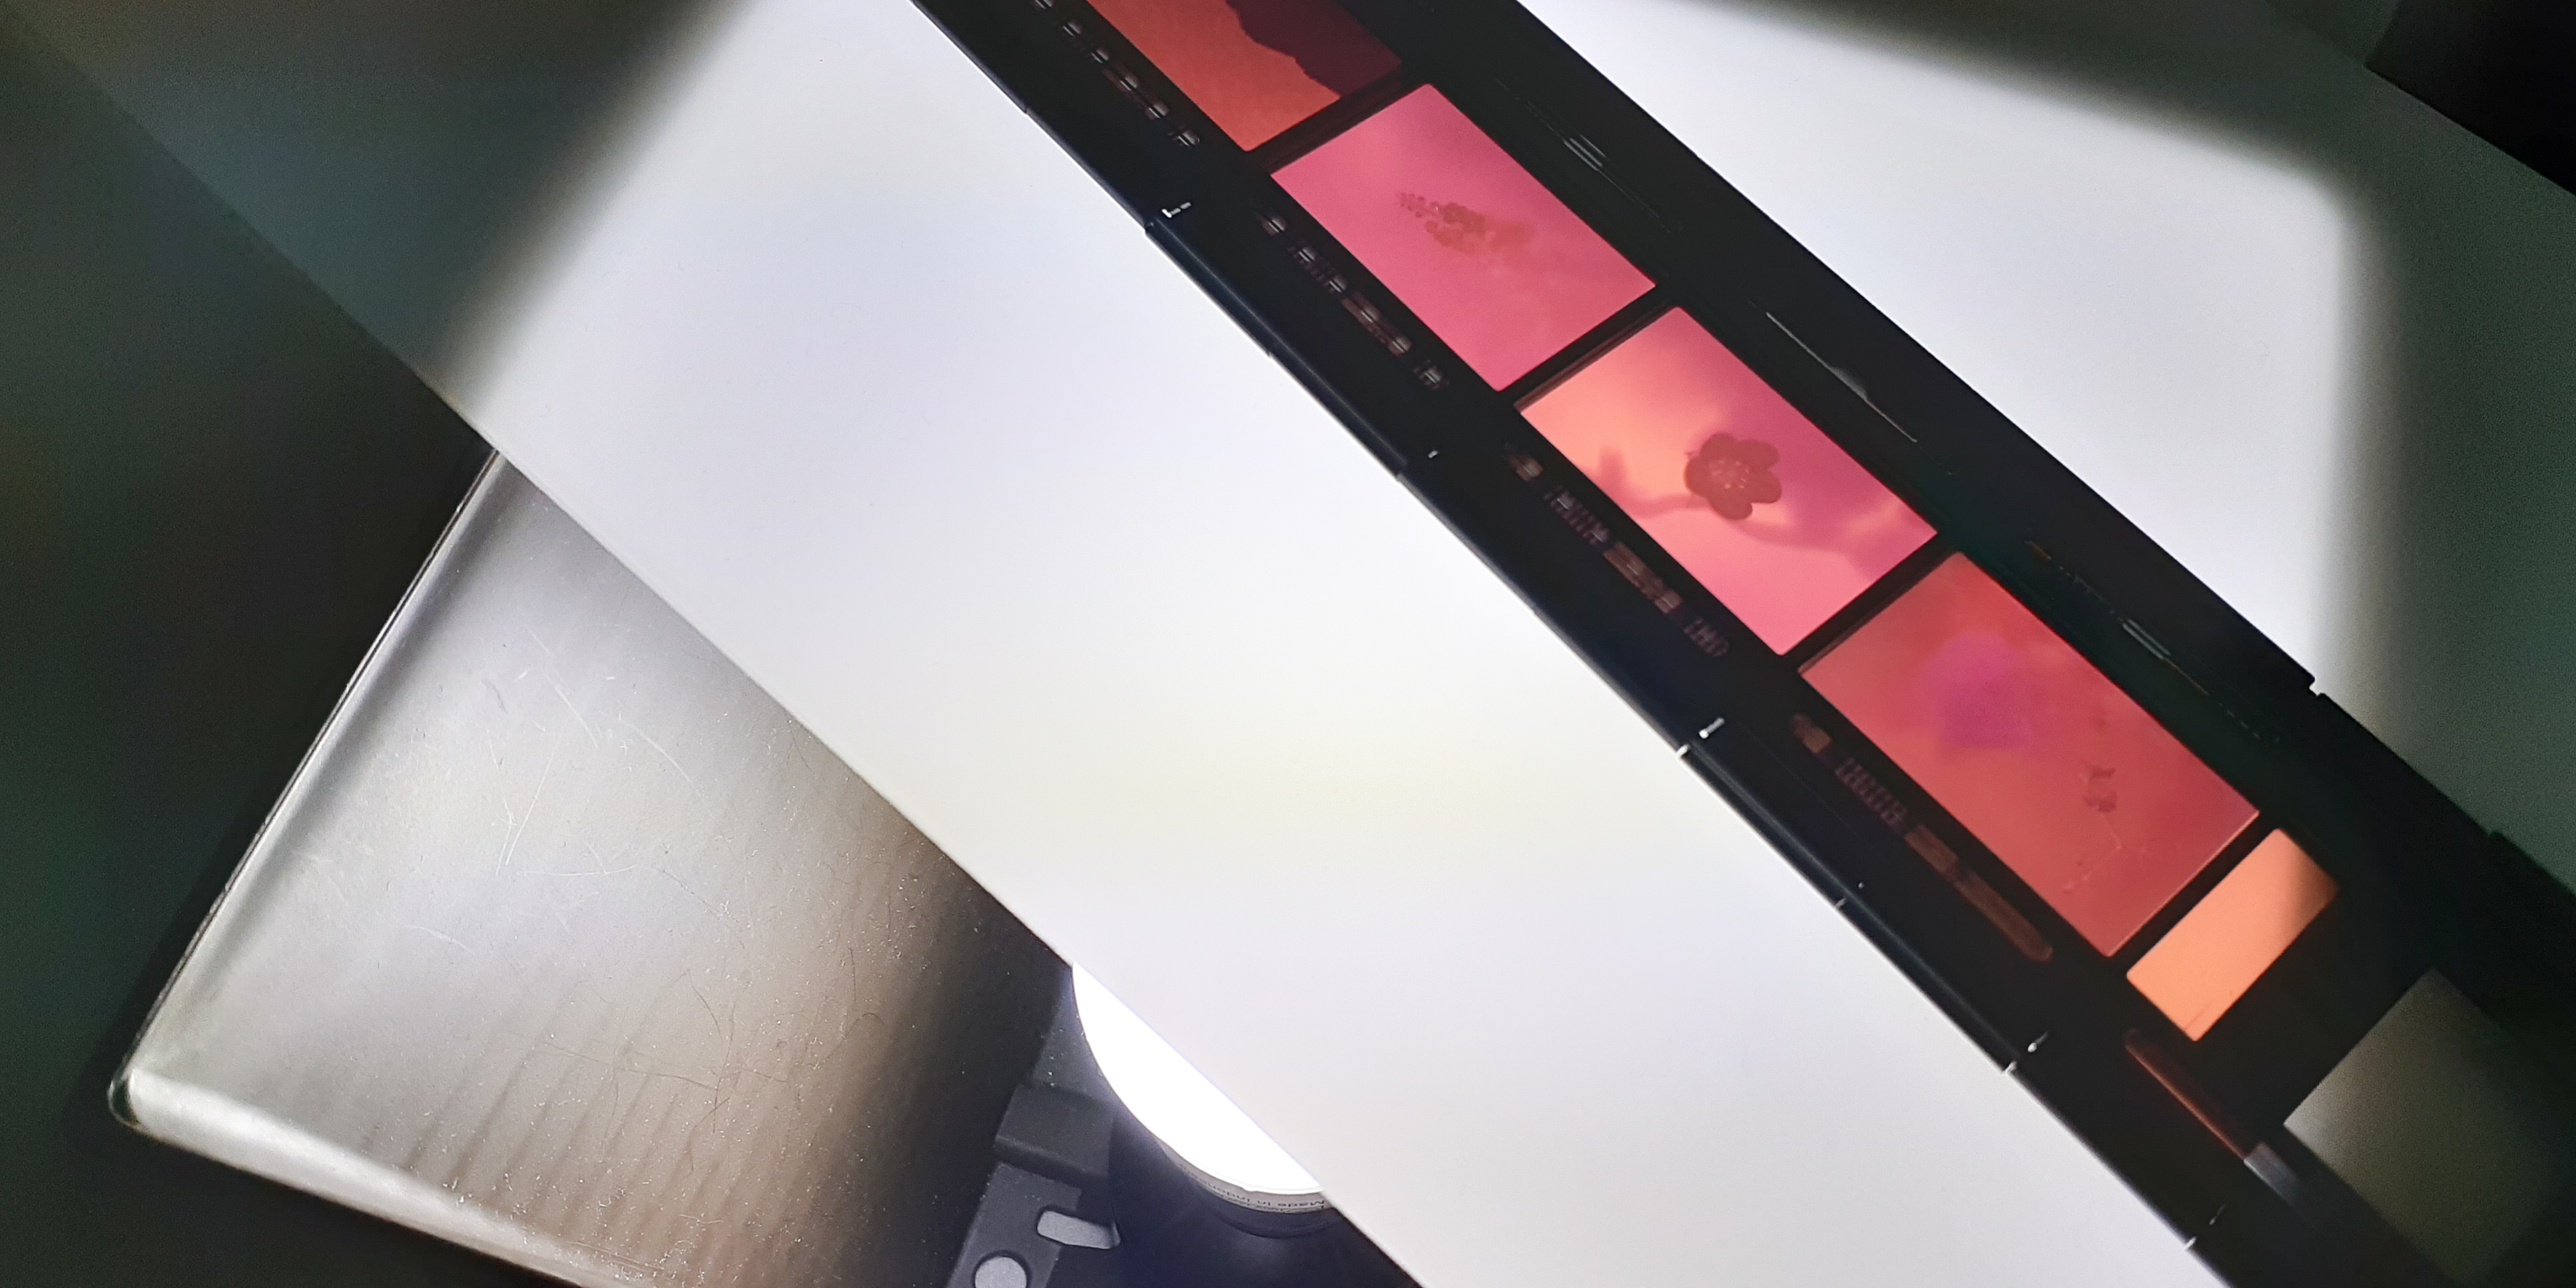
We put a negative film on an acrylic resin milk-white (semi-transparent) plate with white light from the bottom, and took a picture directly above the plate.
Negative films are in the film holder. However, when you shoot negative films, they should include unexposed areas of the film. Alternatively, unexposed film image should be shot in the same shooting conditions as other images and unexposed areas should be specified on the thumbnail.
You can shoot beautifully with white light directly from the bottom. So, why not take this opportunity to take on the challenge of digitizing film photos? In that case, please use SILKYPIX’s Negative film inversion tool!
For more information on SILKYPIX Developer Studio Pro10
You can experience all the features for free for 30 days!
![]()