We introduce the new function “Object information (Semantic Masks) filter” of the SILKYPIX Developer Studio Pro11.
SILKYPIX supports the object information (Semantic Masks) in the exported DNG data when shooting with Apple ProRAW on iPhone*. Therefore, when using the Partial correction tool, it is possible to analyze the object information from the image and select the range of partial correction using the object information.
You can easily specify an area of partial corrections by simply selecting items that appear as object information. This makes it much easier to make area selections than to make area selections in the brush.
*Currently, the supported models are iPhone 12 Pro/12 Pro Max and iPhone 13 Pro/13 Pro Max.
*To set iPhone’s Apple ProRAW settings, select iPhone Settings > Camera > Format, and then select Apple ProRAW for the Photograph shoot option. Tap the camera’s “RAW” button before shooting. For details, refer to the manual for your model.
How to adjust using the Object information (Semantic Masks)
Partial correction tool
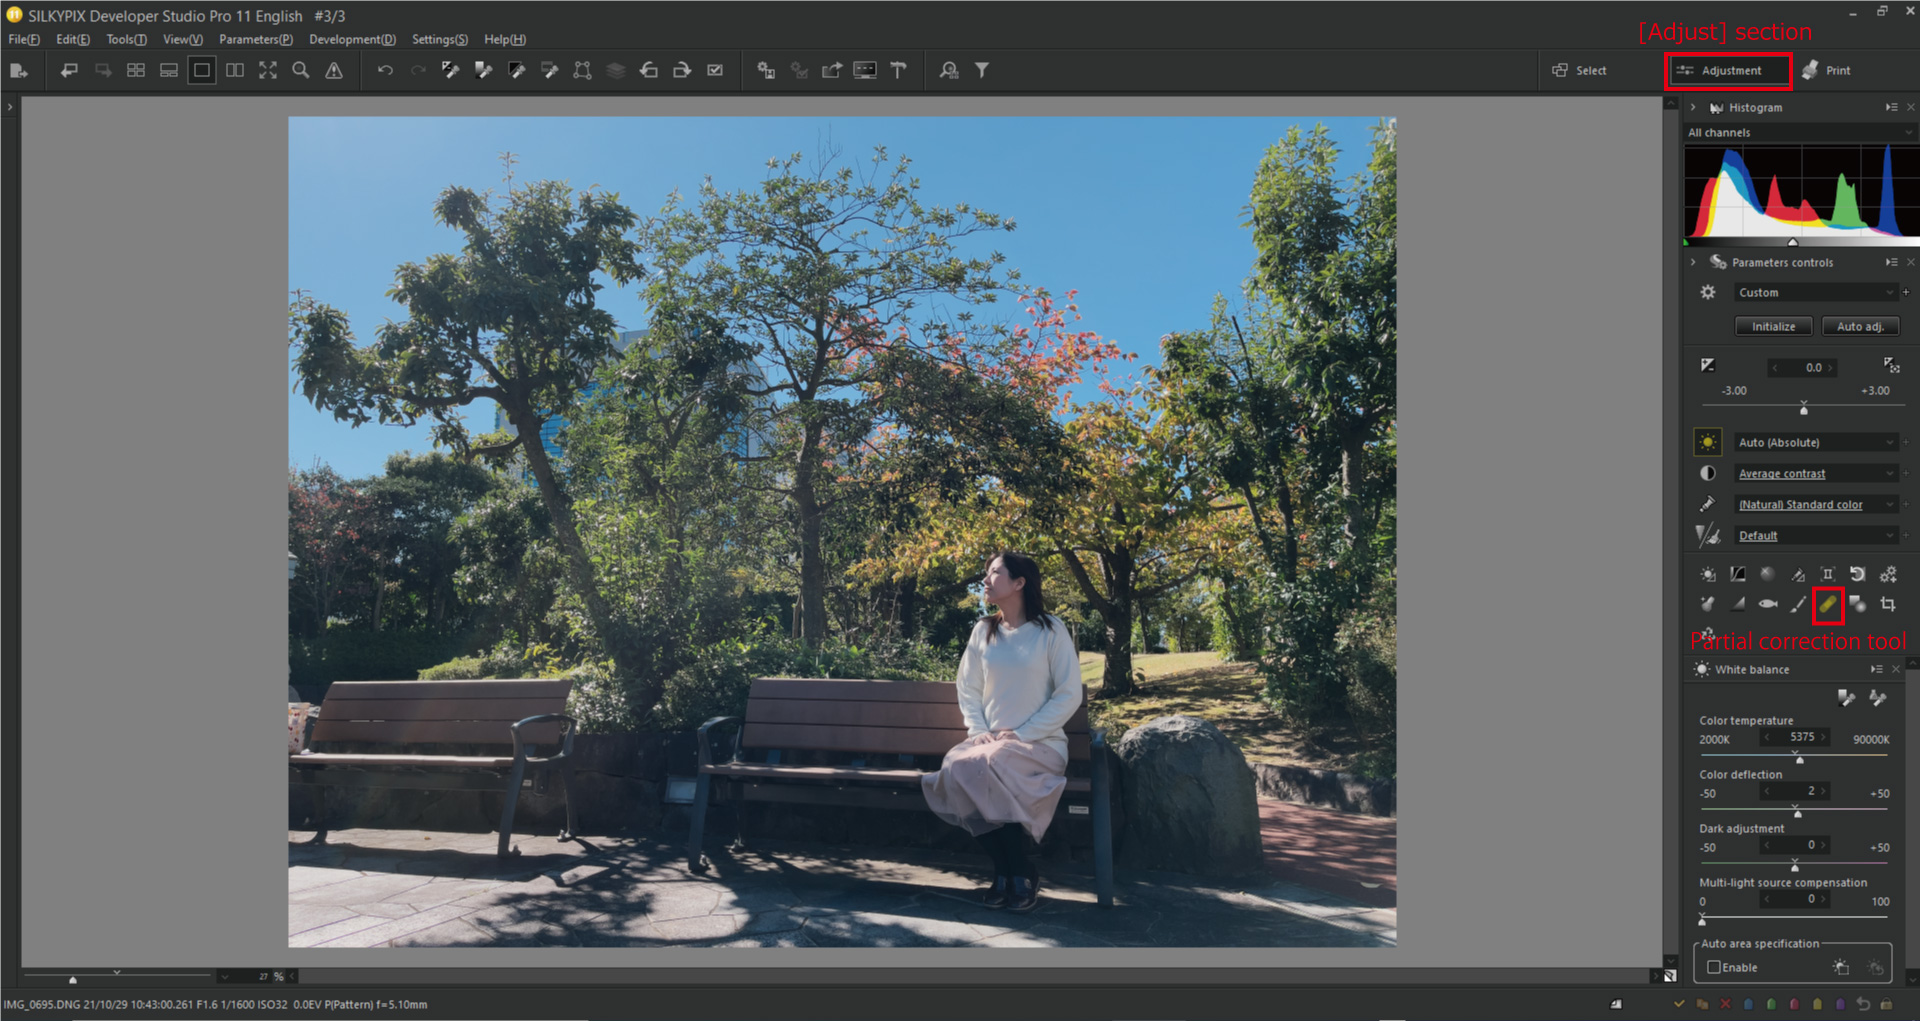
When the image containing the object information shot by iPhone is displayed, open the Partial correction tool. The Partial correction tool is located in the parameter controls in the [Adjust] section.
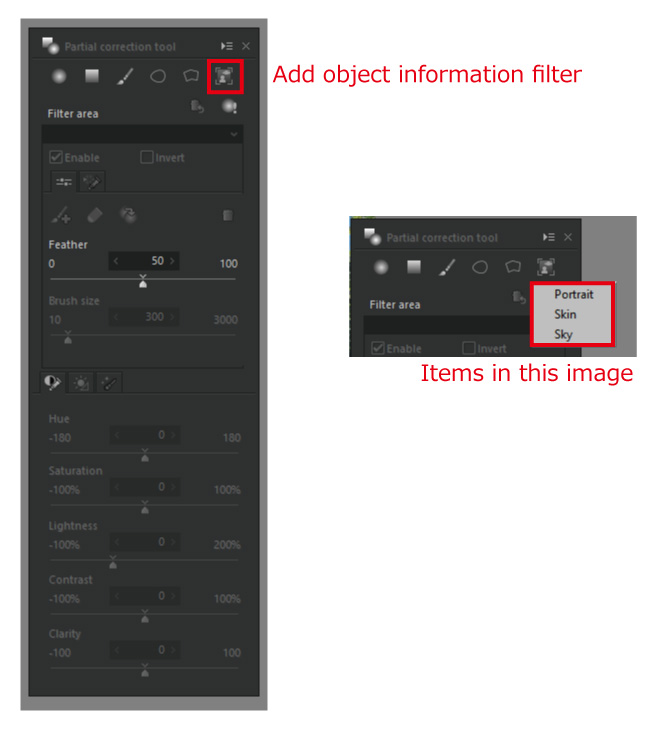
Clicking the icon of the Partial correction tool displays a dedicated sub-control.
At the top of the sub-control are the icons for the six area selection tools, and click the icon [Add object information filter] at the far right. Click this icon to display the object information items included in the image data.
In the following example, [Portrait], [Skin], and [Sky] items are displayed. These three areas are displayed as items in this image.
Example of selecting the [Portrait]
![Example of selecting the [Portrait]_2](https://silkypix.isl.co.jp/en/files/media/2022/02/app_3.jpg)
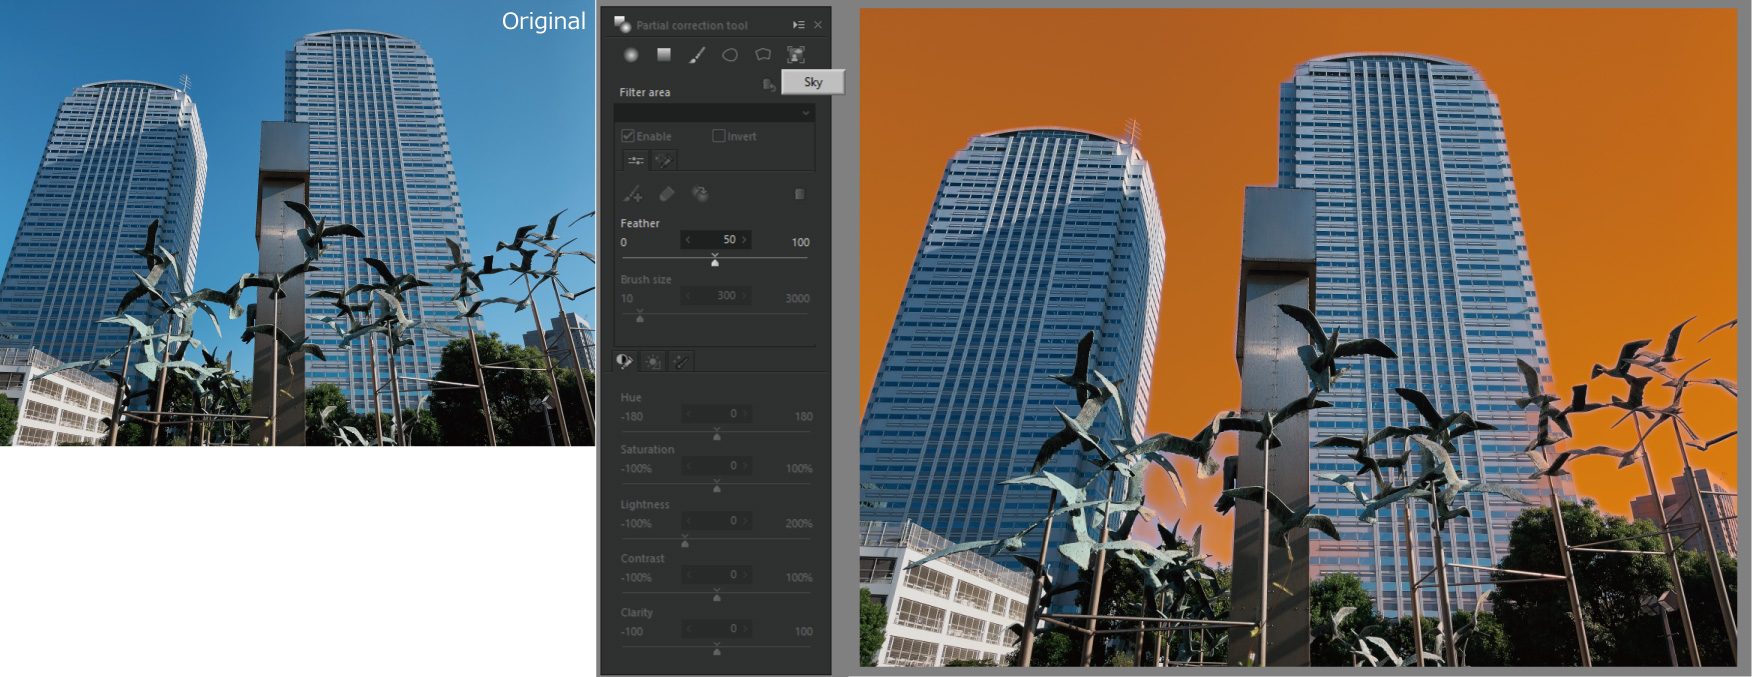
When you select the [Portrait], only the person in the image above is brightened. This bright area is the correction area. For clarity, it is automatically brightened. Alternatively, you can click the [Emphasize partial correction filter areas] to add orange color to the selected area for easy viewing.
![Example of selecting the [Portrait]_3](https://silkypix.isl.co.jp/en/files/media/2022/02/app_4.jpg)
As shown above, you can adjust only the person by clicking the [Portrait] and then adjusting the Saturation, Lightness, etc. in the sub-control of the Partial correction tool.
![clicking the [Portrait] and then adjusting the Saturation, Lightness, etc.](https://silkypix.isl.co.jp/en/files/media/2022/02/app_5.jpg)
Example 2
Next, we will show you how to make adjustments when you want to correct an area other than the one selected as object information.
Currently [Sky] is selected as the correction area, but after this, click the [Invert] on the sub-control.
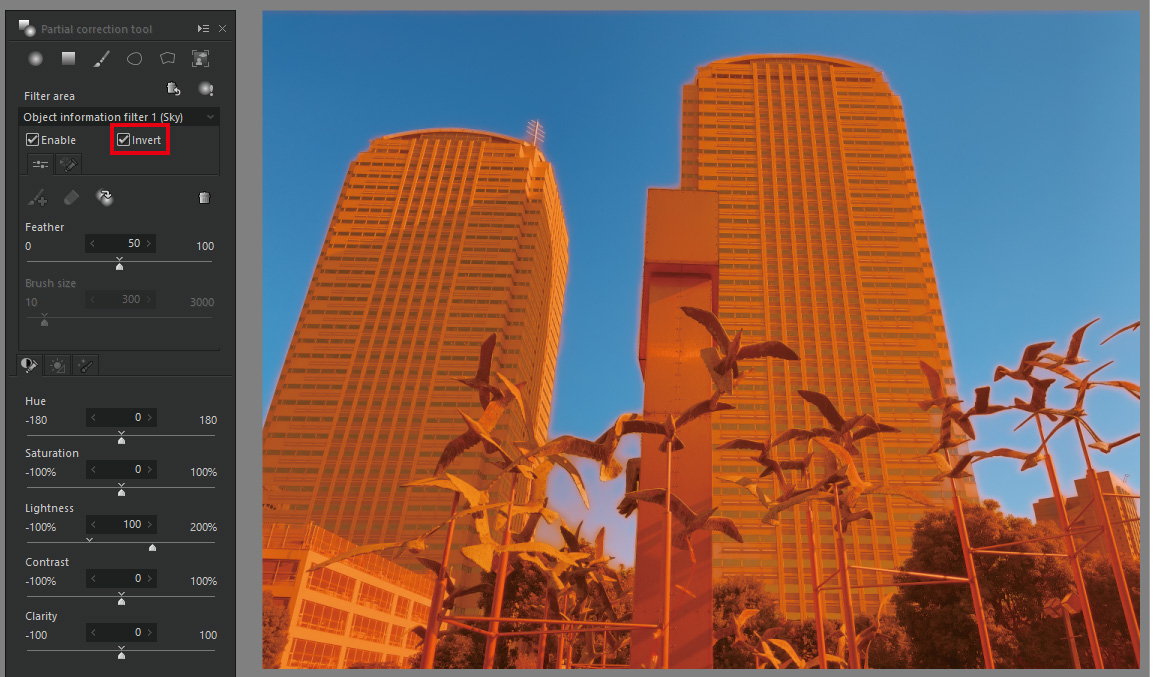
This way, you can select a non-sky part of the correction area.
The object information items are limited to [Portrait], [Sky], [Skin], etc. However, this method is useful when you want to adjust something other than object information.
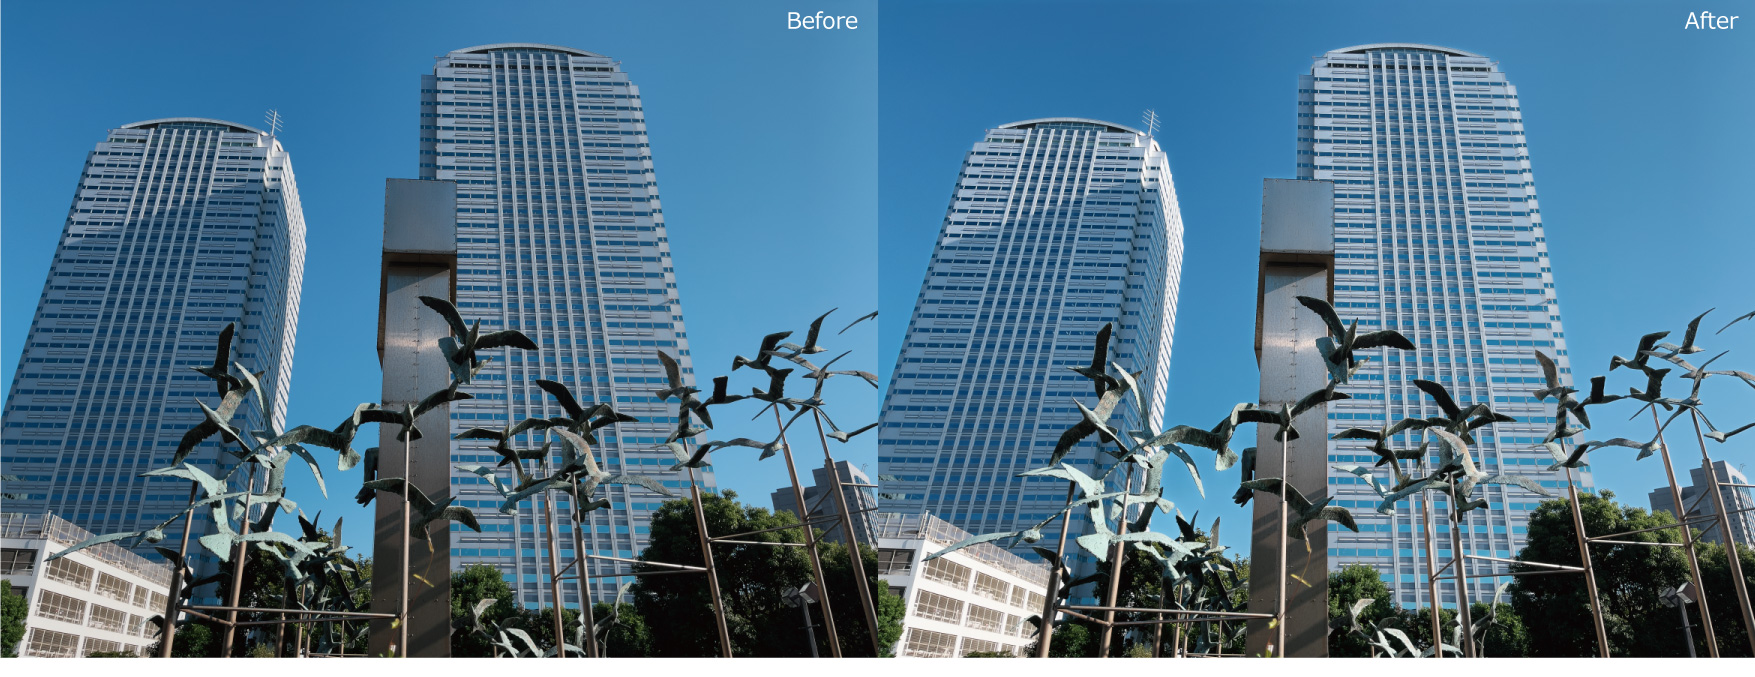
In this example, we used [Invert] to select objects that are difficult to select. Therefore, we were able to easily select it as a correction area and make it brighter.
You can try the SILKYPIX for 30 days, free of charge.
