We introduce the new “Fine color controller (Advanced)” of the SILKYPIX Developer Studio Pro11/11.
This time, we will introduce the [Advanced] mode of the Fine color controller which enables you to specify the color to be adjusted in detail, and also enables you to change the color larger than before.
How to use the Fine color controller (Advanced)
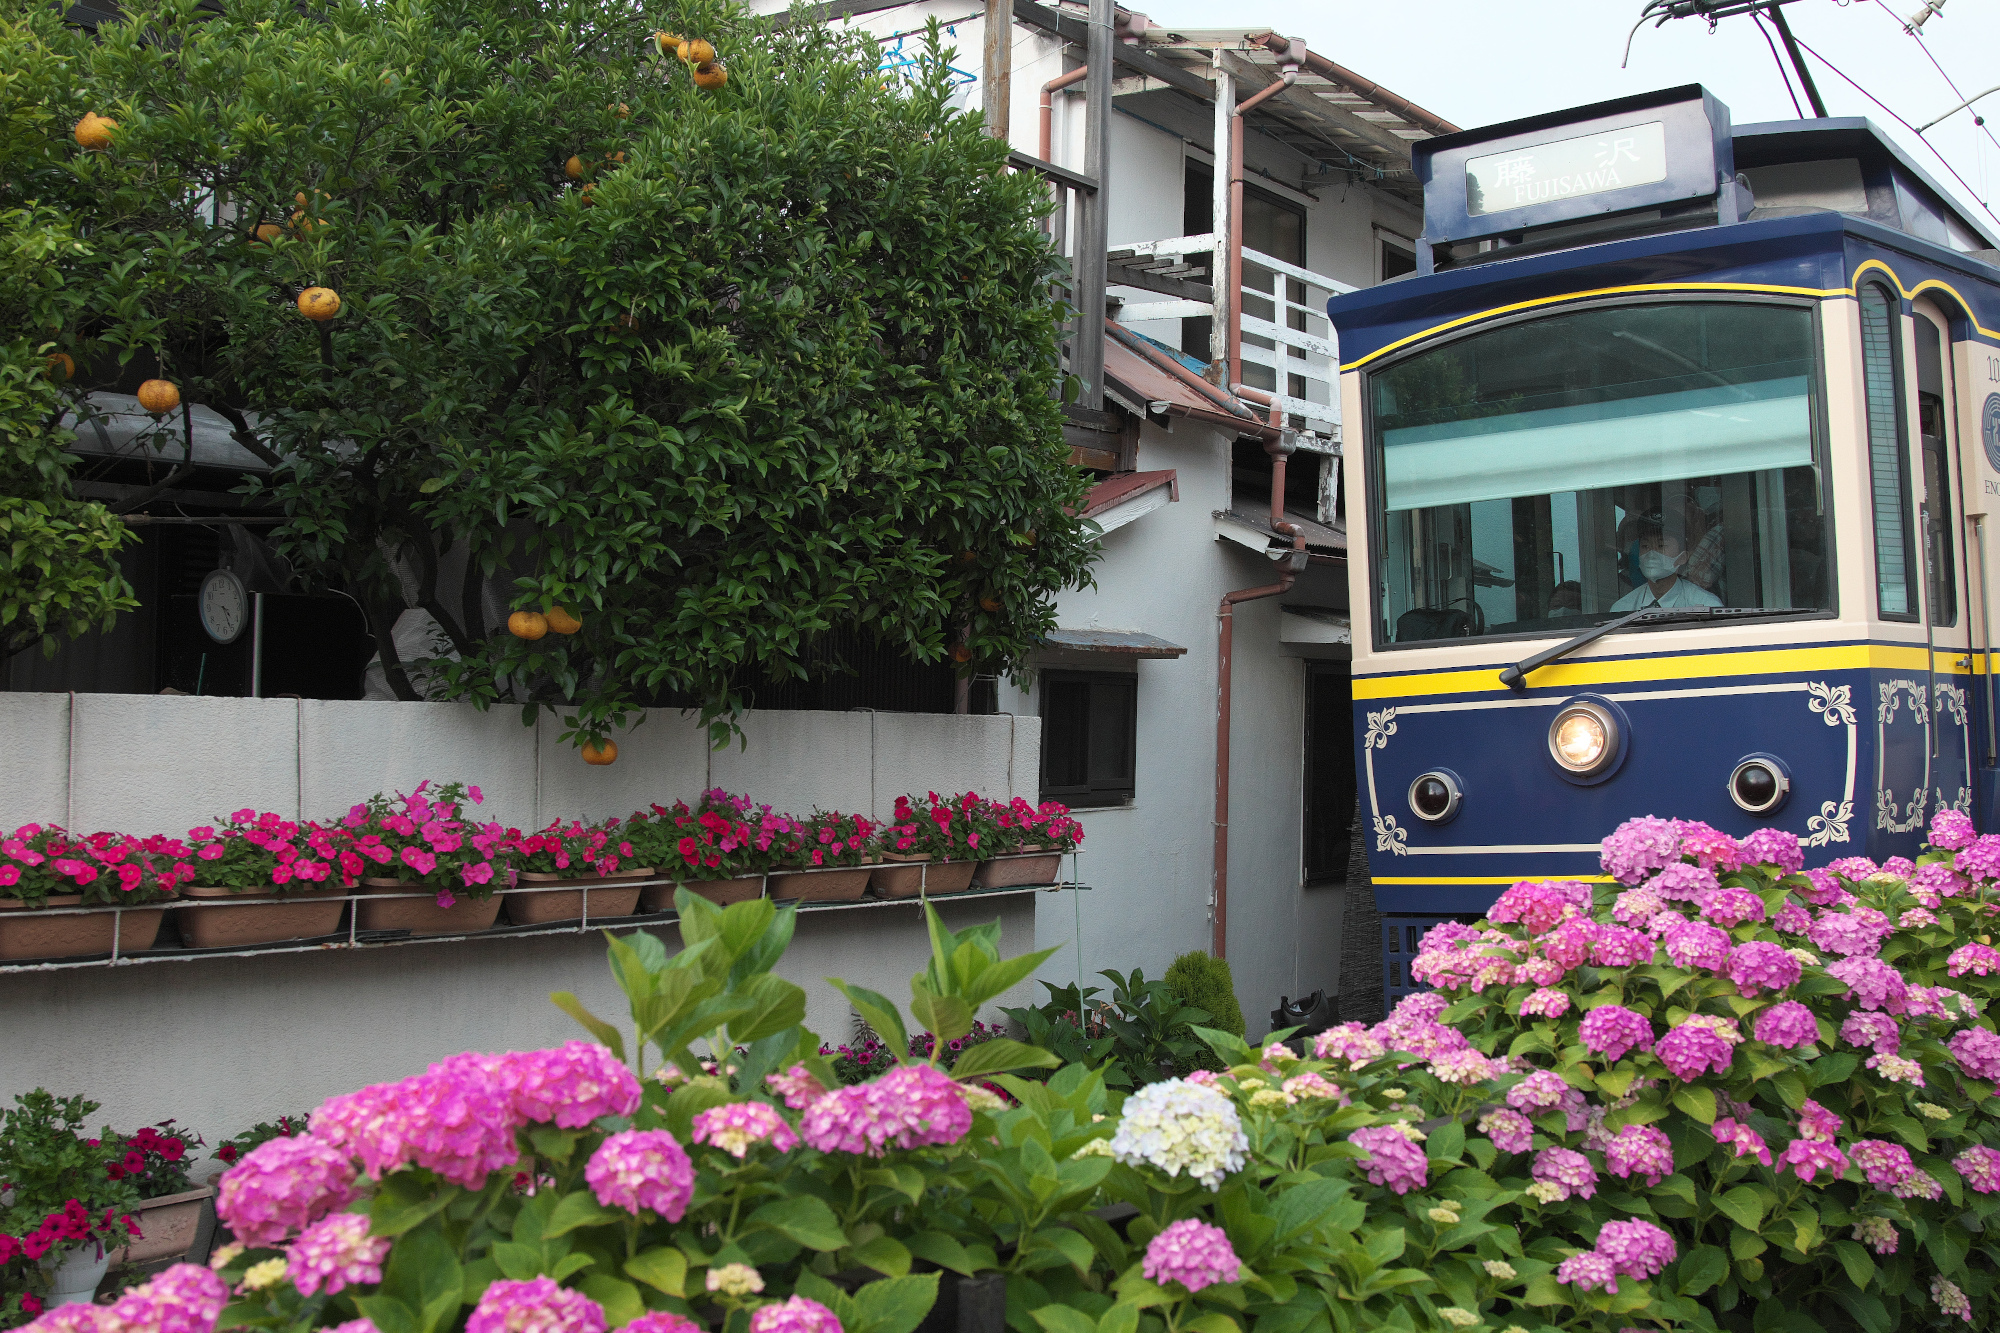
We would like to make this photo’s hydrangeas more vivid.
First, click the [Adjust] section to open the adjustment screen. Click the Fine color controller icon in the parameter control to display the sub control. There are two tabs above the sub control, and clicking the [Advanced] icon on the right switches to the adjustment items of the Fine color controller (Advanced).
![[Adjust] section](https://silkypix.isl.co.jp/en/files/media/2022/03/fine-1.jpg)
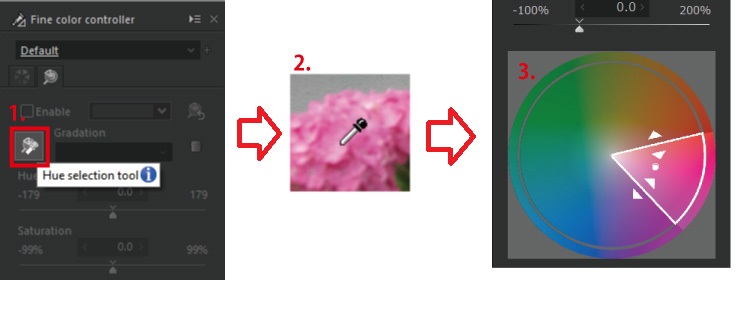
- When you click the Hue selection tool, the cursor in the preview becomes an eyedropper.
- Use the eyedropper to click on the color you want to adjust in the image.
- Click to display the target gamut in the color circle.
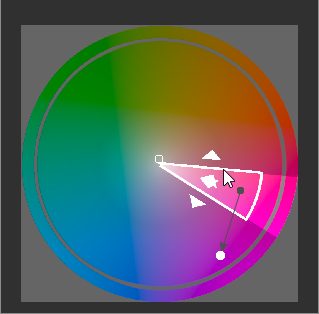
Click on the color you want to adjust with the eyedropper, and the white frame indicating the adjustment range appears in the color circle. You can adjust the color within the adjustment range by moving the Hue, Saturation, and Lightness sliders.
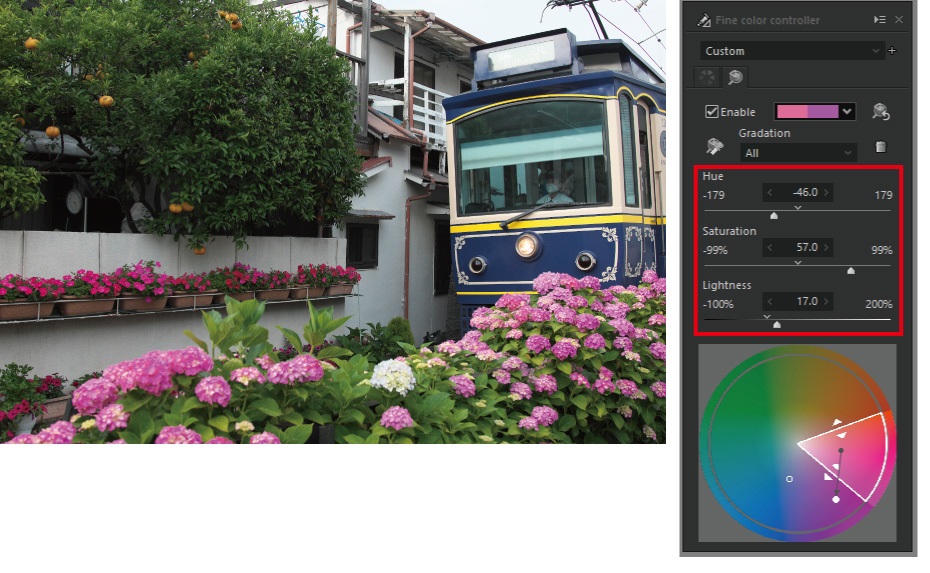
You can also adjust other than Lightness by dragging the white point in the color circle with the cursor.
However, if you adjust the image as it is, the color gamut will be too wide, and the flower in the flowerpot above the hydrangea will also change its color. This time, we want to adjust only the hydrangeas below, so we will narrow the color range we want to adjust from here.
How to narrow the gamut you want to adjust
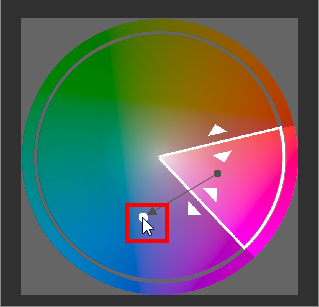
The color circle in Advanced mode displays the color gamut to be adjusted with a white frame. You can adjust the color gamut by enlarging or reducing the white frame.
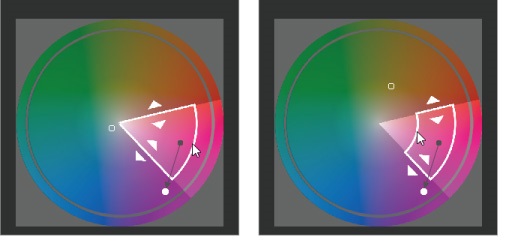
Change the color gamut for saturation by dragging the outer and inner frames with the cursor.
The hue gamut can be changed by dragging the white triangle (frame) with the cursor.
You can also fine-tune the color you want to adjust within the white border area by dragging the black point within the white border area with the mouse. We’ve already introduced that you can move the white point, but the white point indicates the adjusted color location in the image where you want to adjust the color, and the black point indicates the location in the image of the color you want to change.
Using this Advanced mode, we tried to adjust the color so that only the lower purple hydrangeas change color.

If it is difficult to know which color in the image will change, hold the white point on a color that is too far away from the color of the subject, and set the color gamut so that only the color you want to adjust changes, move the black point, etc. while checking on the preview.
Other Adjustment Methods
You can also use this Advanced mode to make large changes to the color.
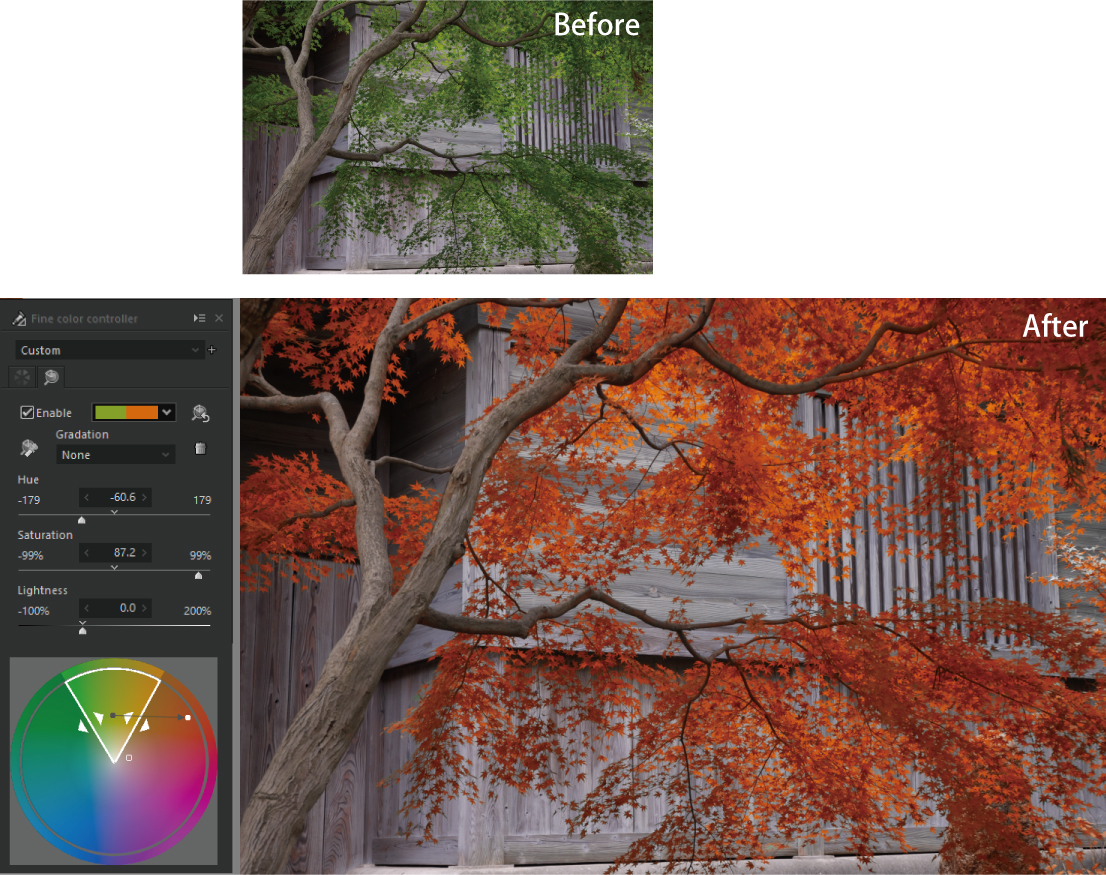
In the example above, the green leaves are adjusted to be red in color, and the leaves are made like red leaves. For the adjustment point, we set “Gradation” to [None].
The “Gradation” determines whether or not to apply a gradation in the saturation and hue directions around the black dot in the white frame of the color circle. The default setting for “Gradation” is [All], and there are also [Hue], [Saturation], and [None]. Let’s switch between them and see some examples.
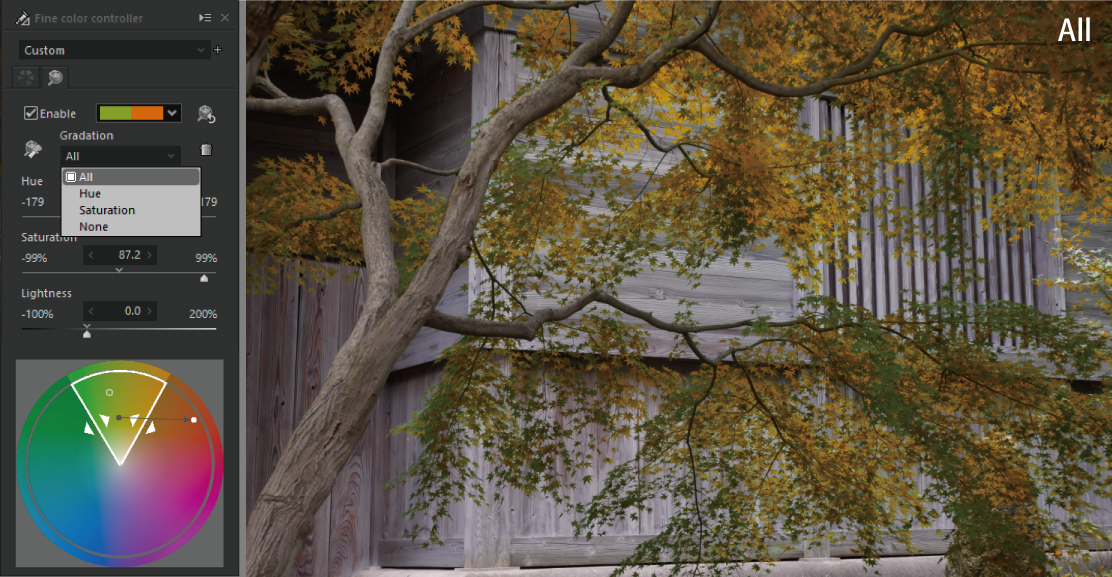
Adjusts the color with an emphasis on the connection of colors, such that a gradation is applied in the direction of hue and saturation from the Source point.
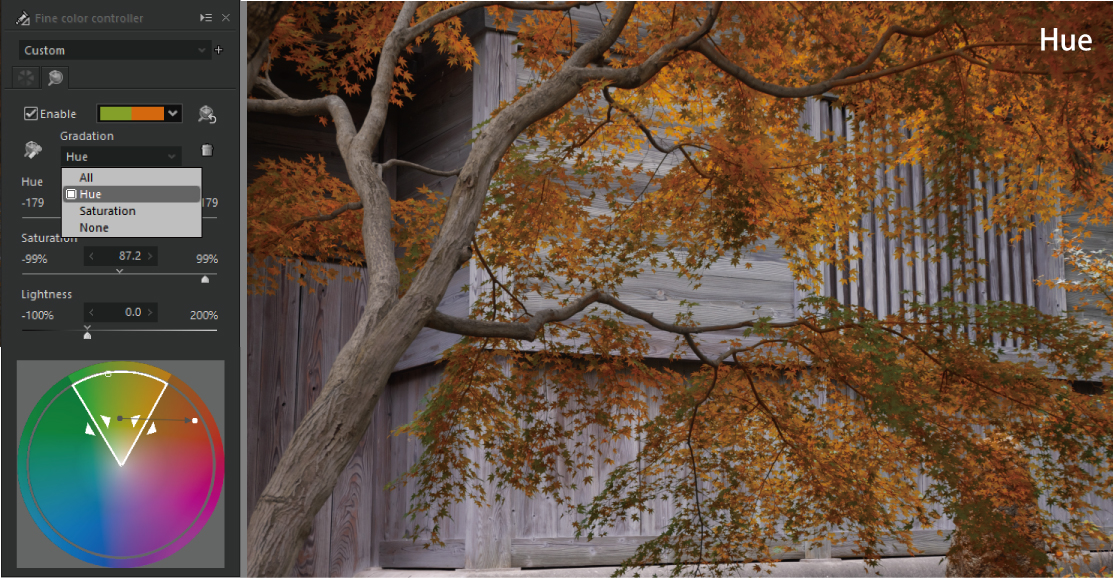
Adjust the color so that a gradation is applied in the direction of the hue from the Source point.
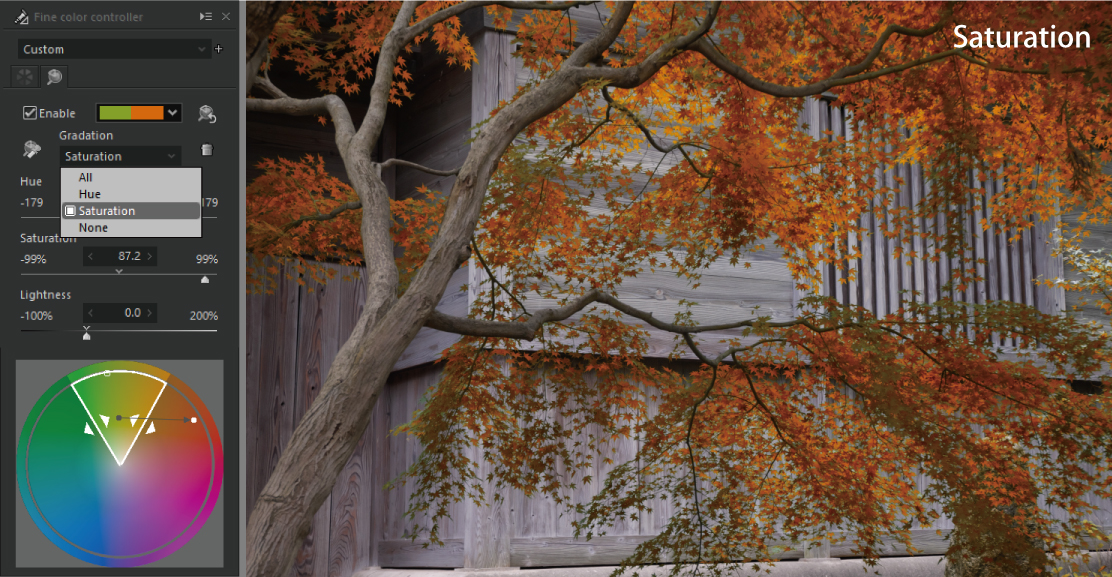
Adjust the color so that a gradation is applied in the direction of the saturation from the “Source” point.
When a gradation is applied, the connection between the colors becomes clean. However, depending on the color saturation or hue of the subject, the areas where the change of the colors is large and small appear.
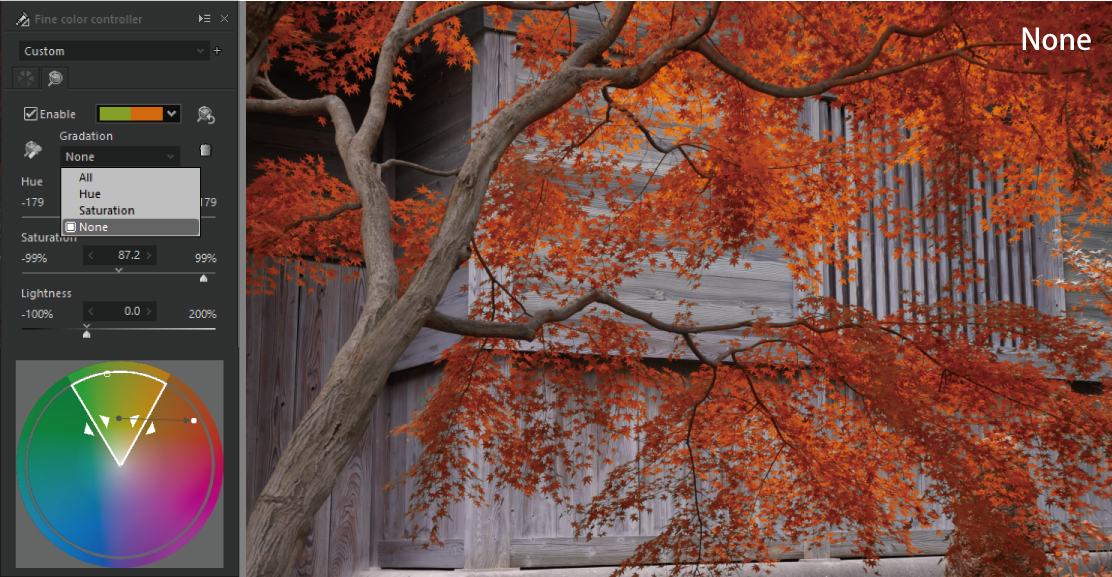
Adjusts the entire gamut framed by a white border to the color of “Destination.” If you want to adjust the entire gamut to a certain hue and saturation, select “None” for best results.
In this example, we wanted to fill the color in the area surrounded by white frames without gradients, so we chose [None].
You can try the SILKYPIX for 30 days, free of charge.
