We introduce the new “Retouch brush tool” of the SILKYPIX Developer Studio Pro11.
Conventional SILKYPIX has been able to erase small dust, that has been taken in photos using the “Spotting tools.” However, it took time to repeatedly click on a large object to erase it.
The “Retouch brush tool” can be deleted from the preview screen by tracing the unwanted objects you want to erase with a brush. As a result, it is possible to easily erase large unwanted objects without taking time.
![[Pro11] Retouch brush tool](https://silkypix.isl.co.jp/en/files/media/2022/03/6acc0c8ce309ce2e4b2bc98fe08b3e08.png)
How to use the Retouch brush tool
Click the [Adjustment] section to open the adjustment screen. Click the Retouch brush tool icon in the parameter control.
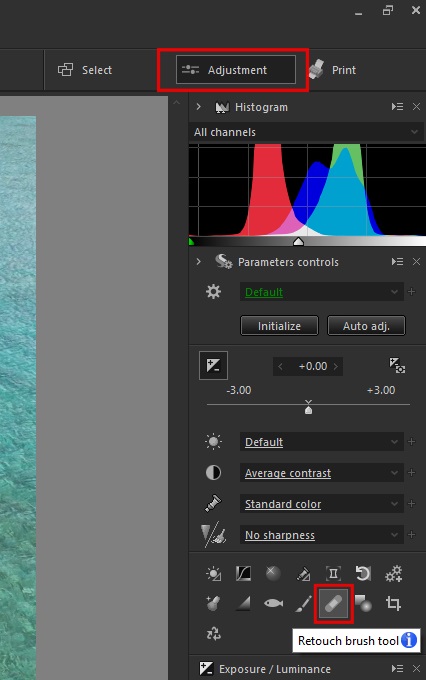
Click the Retouch brush tool to display the sub-control. Click the icon [Add retouch brush] in the upper left of the sub-control.
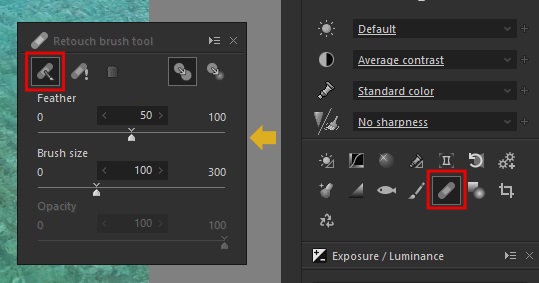
“Retouch brush tool” sub-control
Feather
The larger the feather, the softer the brush’s nib becomes, and the weaker the effect on the outside of the brush. The smaller the amount of feather, the more clearly the boundaries of the brush will be visible.
Brush size
Adjust the size of the brush’s nib to match the area you want to correct.
Opacity
Adjusts the amount to which the correction effect of the added retouch brush area is reflected in the original image before correction. The smaller the value, the more transparent the original image before correction will be displayed.
Click the [Add retouch brush] to make the cursor a circle. Add retouch brush by dragging the unwanted objects you want to erase on the preview screen.
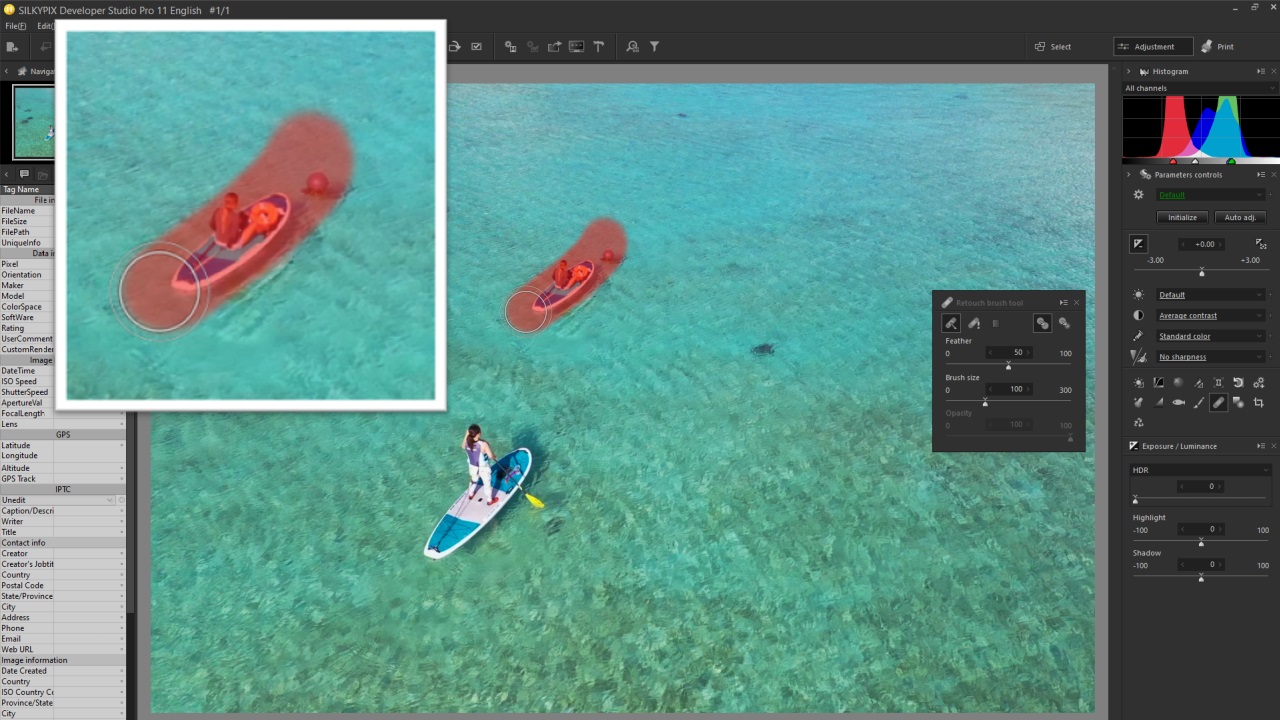
When you finish dragging unwanted objects with the brush, the copy source is automatically selected from the top, bottom, left, or right.
When you hold the cursor at the copy source, it becomes a hand mark, and you can drag to specify the copy source part. Use a brush to move the copy source so that the traced part becomes natural without discomfort.
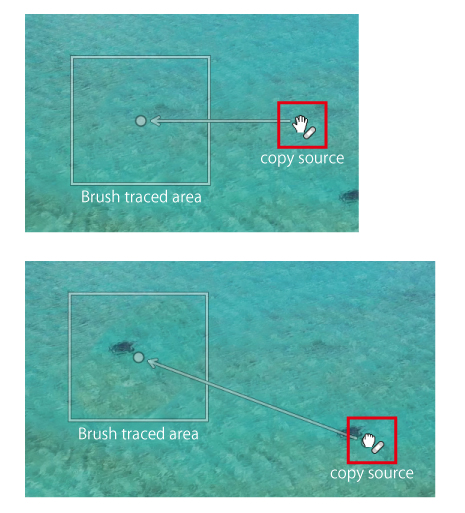
In the above example, it clearly disappeared even if the copy source was not moved.
Retouch mode
The mode for correcting the correcting brush area is at the upper right of the sub-control. You can select between [Copy] and [Retouch]. Each feature is described below.
Copy
The source area is copied directly to the brush area and reflected. By setting the feather of the brush to a larger size, a natural correction can be achieved.
Retouch
Adjusts and reflects the image of the source area to match the brightness and color of the surrounding area of the brush area.
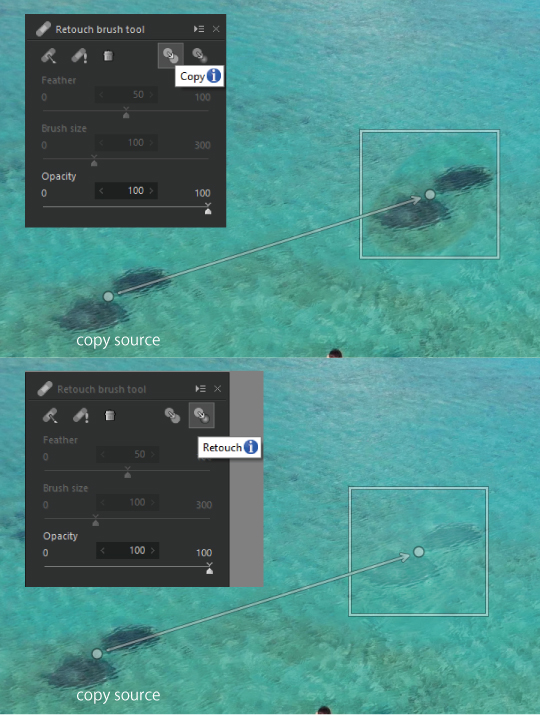
Try selecting this option while looking at the screen so that the subject becomes natural.
Simple operation by dragging the parts you want to erase on the preview screen!
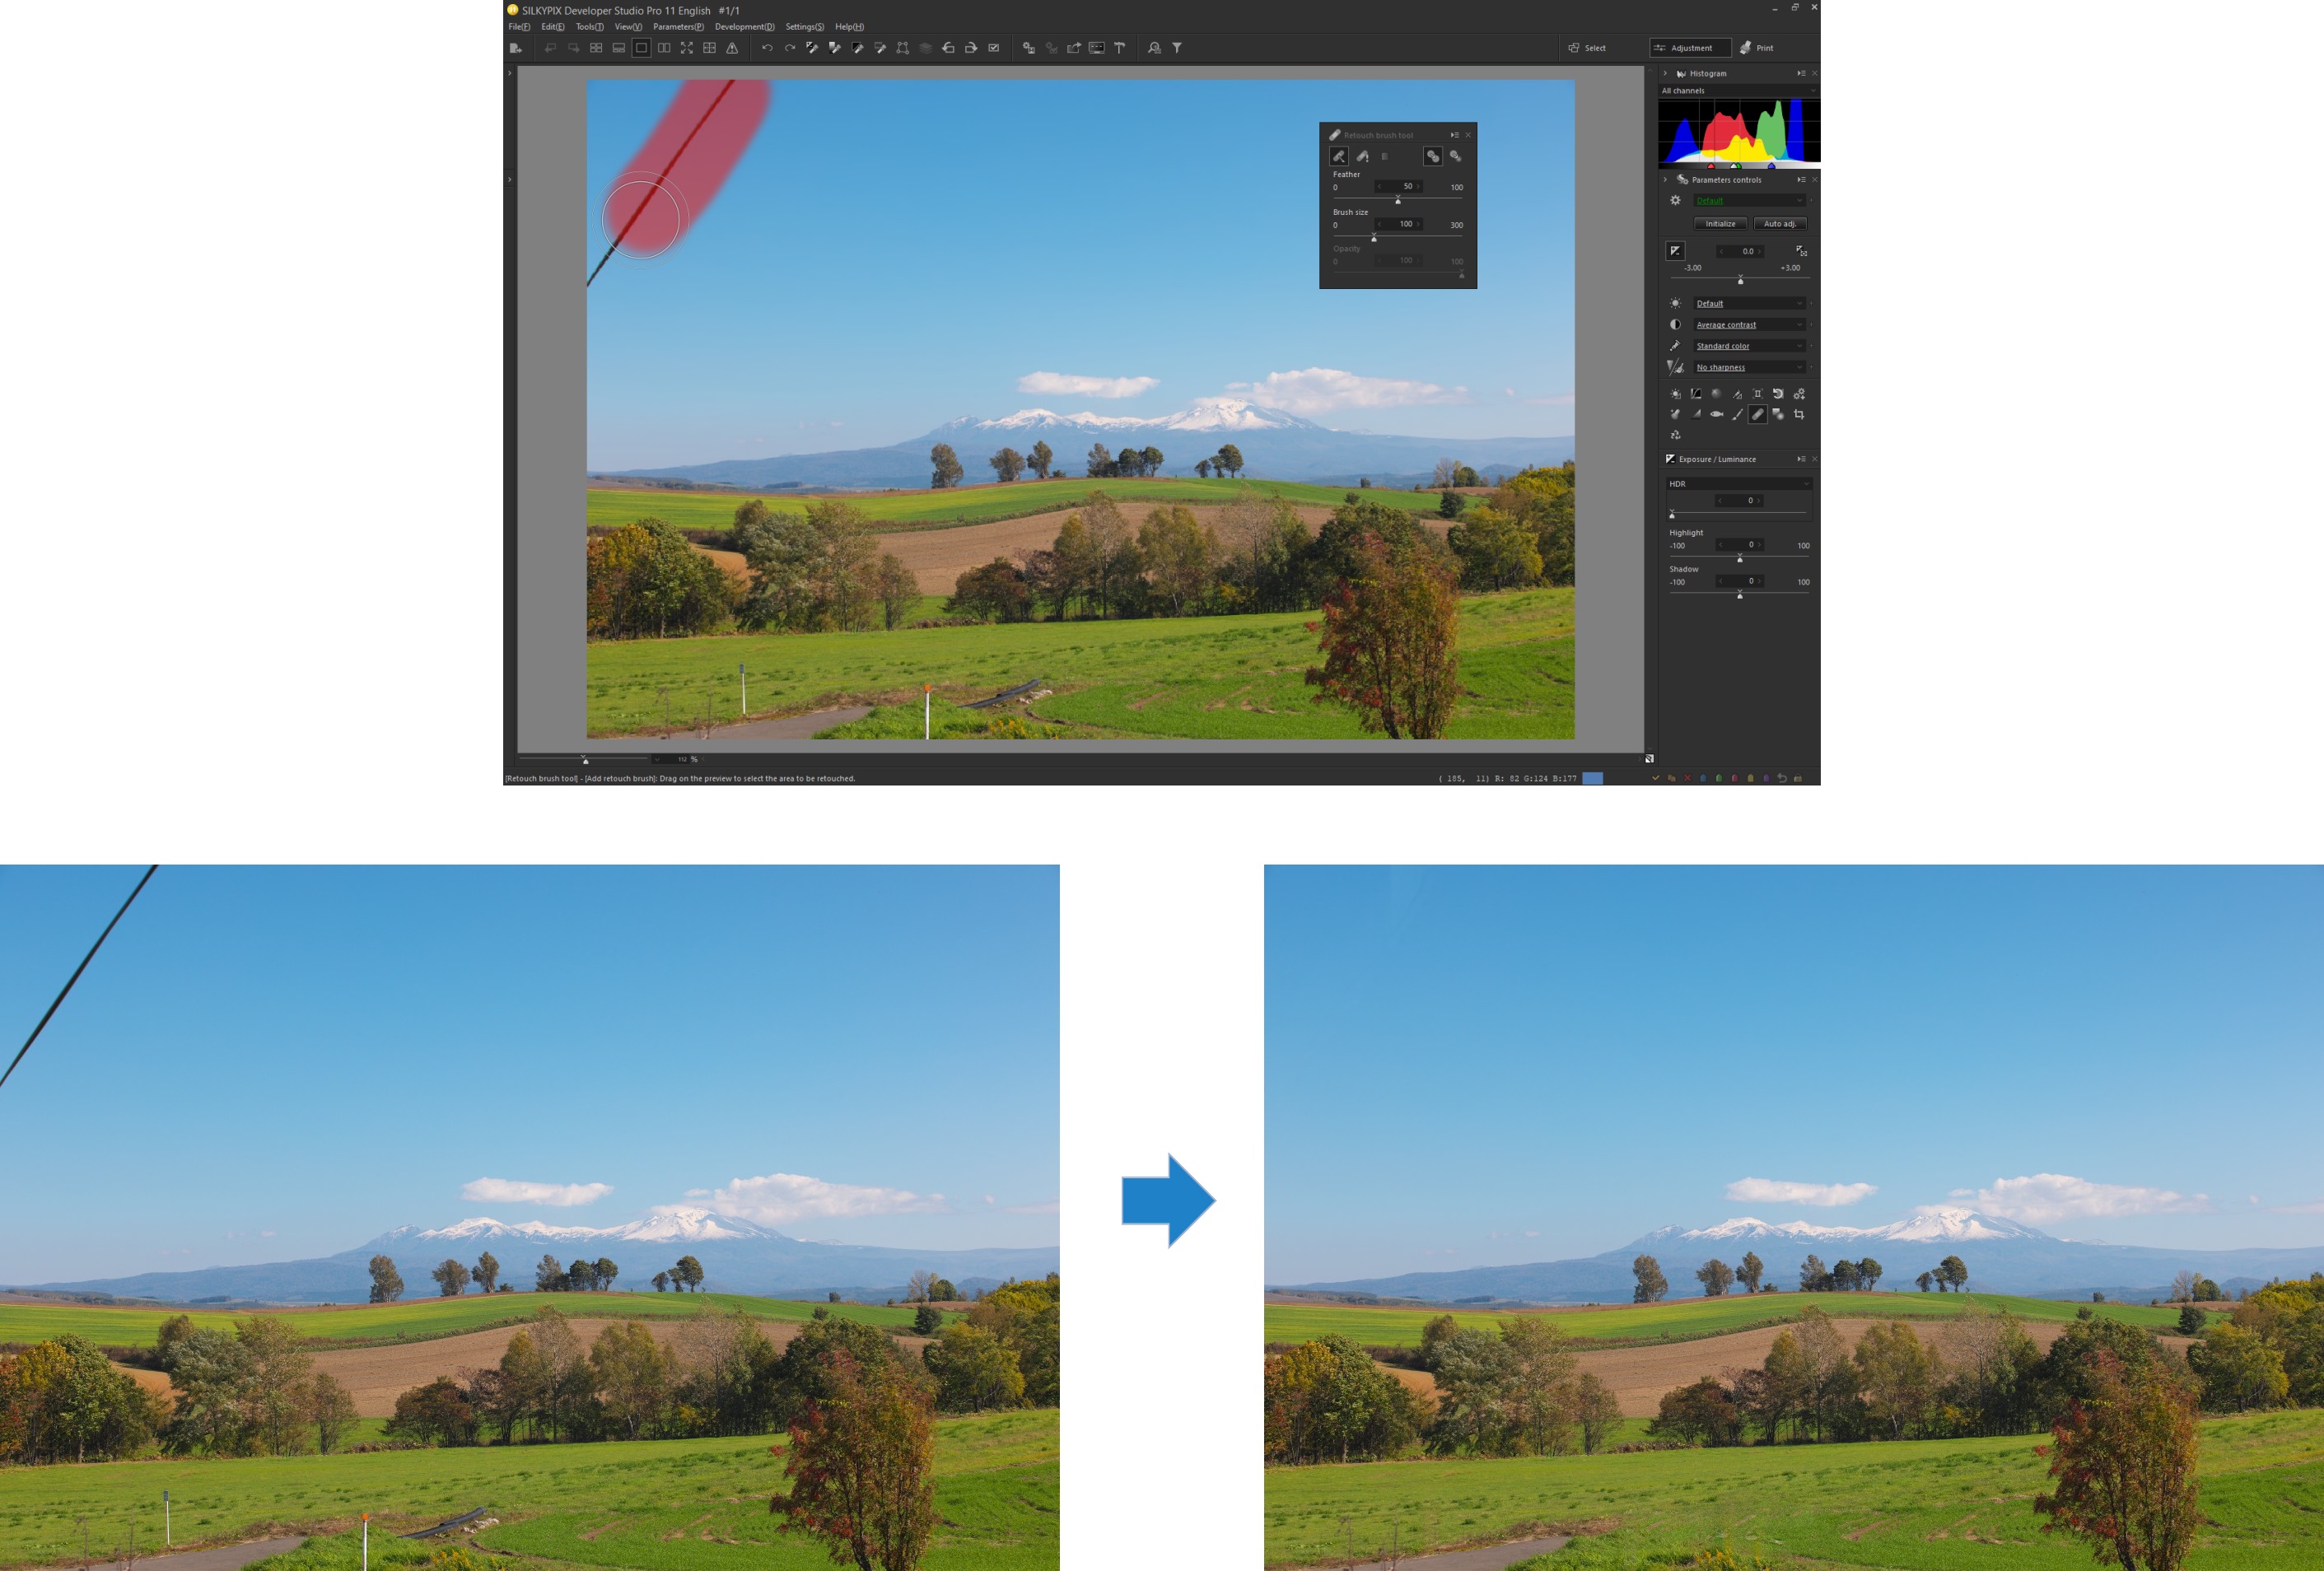
It is now possible to easily erase wires and large unwanted objects that had been hard to erase until now. Please give it a try!
You can try the SILKYPIX for 30 days, free of charge.

