You can try out all the features for free for 30 days after installing the SILKYPIX series. Please try your data as you can download it from this website.
Click here to download the SILKYPIX series.
![]()
Click here for installation instructions.
https://silkypix.isl.co.jp/en/download/how-to-install/
Start the programs by clicking the icons on the SILKYPIX when the installation is complete.
Open RAW data
Select the folder where the RAW data is saved and open the RAW data. Please switch the screen as follows.
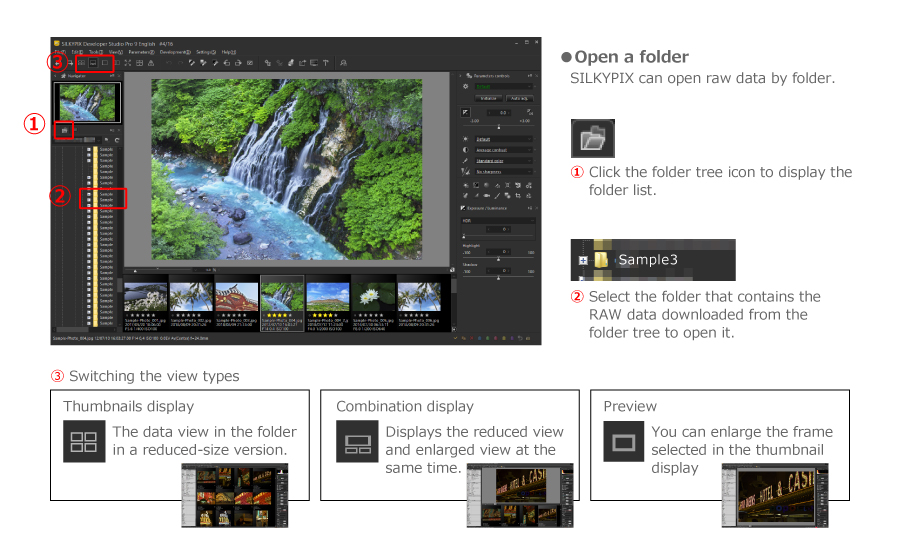
Screen elements
Icons and adjustments are as follows.
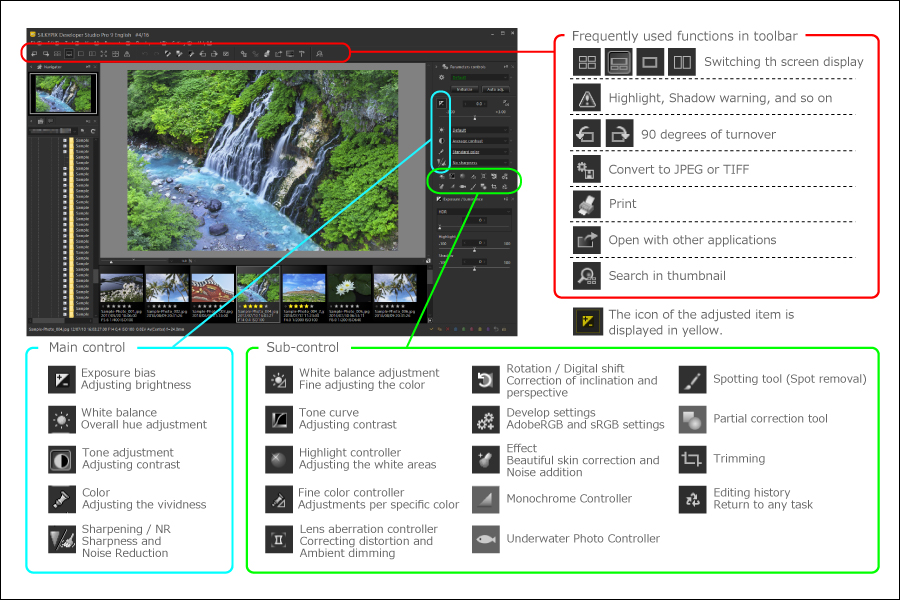
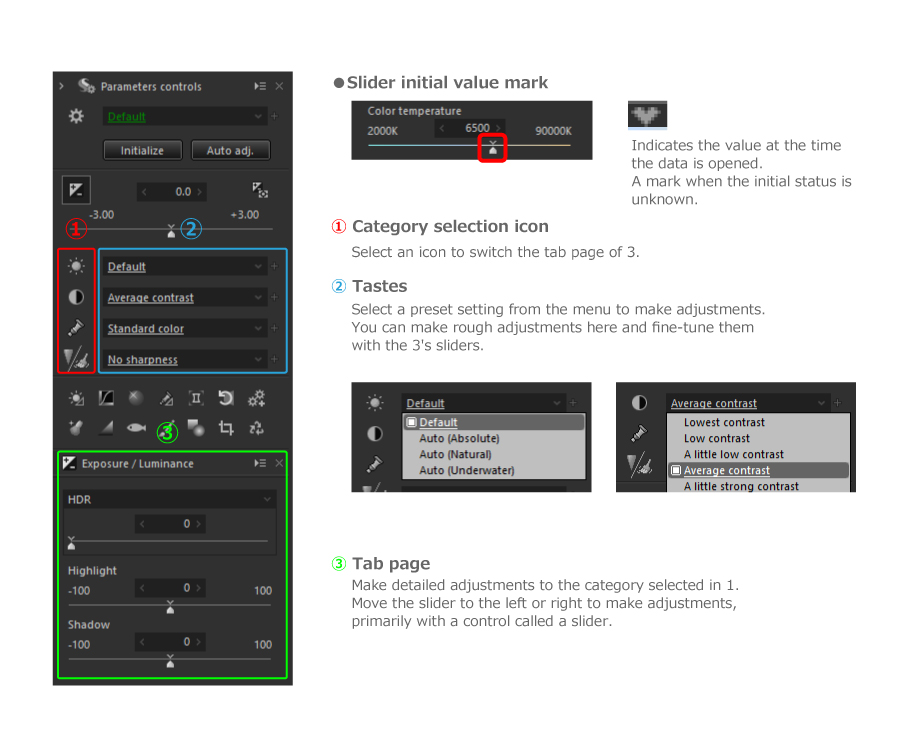
Main control
Frequently used basic adjustments are made in the main control.
Development
When the adjustment is completed, the RAW data is converted to image data such as JPEG and TIFF. This is known as “Development”. The original RAW data remains after processing, so you can repeat the adjustment from the beginning any number of times.
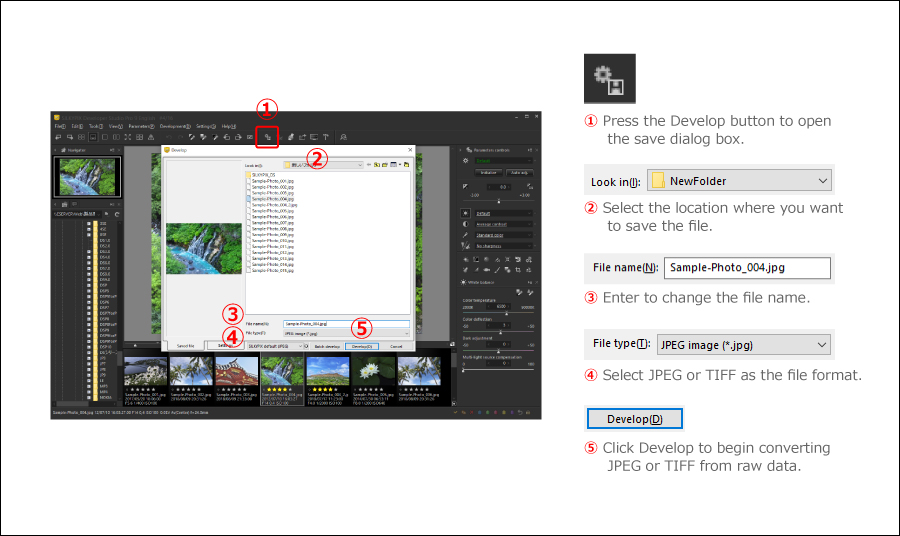
What Is Developing?
Converting RAW data into JPEG or TIFF is called “Development” in SILKYPIX. The TIFF can be 8 bits or 16 bits.
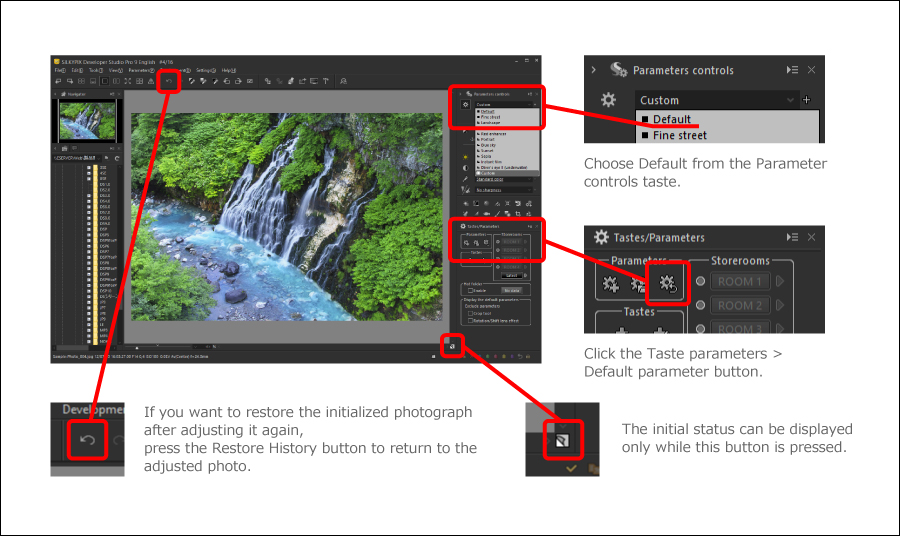
Return to the original state before editing
To restore the adjusted RAW data to its original state before editing, use the following methods.
Please try SILKYPIX’s high-quality RAW development.
You can download a free 30 days trial and try it out.
![]()