The partial correction tool for correcting the designated area
Circular correction filter
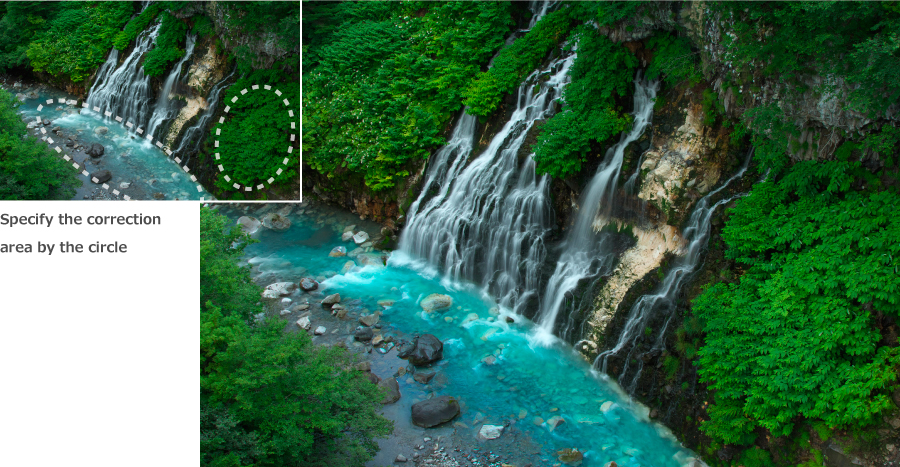
In the preview window you can correct below items to the designated circle or oval area.
[Hue] – [Saturation] – [Lightness] – [Contrast] – [White balance]
Gradual correction filter
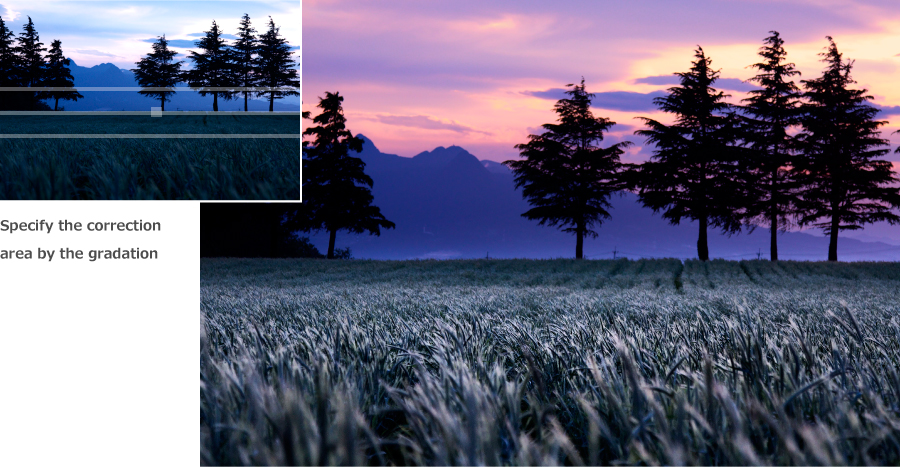
In the preview window you can correct below items to the designated graduation area.
[Hue] – [Saturation] – [Lightness] – [Contrast] – [White balance]
You can use the gradated correction filter like as a half-ND filter by changing the exposure in the horizon or horizontal line.
Improved gradation on highlighting

In the highlight or high saturation part the limit of overexposure has increased and rich gradation has been realized.
– The deviation of the hue in highlight (color fall over) has been suppressed as usual.
– The color connect in the overexposed portions and the vicinity of contour part where the gradation remains has been improved.
Improved highlight recovery during the exposure desensitization processing
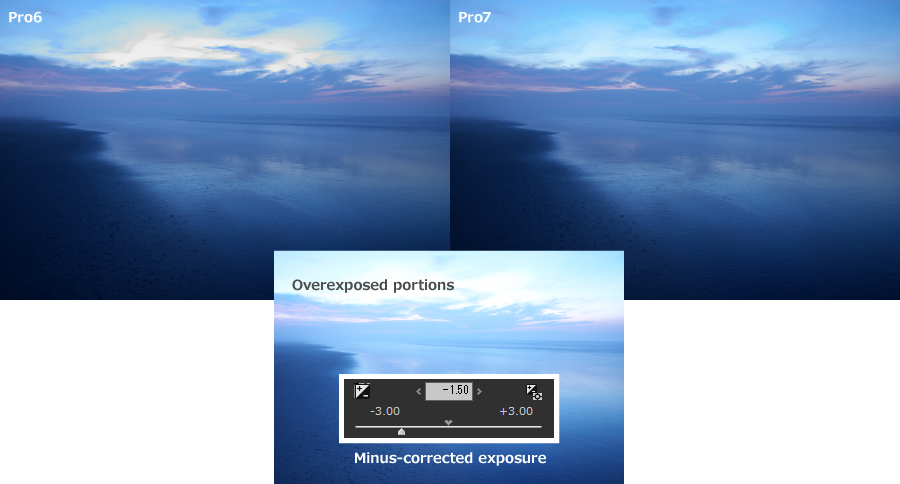
In the initial status RAW data also have the information of color and tone even in the overexposure area. It will be restored by exposing the dark correction during RAW development (desensitization). In SILKYPIX Developer Studio Pro7, when you correct to underexposure, you can increase the amount that can be restored overexposure and expand the range that can be desensitized.
New type sharpness (Natural sharp)
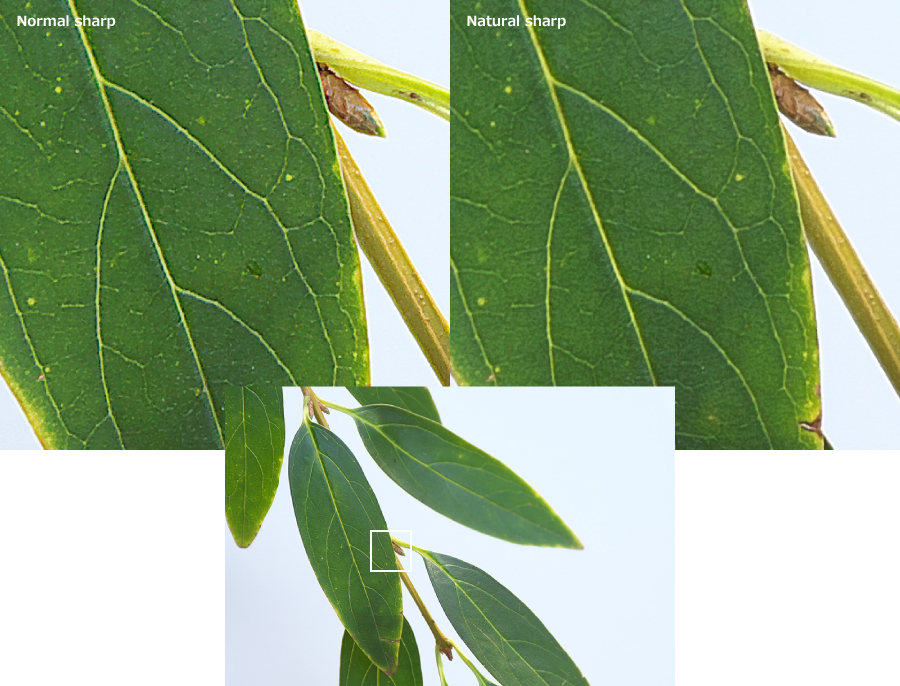
New type sharpness (Natural sharp) which improve the descriptive power of details significantly is obtained.
It improves the resolution with reducing the side effects of sharpness “Pseudo outline” which borders the outline.
And, newly “Bokeh preservation” has been obtained.
It reduces the side effects that blur becomes unnatural in out-of-focus parts when the sharpness is strengthened or the noise is emphasized.
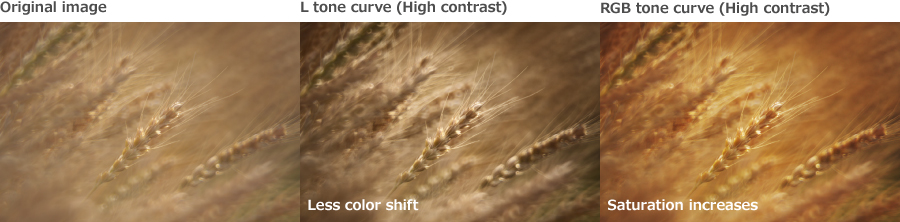
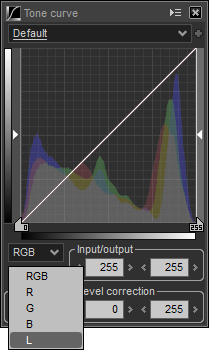
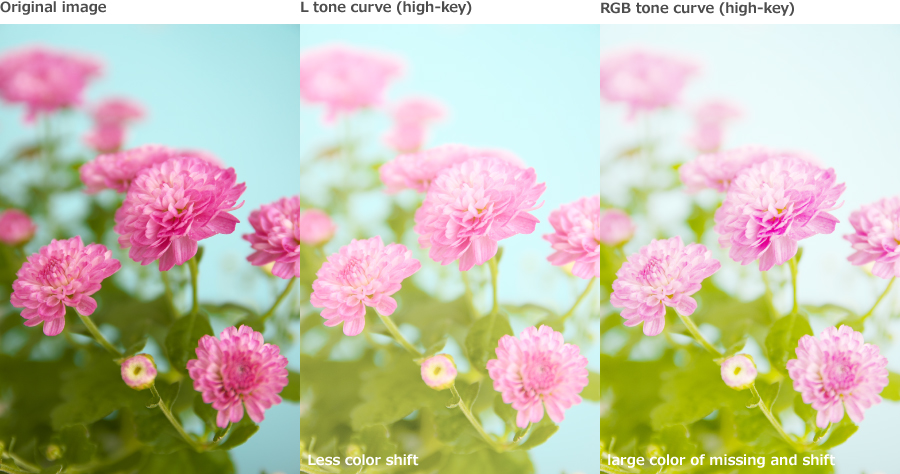
L tone curve “Luminance tone curve”
Example of high-key
Example of high contrast