This topics introduce you to the feature “Partial correction tool” in SILKYPIX Developer Studio Pro9!
In SILKYPIX Developer Studio Pro9, the Partial correction tool, a feature that corrects a specified portion of a image, is useful function. We introduce “Select color to be corrected” and “Invert the filter area”. In addition, we introduce how to create a image (called a part color) in which only one color is left in a monochrome image by using “Select corrected color range” or “Invert corrected area”.
Select color to be corrected
Selecting the correction gamut means that only the specified hue in the correction area is corrected.
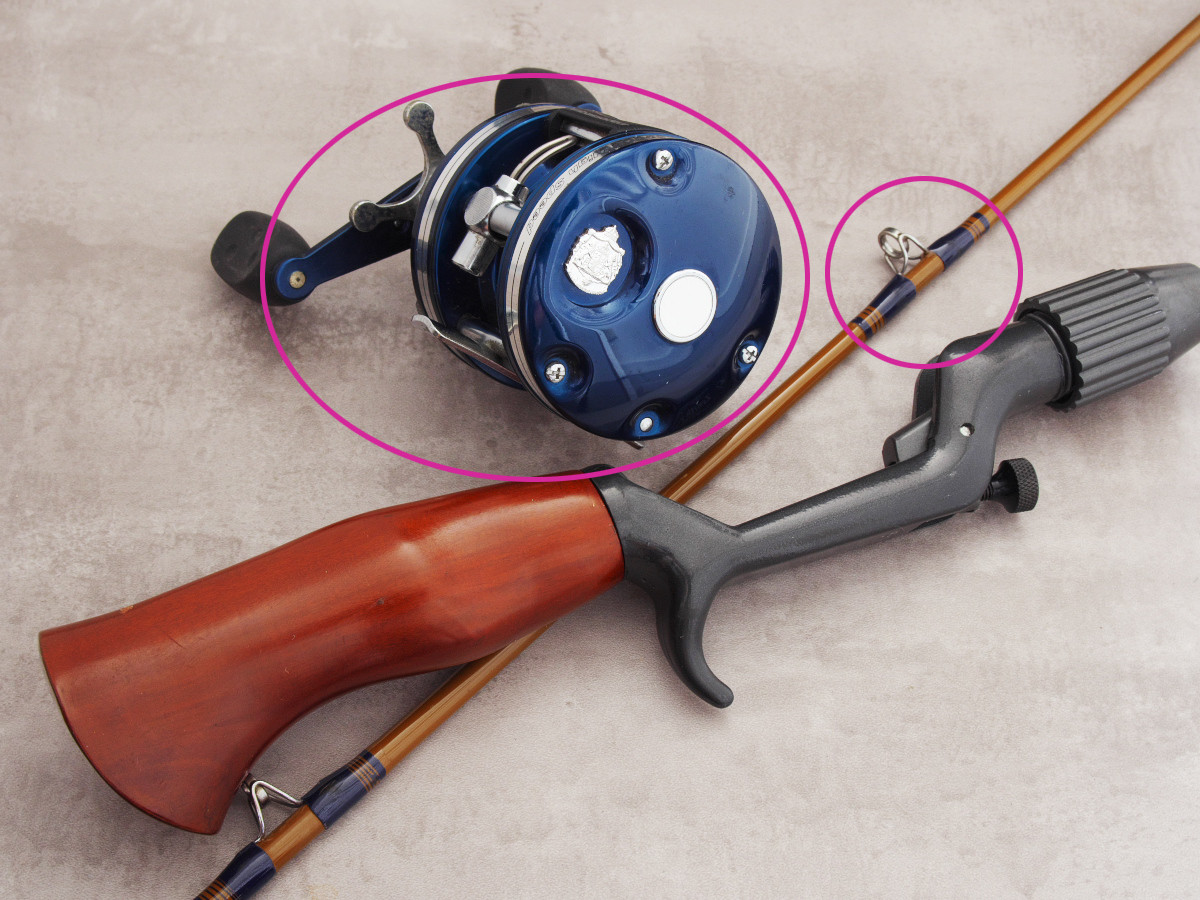
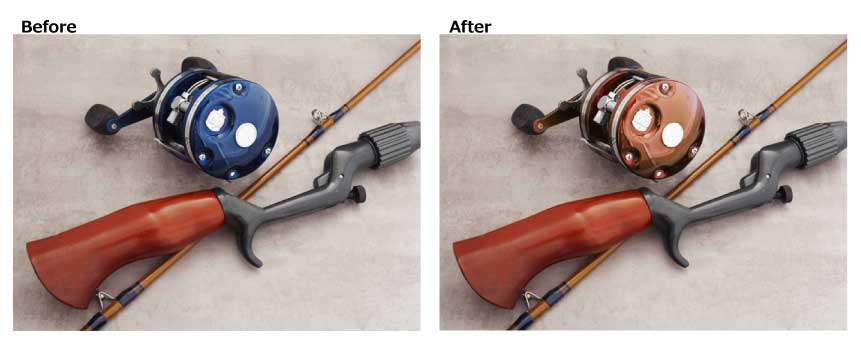
I want to correct only the blue of the reel. However, I don’t want to correct the blue of the rod. This can be useful if you want to correct only a specified part of a image’s colors, for example.
Opening the Partial correction tool
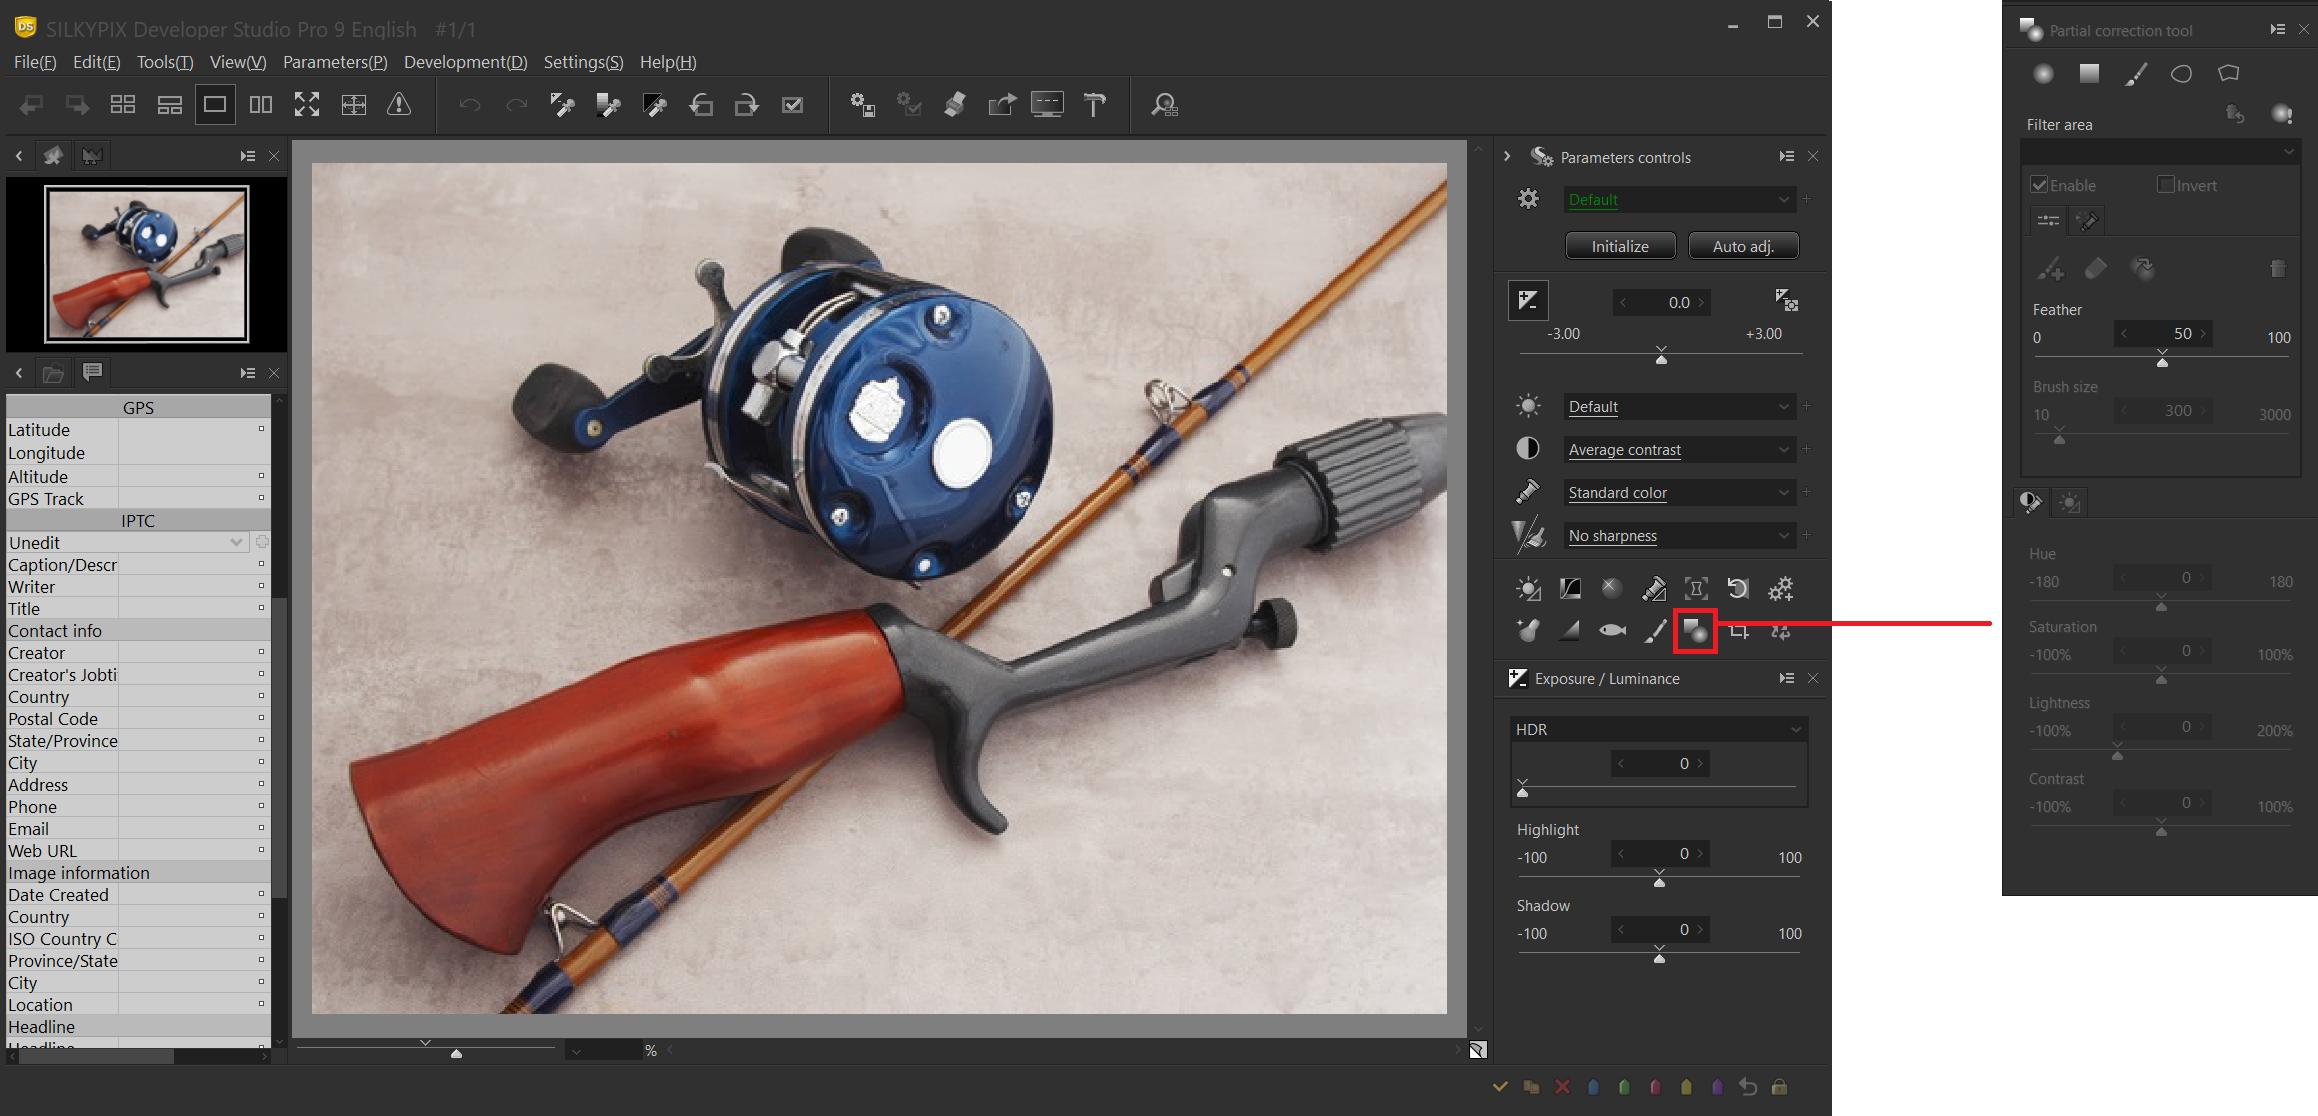
The Partial correction tool is located inside a sub-control icon.
Specify the filter area
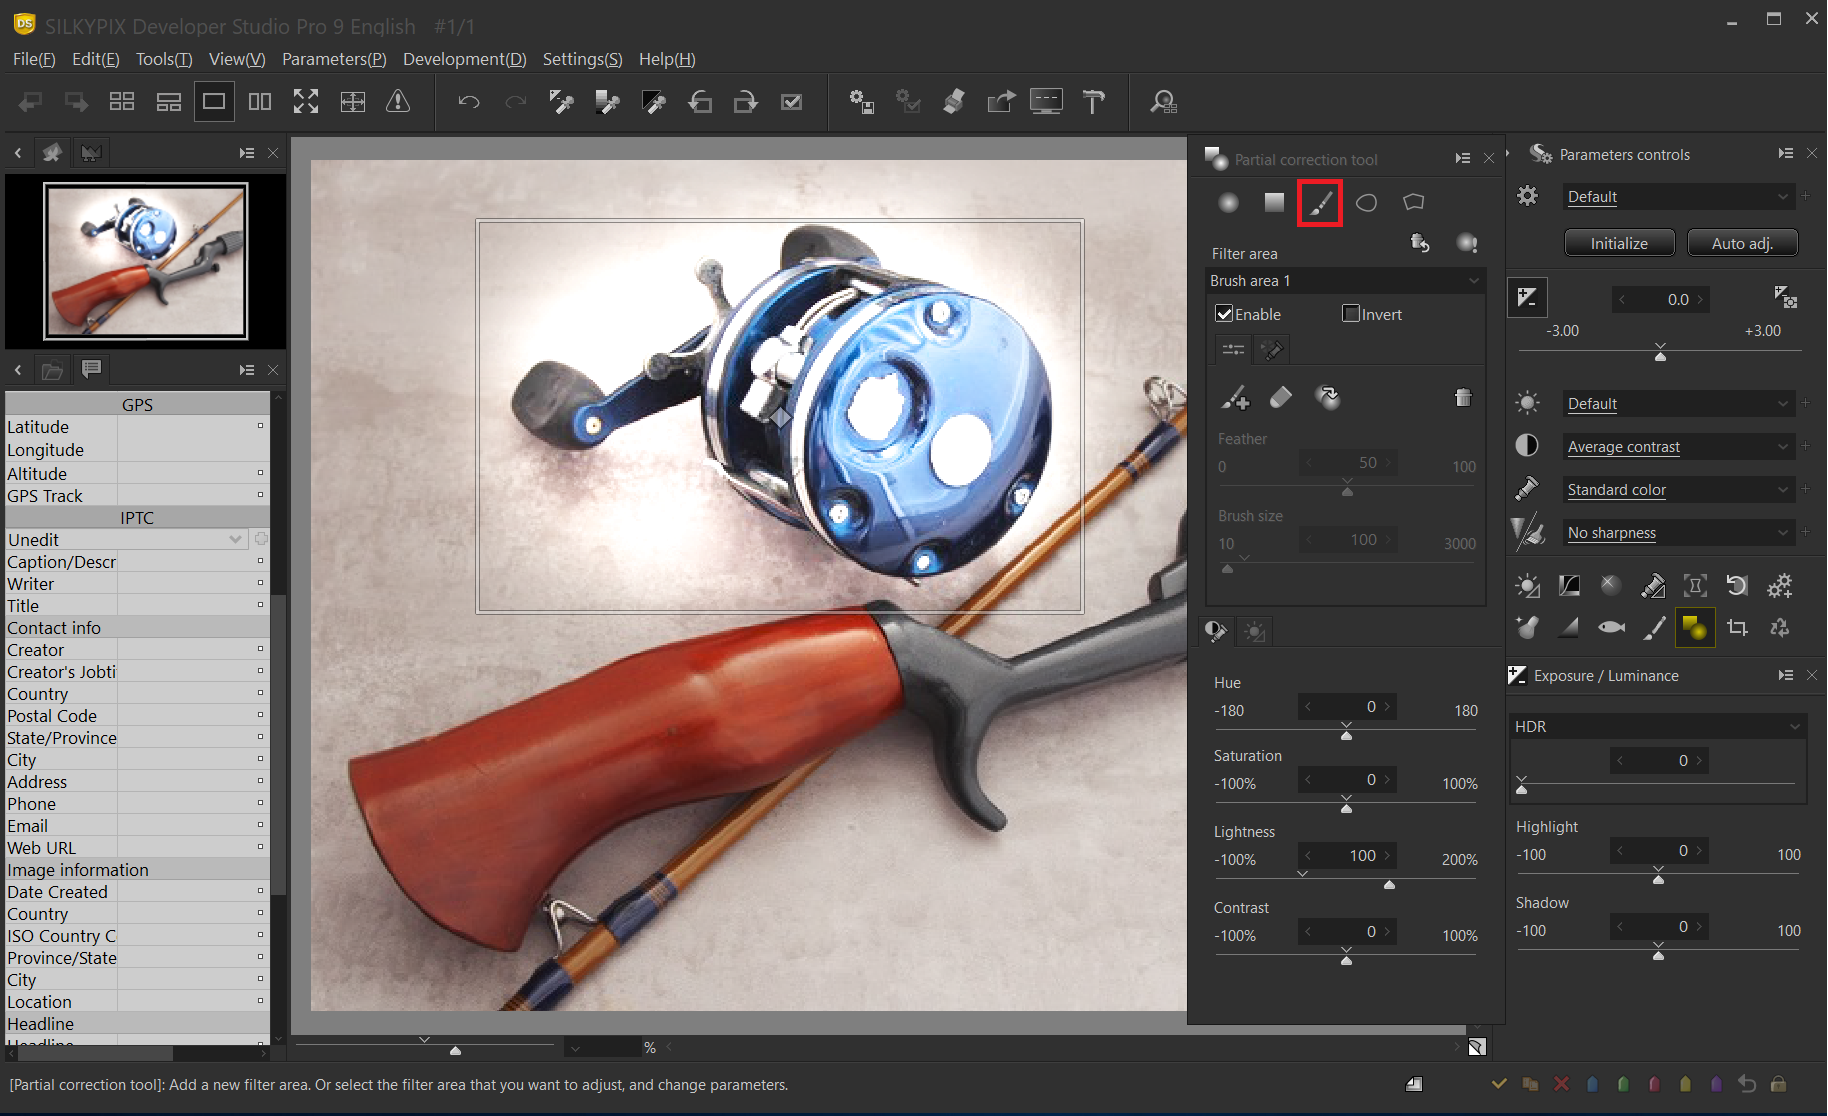
In this example, a brush is used to specify the correction area. Specify the area you want to correct first with the brush. In this case, it is important to specify the position as large as possible. The brighter area is the current correction target area.
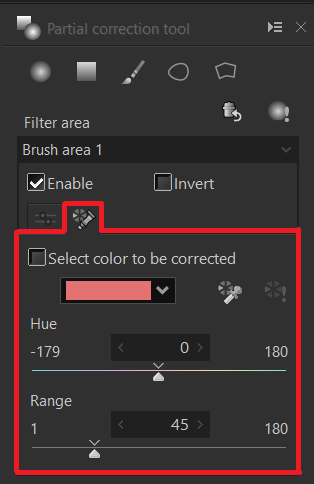
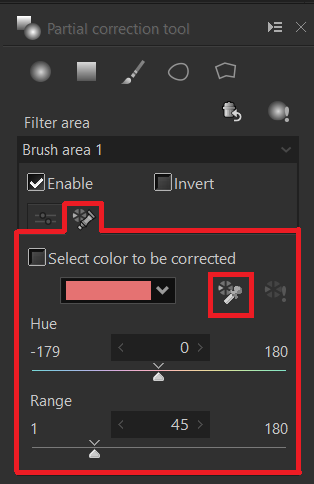
Select color to be corrected is displayed by switching the tabs in the filter area.
Choosing a correction hue
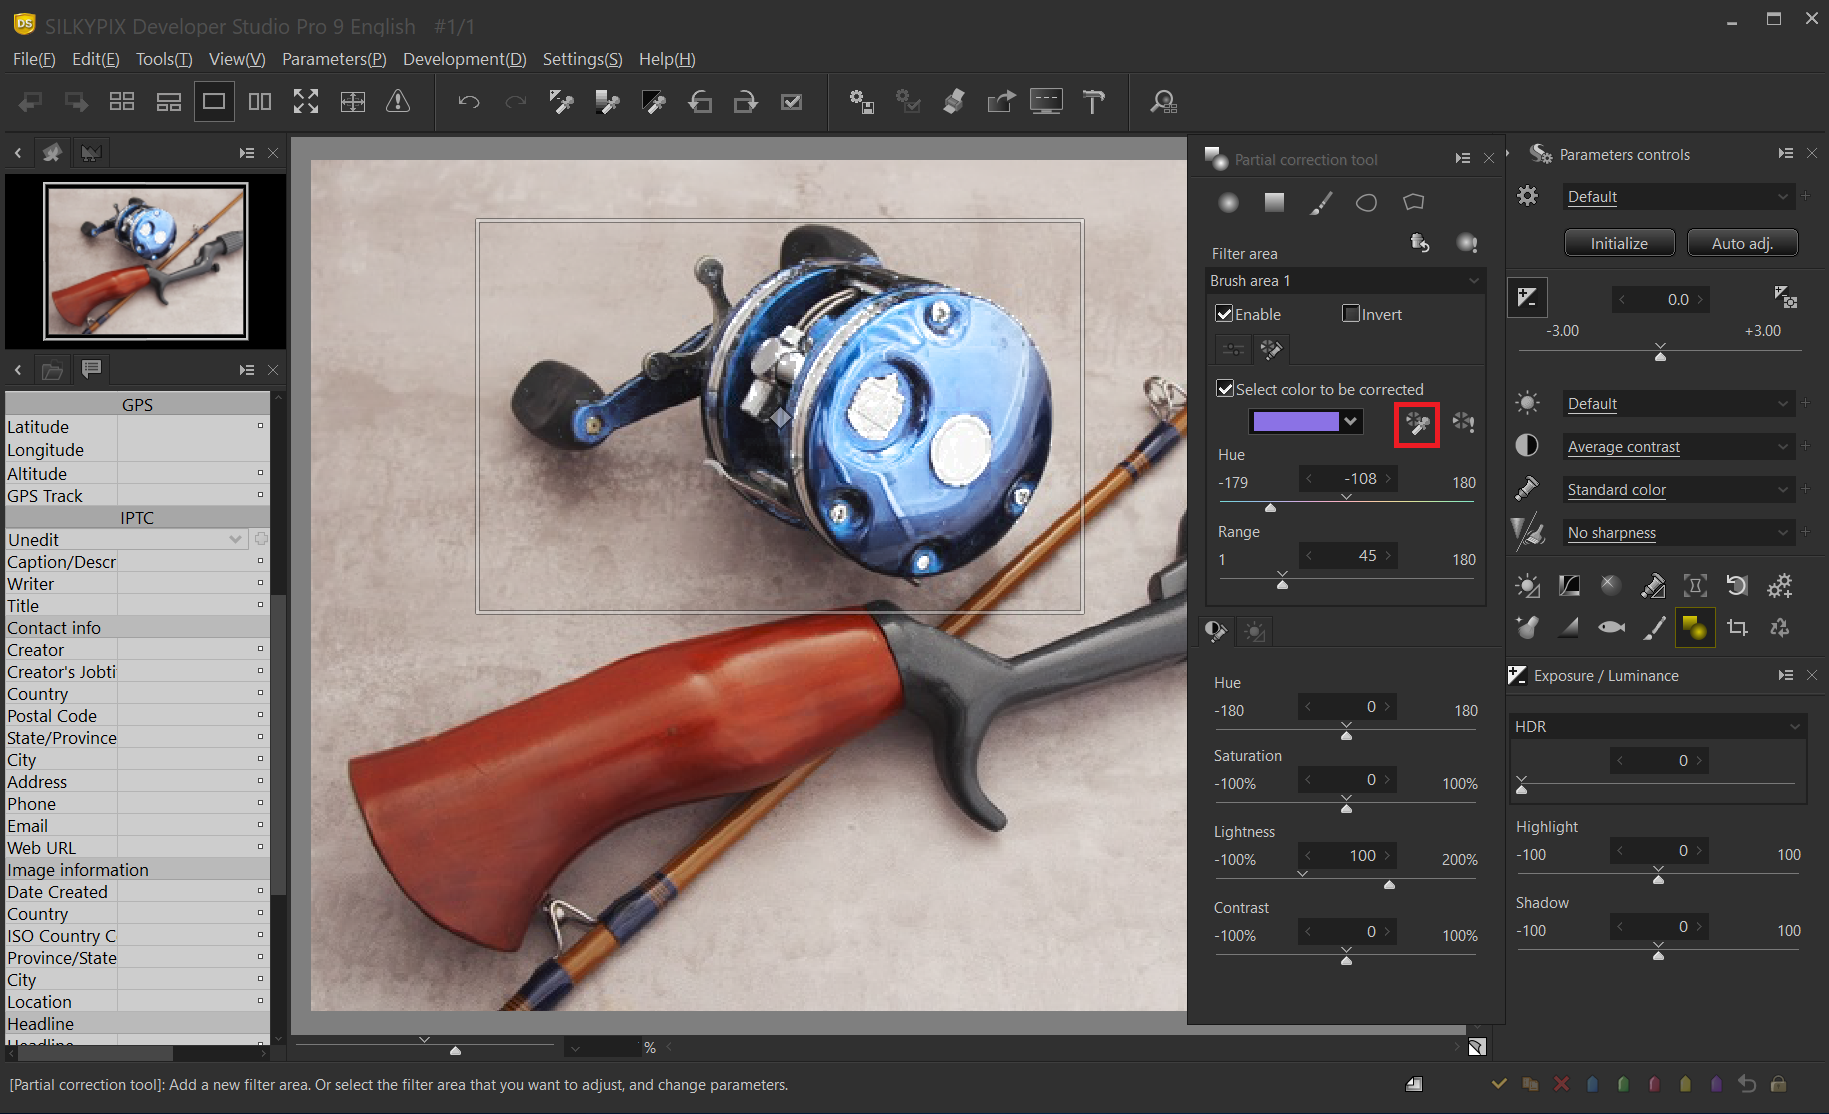
When you click the Hue Selection tool, the mouse cursor becomes an eyedropper on the preview screen. If you left-click on the color you want to correct, the correction effect is applied only to the color specified in the area specification.
Adjusting the correction hue

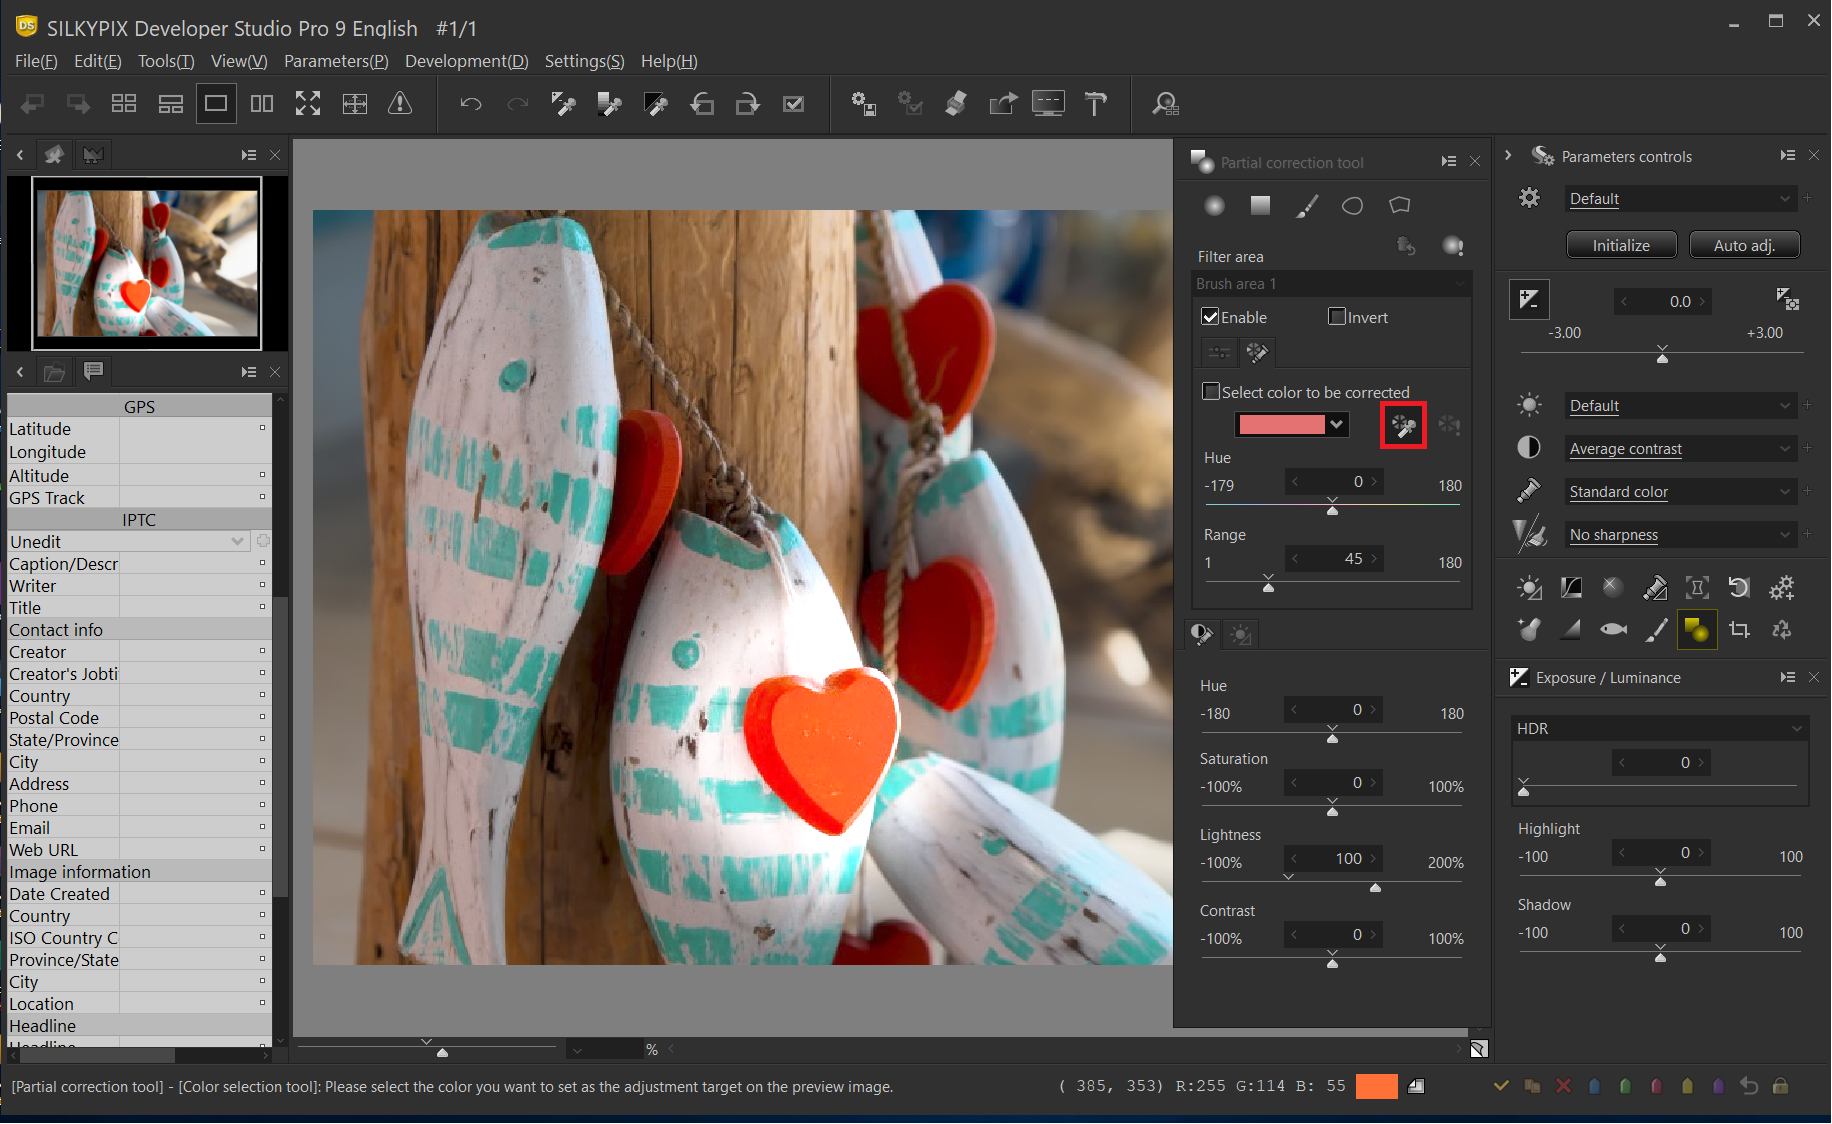
Press the preview of selected color button to see which correction is applied to which part. The correction effect is not applied to the area displayed in black and white, and only the area displayed in color is corrected. If the correction range is uneven in this state, adjust it by moving the “Hue” and “Range” sliders.
Hue slider
Adjusts the tint of the color to be corrected.
Range
Adjusts the range of colors considered to be corrected hue.
Press the preview of selected color button again to cancel the preview.
Adjusting the compensation area
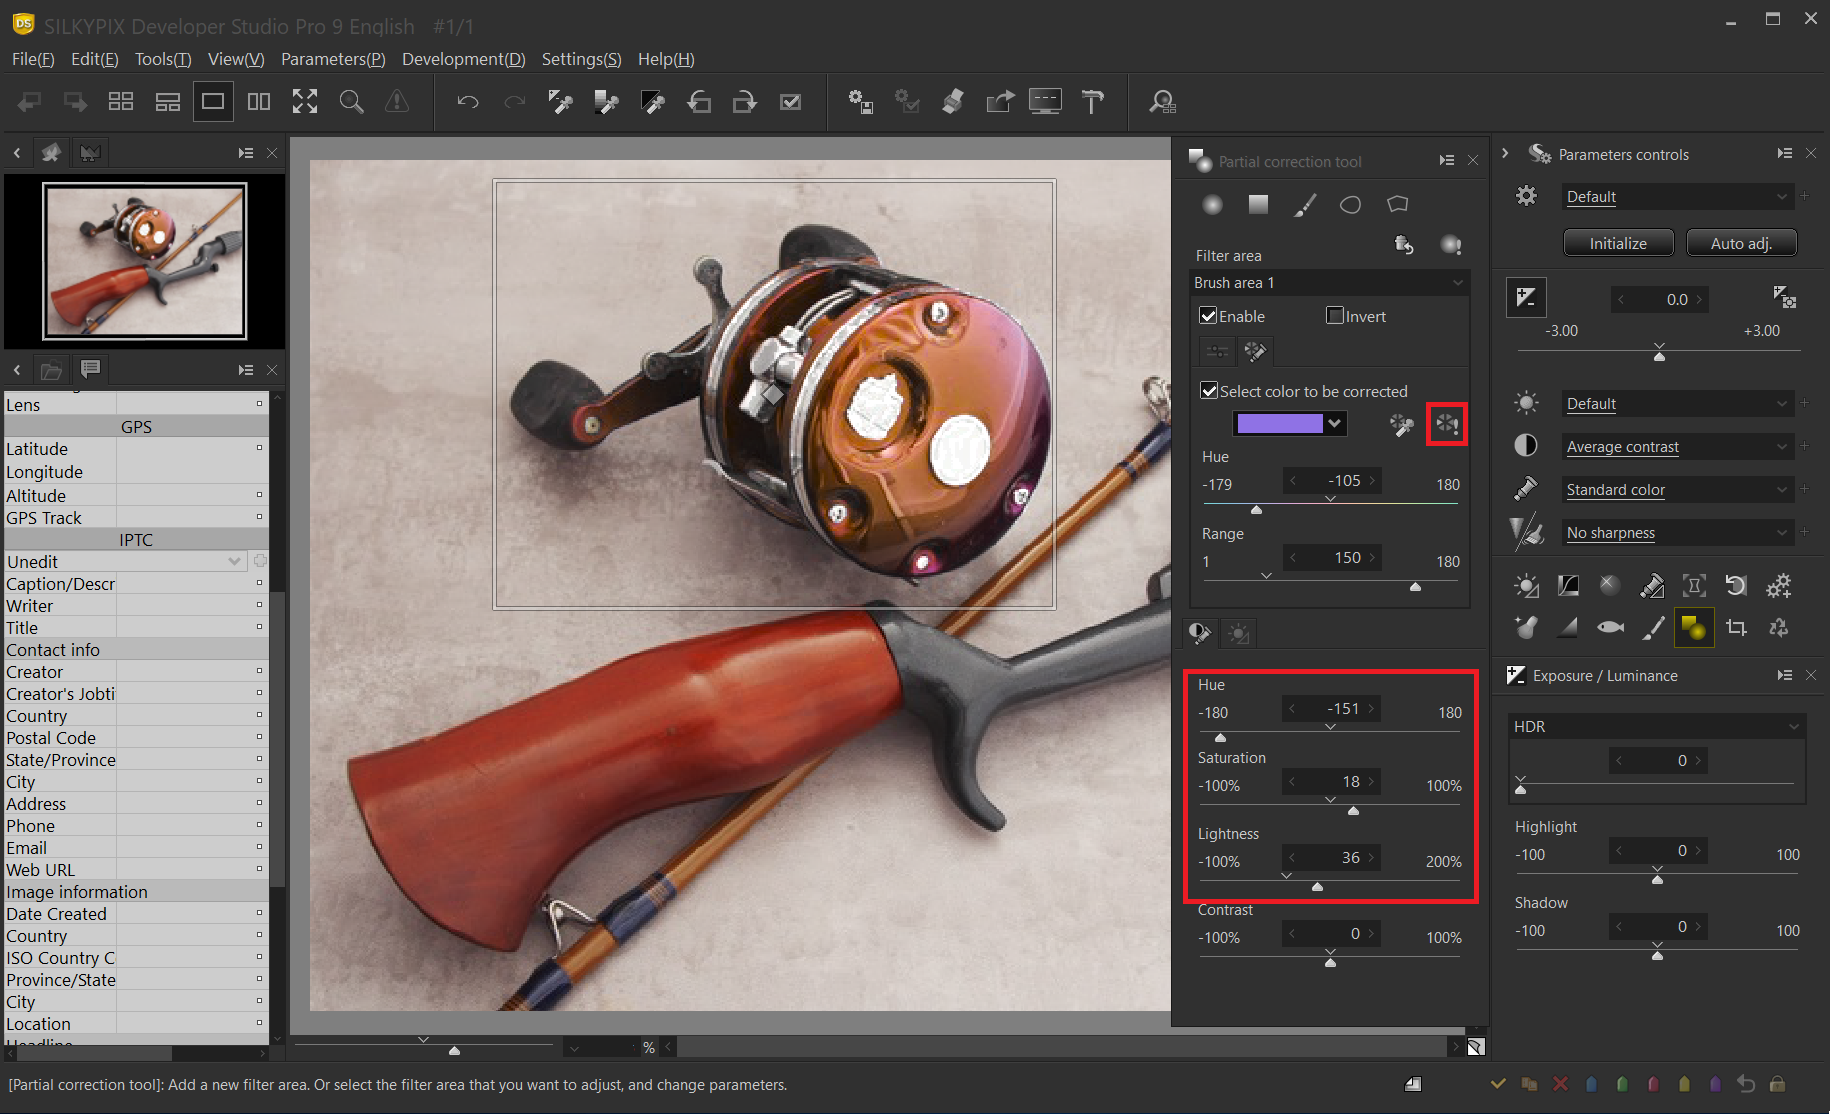
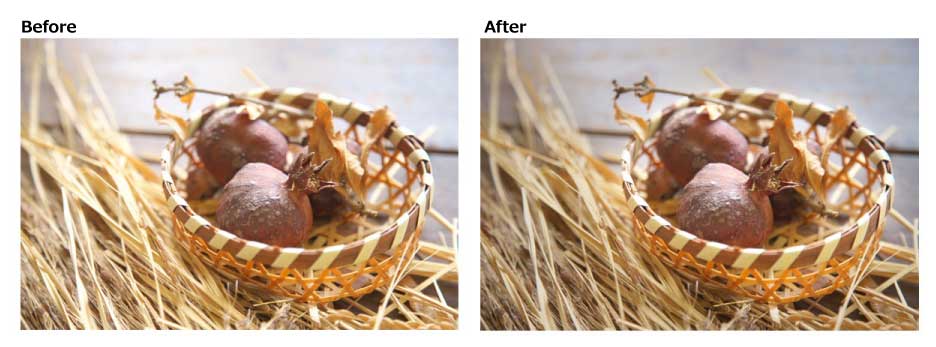
When you’ve finished adjusting the hue, make corrections to that area. To make the effect easier to understand, we have adjusted the hue, saturation, and lightness to greatly change the tint of the selected part. You can see that even in the same blue part, the blue part of the rod that is not specified in the correction is not changed.
Invert corrected area
Invert corrected area enables you to make corrections to areas other than the specified area. This can be set in all area designations of “Circular/Gradual correction filter, Brush, Curve/Polygonal area selection”.
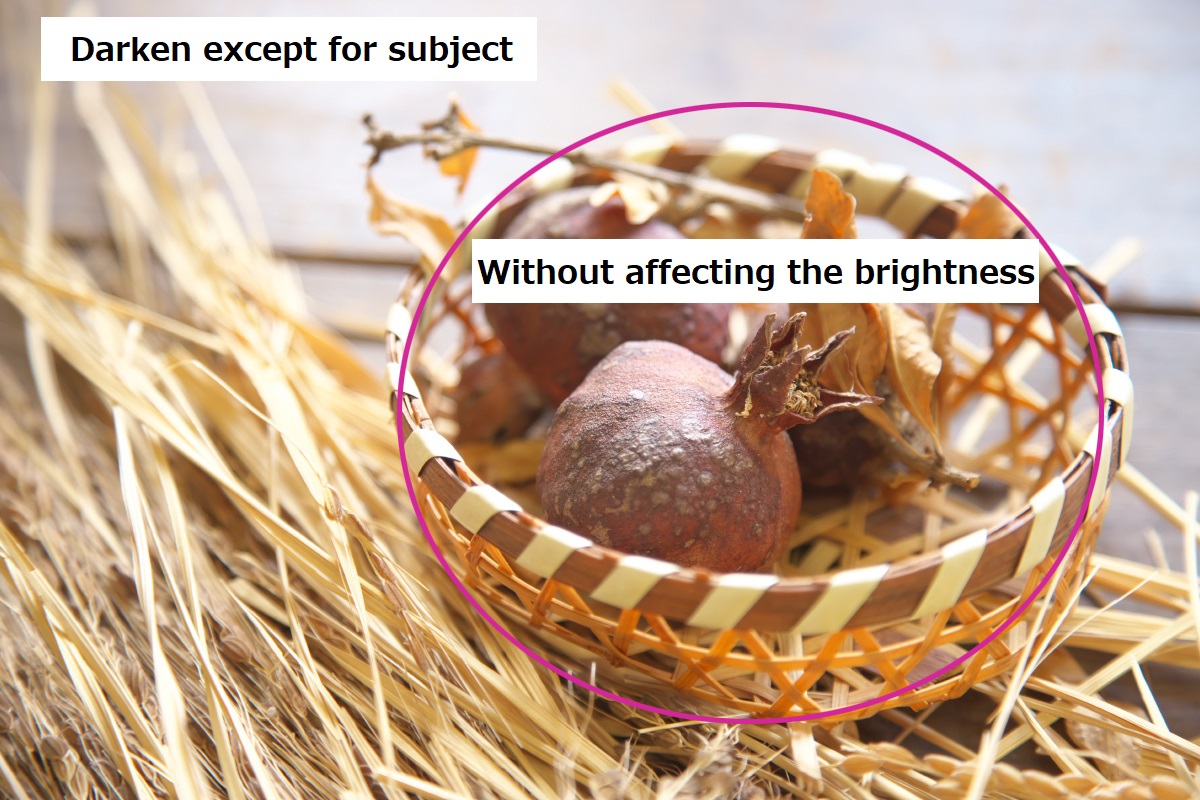
In this example, we want to emphasize the light hitting the basket or the subject within it by darkening the rest a bit and emphasizing the lightness and darkness.
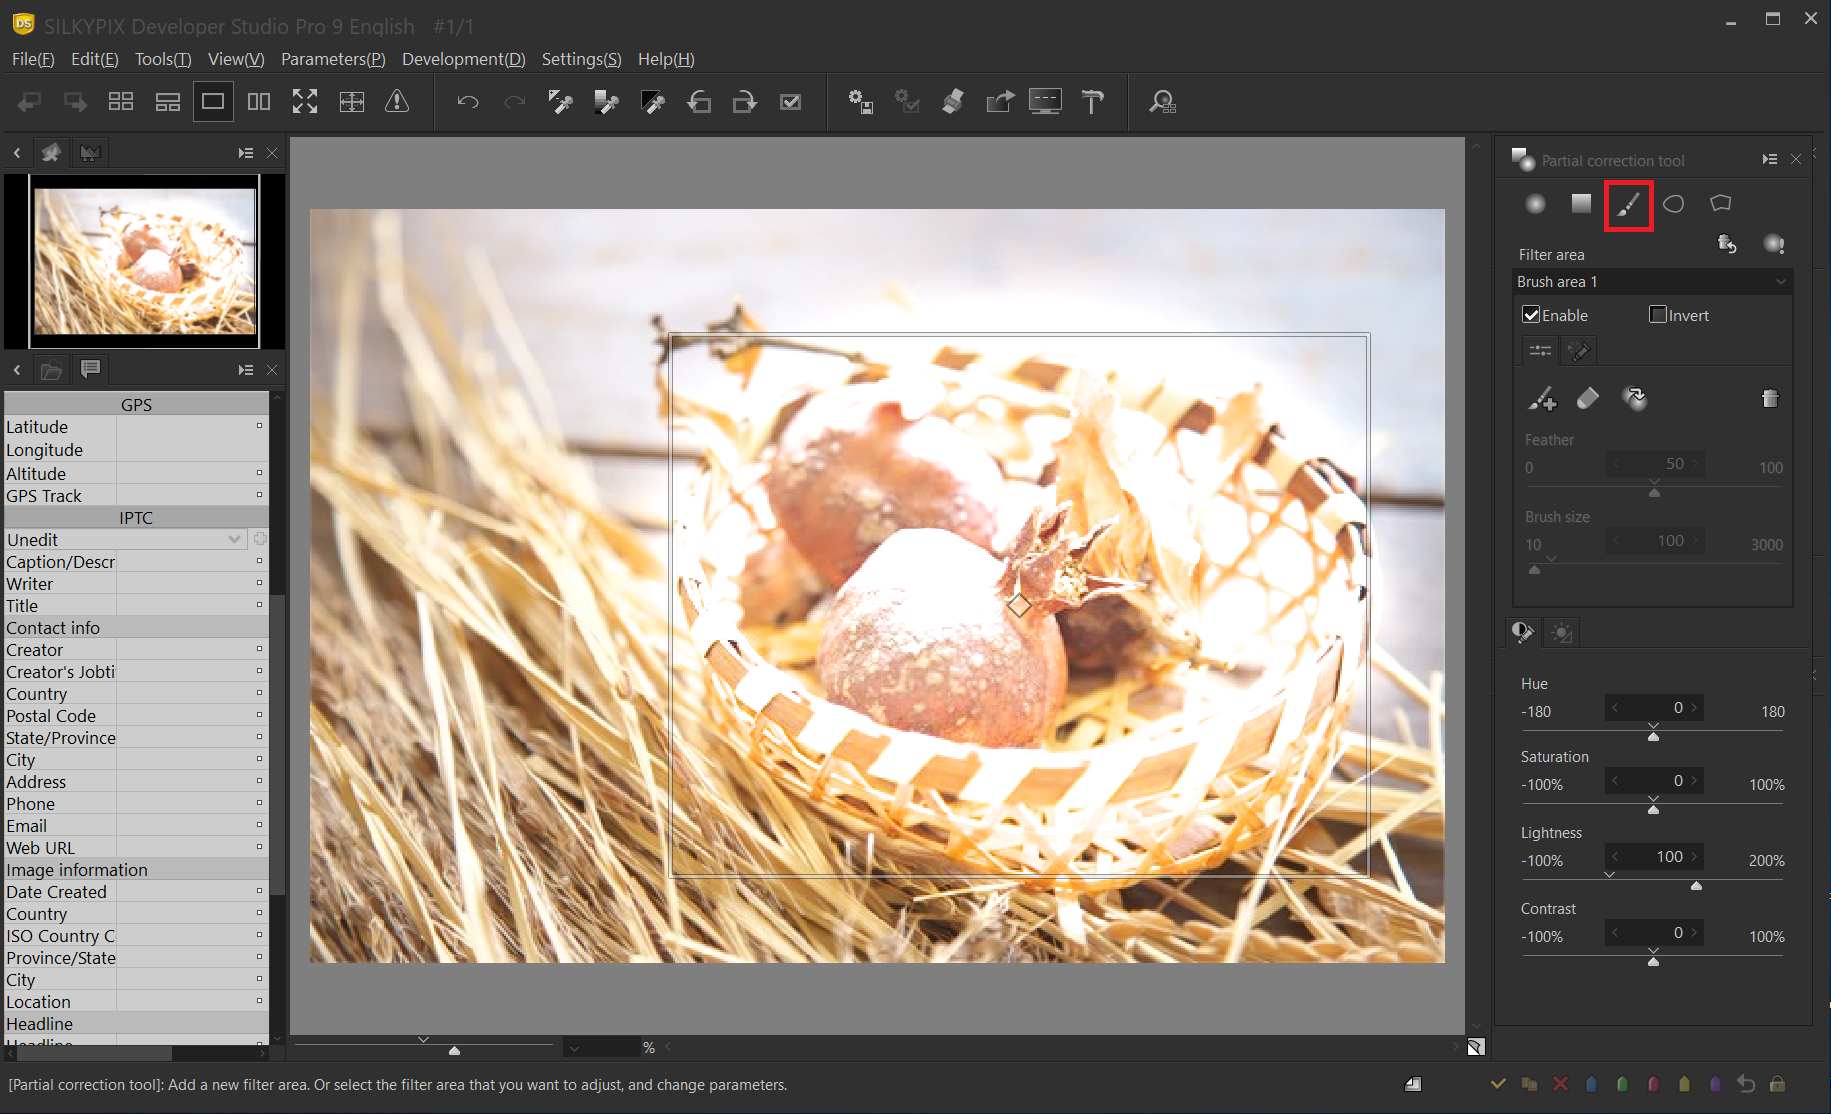
In this example, “Brush” is used to specify the correction area. First, specify the area you do not want to correct with the brush. The highlighted area is the area to be corrected.
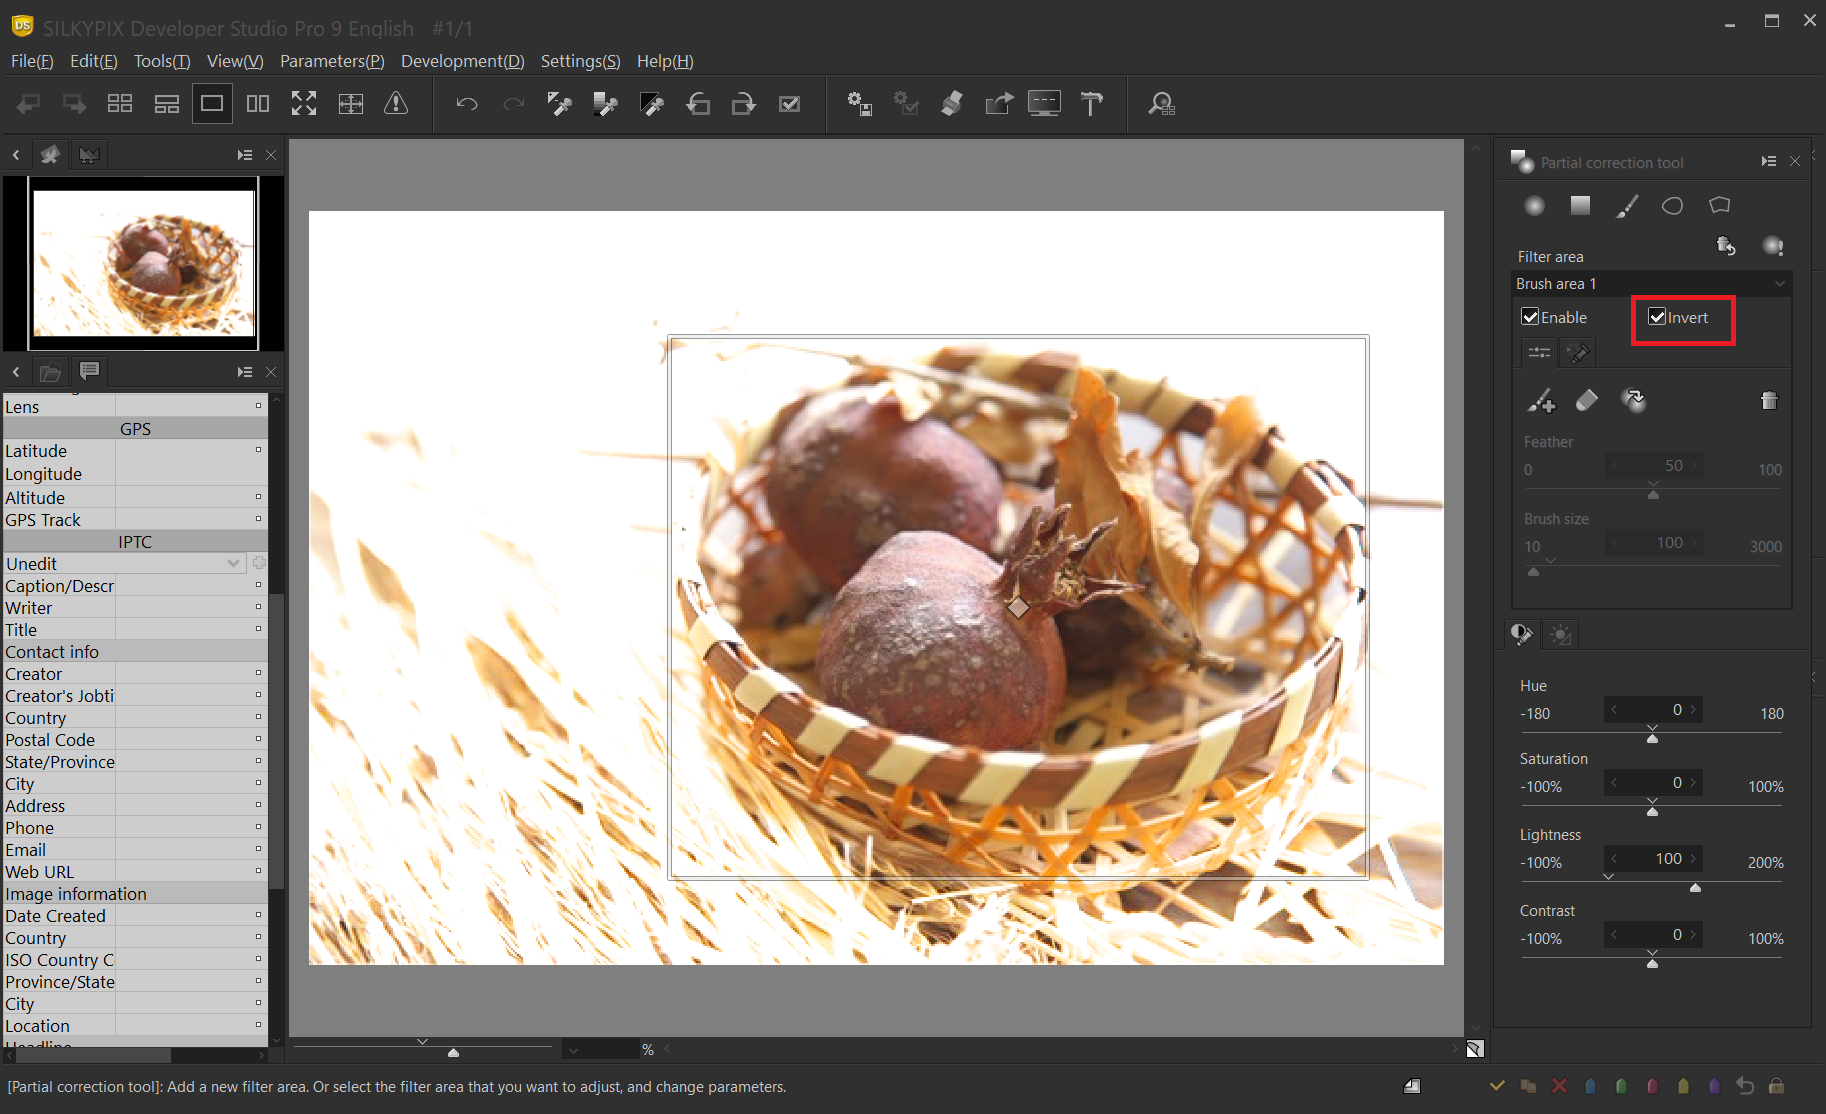
Next, when “Invert” is checked, the correction area is inverted, and the part other than the specified area becomes the correction target.

Adjust the correction parameters of the Partial correction tool.
Using Select color to be corrected

A image in which only one color is left in a monochrome image is called a part color. A part color is often used in creations of subject, especially for representing impressions in color, and in advertising image. This section describes how to create a part color using the Part correction tool.
Determine what color you want to keep
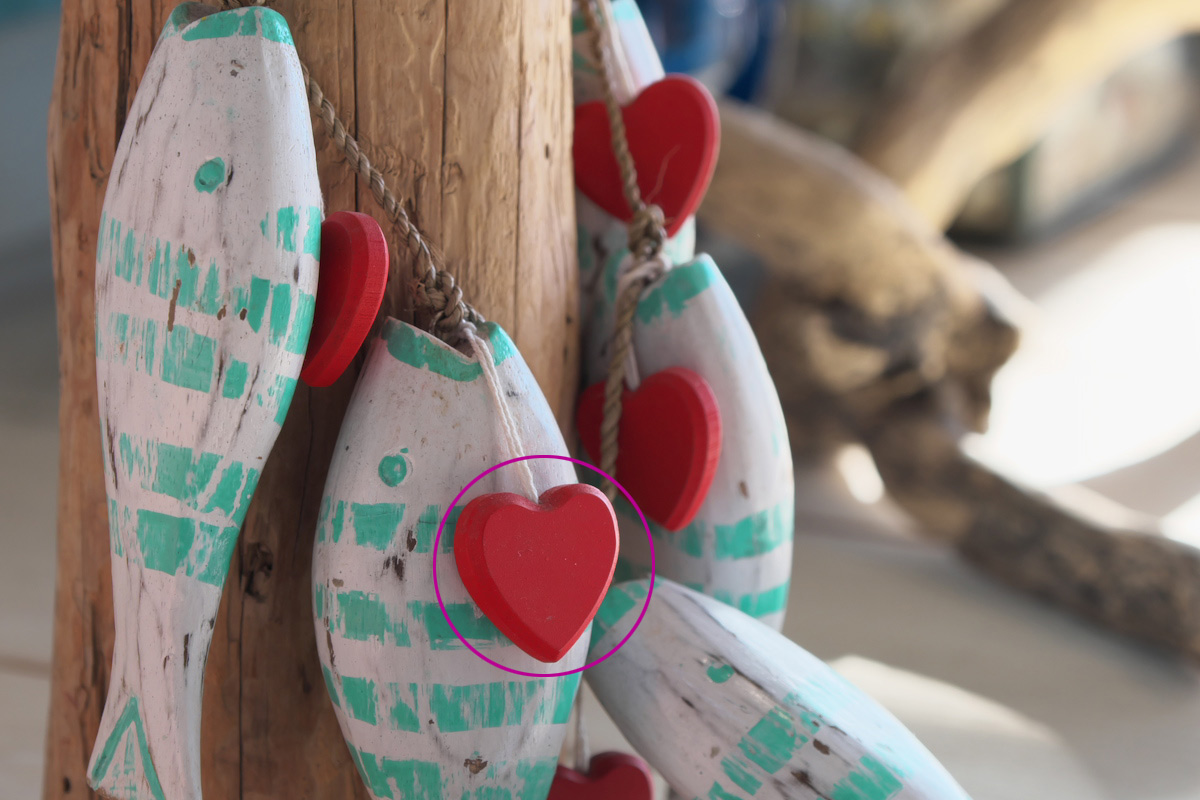
Determine what color you want to keep in your image. This example leaves the color of only the smallest part of the heart in front of the circle. Specify this area with the Part correction tool.
Specify the filter area

In the figure above, the highlighted area is the filter area. In this case, it is important to specify the position as large as possible. The other is not to specify the same other colors (red here).
Even when using a Circular/Gradual correction filter or Curve/Polygonal area selection, the point is to specify an area slightly larger than the subject whose color you want to keep.
Select color to be corrected
Switch to the Select color to be corrected tab. The Select color to be corrected range applies the effect only to the specified color (hue) in the filter area. Click “the Select color to be corrected” to display the mouse cursor as an eyedropper on the preview screen.
In the correction area, click on the color you want to keep. As a result, only the hue specified in the correction area is extracted and becomes the correction area. In this example, only the red of the foreground heart is affected.
Press the preview of selected color button to see the selected color. The part displayed in color is the select color to be corrected, and correction can be performed only for that part. If you confirm that it is OK, click the preview of selected color button again to turn it OFF.
The preview of selected color is a monochrome view of the color other than the one you’ve set, and is not an adjustment parameter.
The Range slider lets you can adjust the range of the color when the correction color gamut becomes uneven. If you set a small value for correction Color Gamut Threshold, only colors closer to the specified color become the corrected color gamut. Higher values expand the correction area.
Invert the filter area
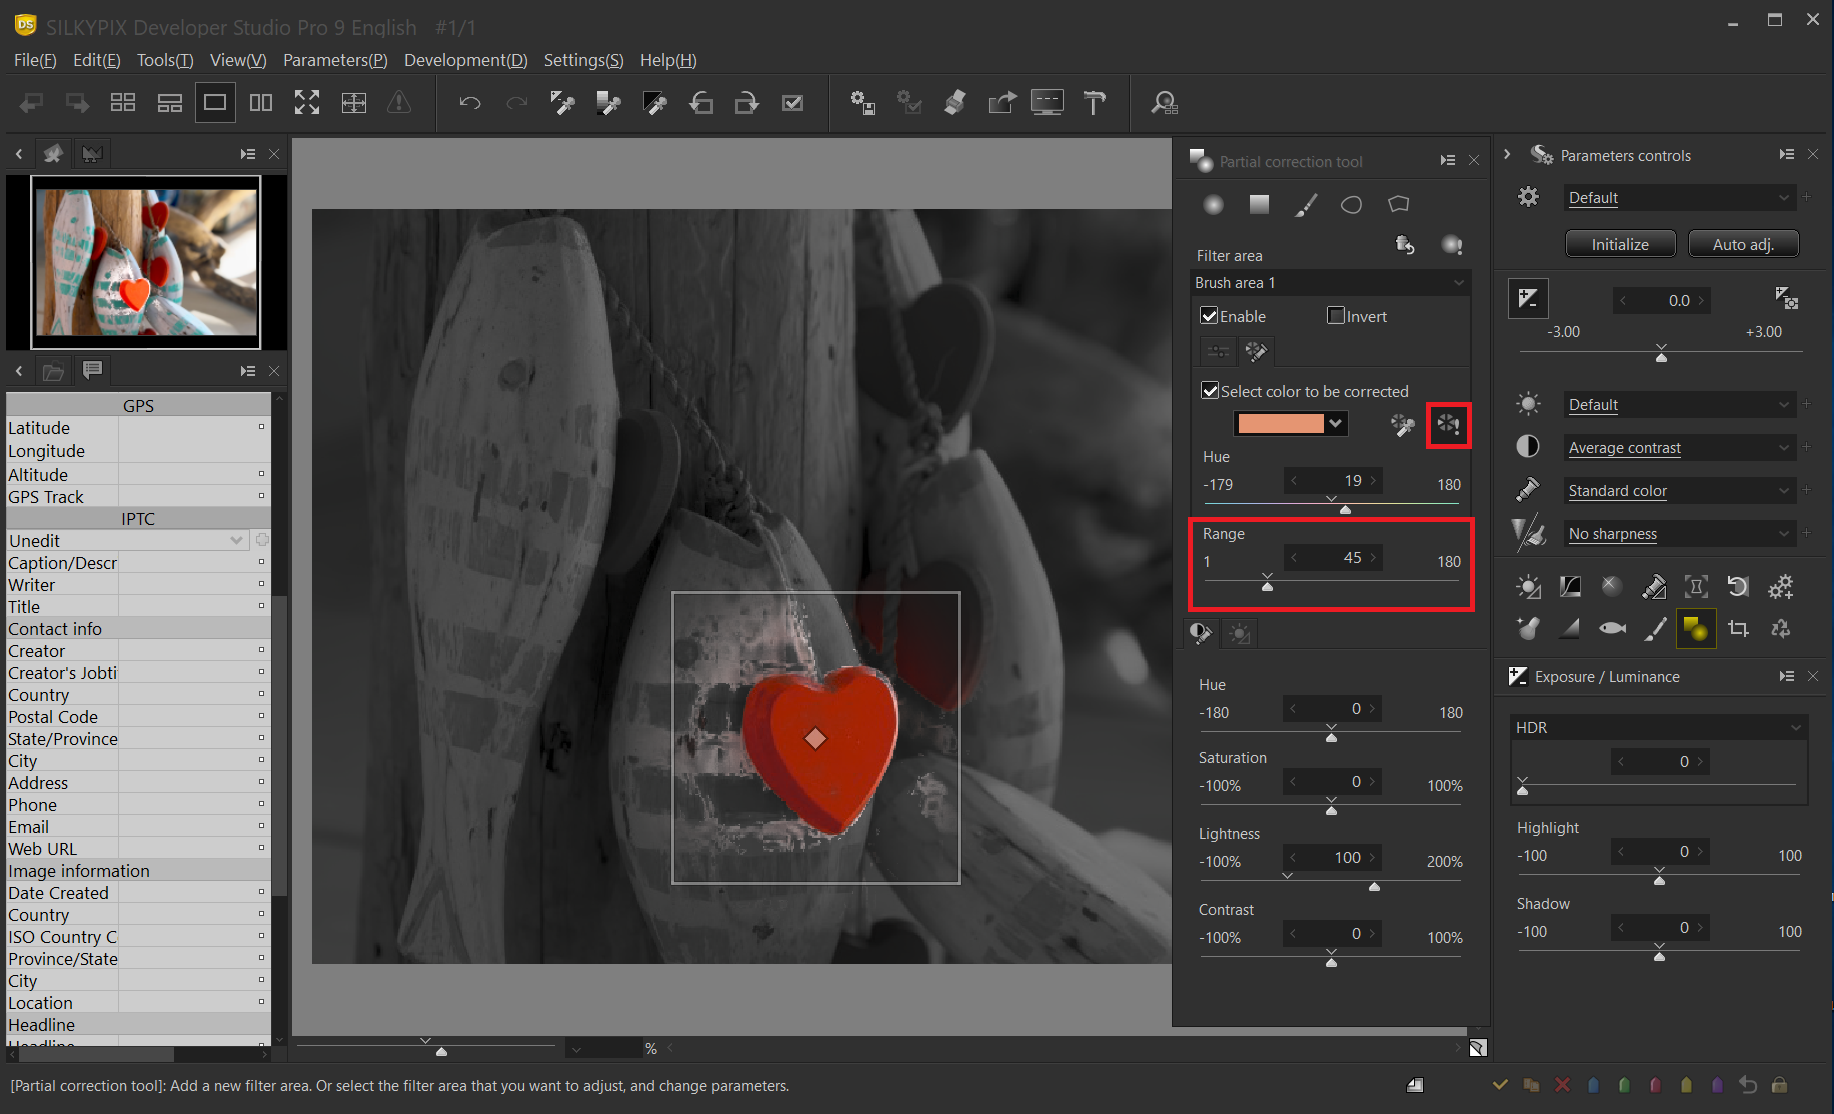
You can invert the filter area by checking Invert. In this example, the portion other than the heart is the corrected area.
The correction area is set to “Lightness 100” to make it easier to understand. You can see that the filter area is inverted because the area other than the heart becomes brighter.
Setting parameters
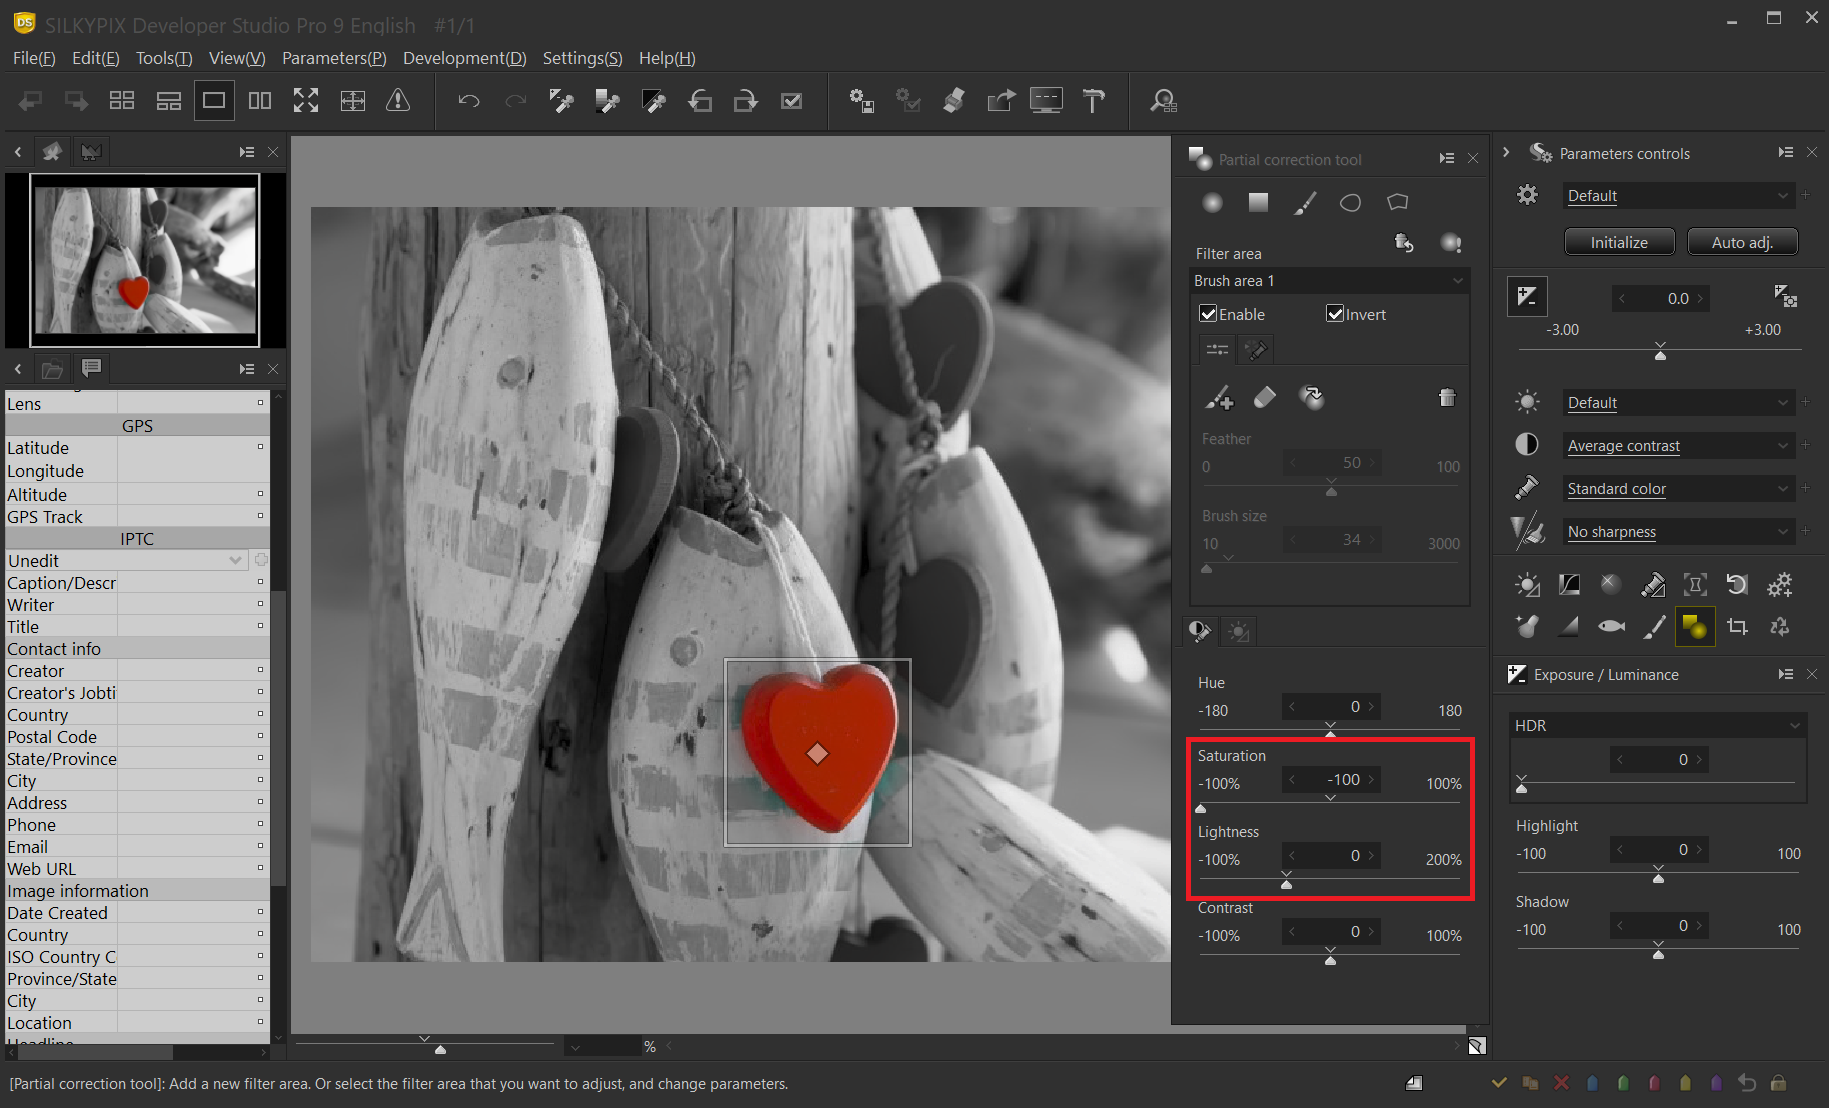
From the Color contrast tab, set Brightness to 0, which was set to 100, to emphasize the filter area, and restore the original brightness.
When the saturation is set to “0”, the correction area other than the heart becomes monochrome by invert.
This way, you can easily create a part color, so please try using the Partial correction tool even in your images!
Please try it out with your images!
You can download a free 30 days trial and try it out.
![]()