Highly-key tone photographs are photos that have been made brighter than the right exposure. It is one method of finishing for photographs such as flower photographs and portraits.
If SILKYPIX, you can finish a high-key photo without blown-out highlights.
This time, we’ll show you how to adjust the photo of flowers using Exposure, Clarity, Gamma, and Tone curves to create a photo with a very bright high key tone.
RAW Development software used: SILKYPIX Developer Studio Pro10
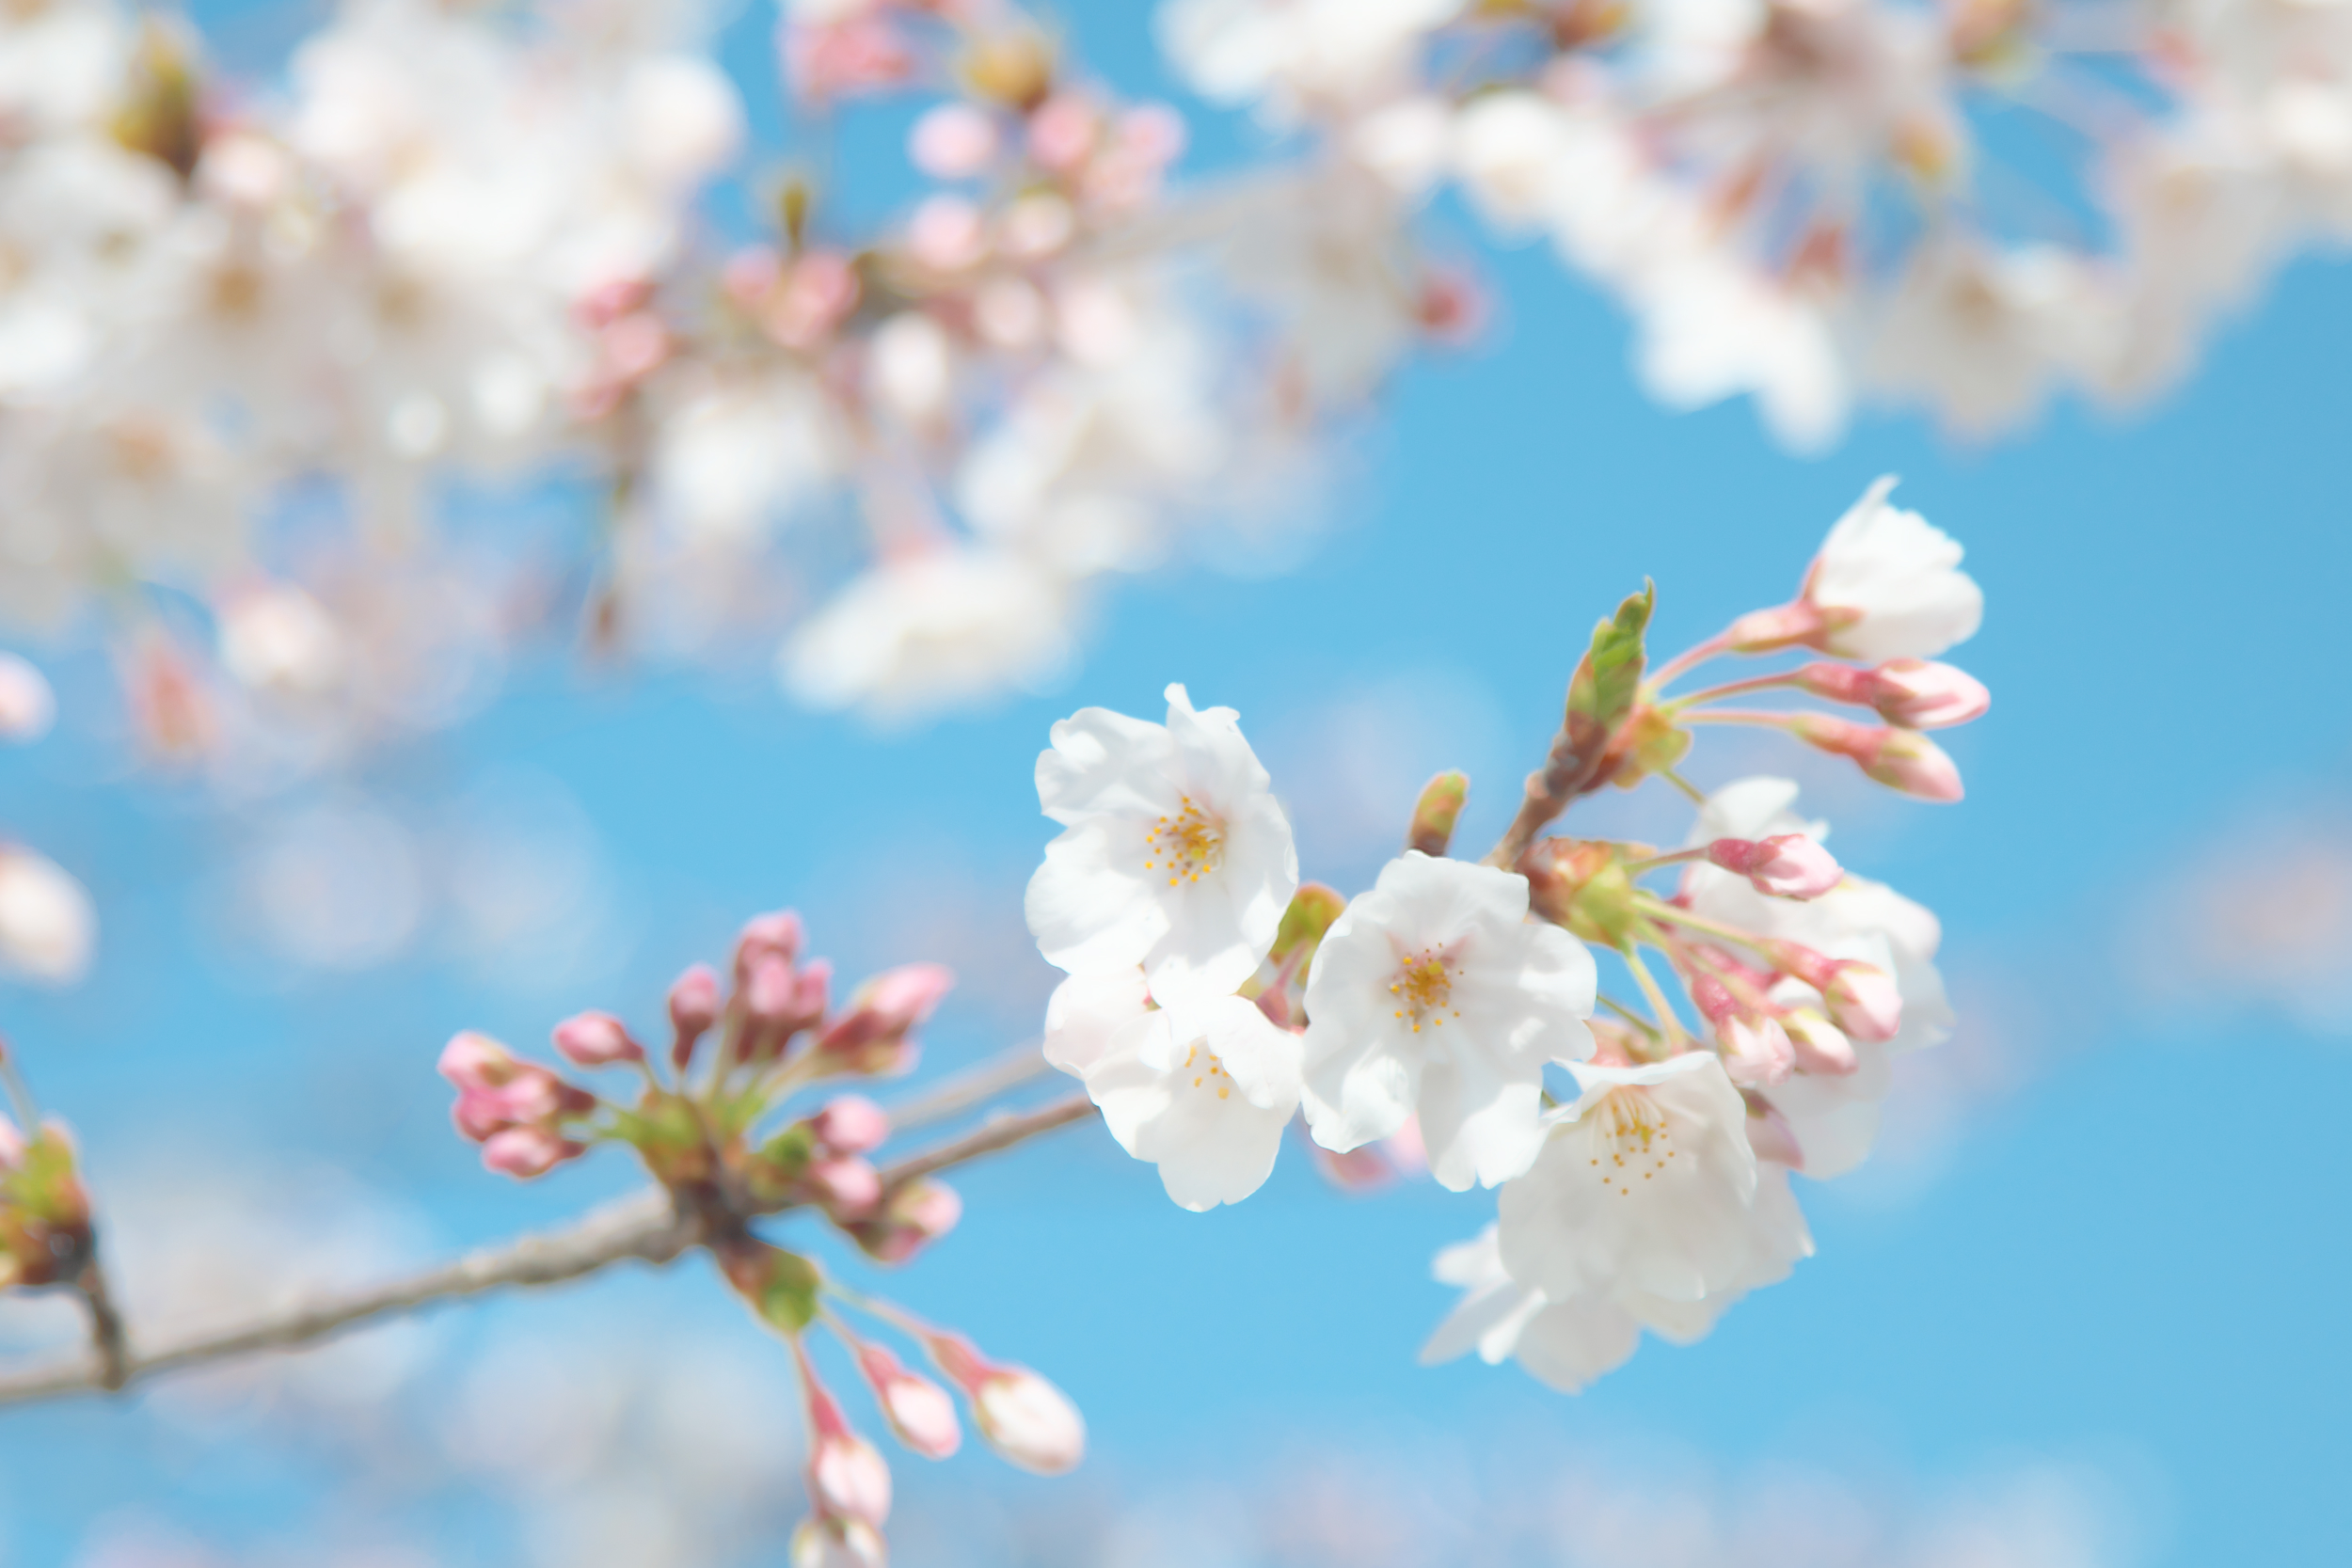
Adjust a cherry blossom photo with a high key tone
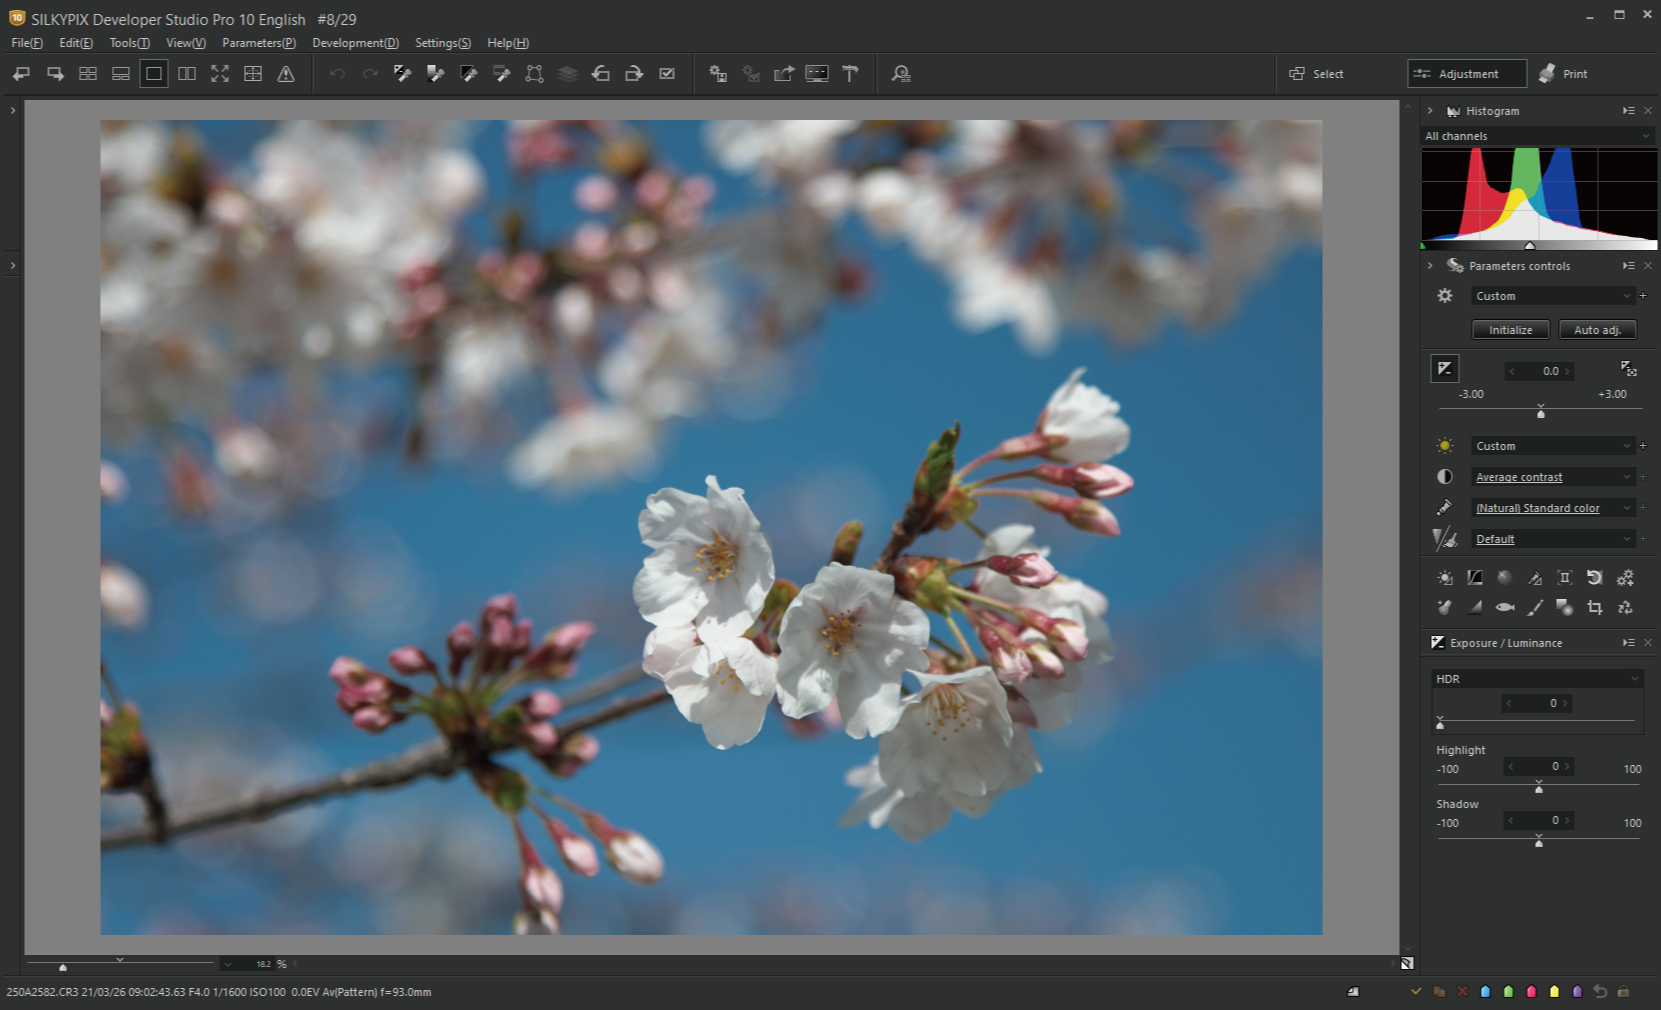
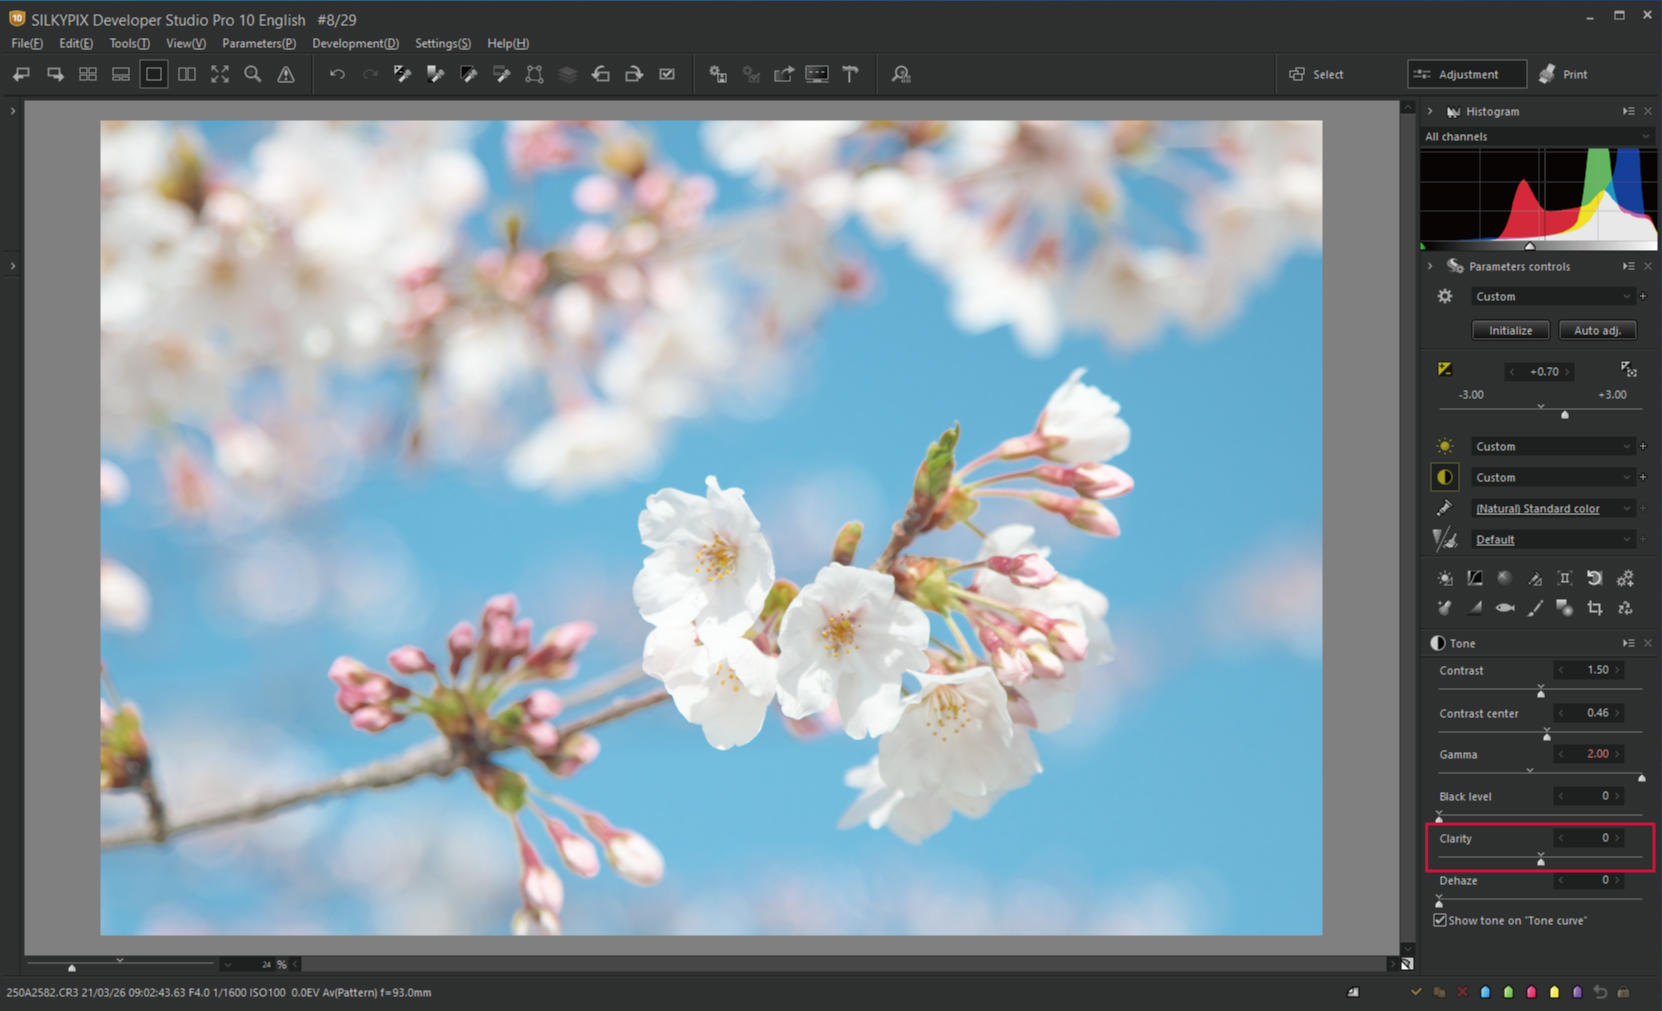
First, I would like to adjust this cherry blossom photo.
You can adjust the brightness of the photo by using the slider of “Exposure (Luminance).”
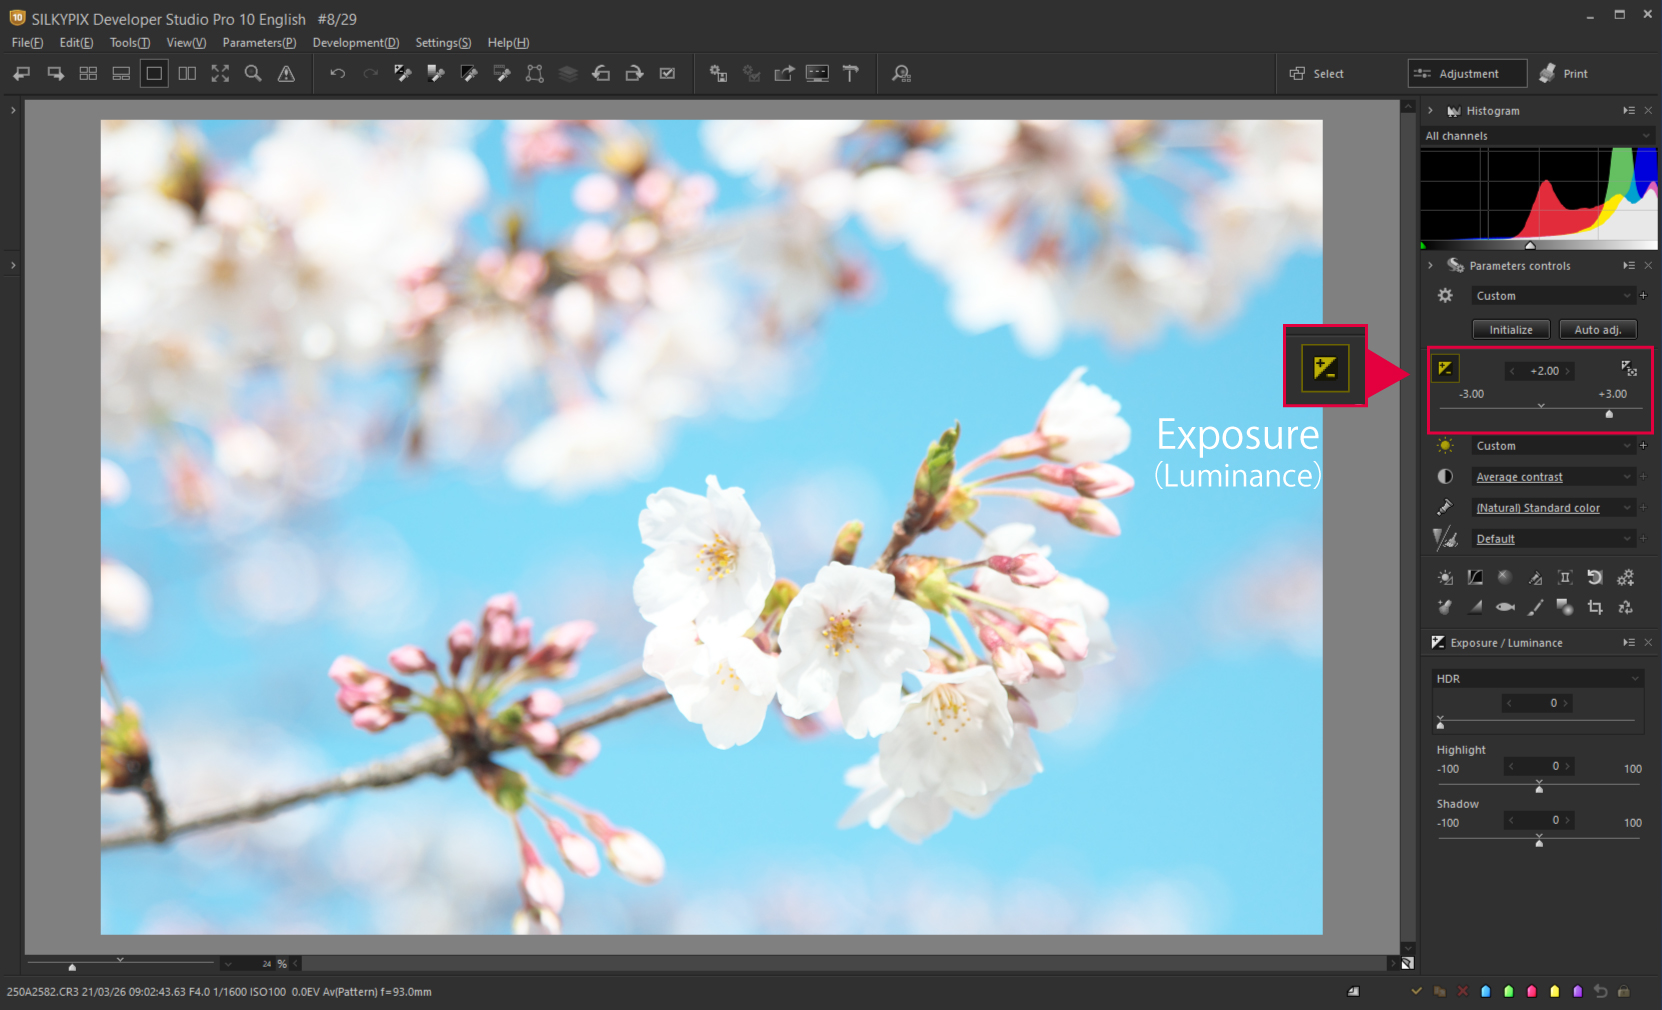
However, just like Exposure on the camera, you would adjust the brightness of the entire photo. As a result, when I correct the + 2.00EV, most of the cherry blossom petals overexposure. There are also some works that are intentionally overexposed, but I would like to finish this time with bright photography without blown-out highlights.
Here, I will use the “Gamma” of SILKYPIX.
The Gamma is located in the Tone tab when clicking the Tone icon. Gamma allows you to adjust the mid-tones lighter or darker, with little change in the light and dark areas.
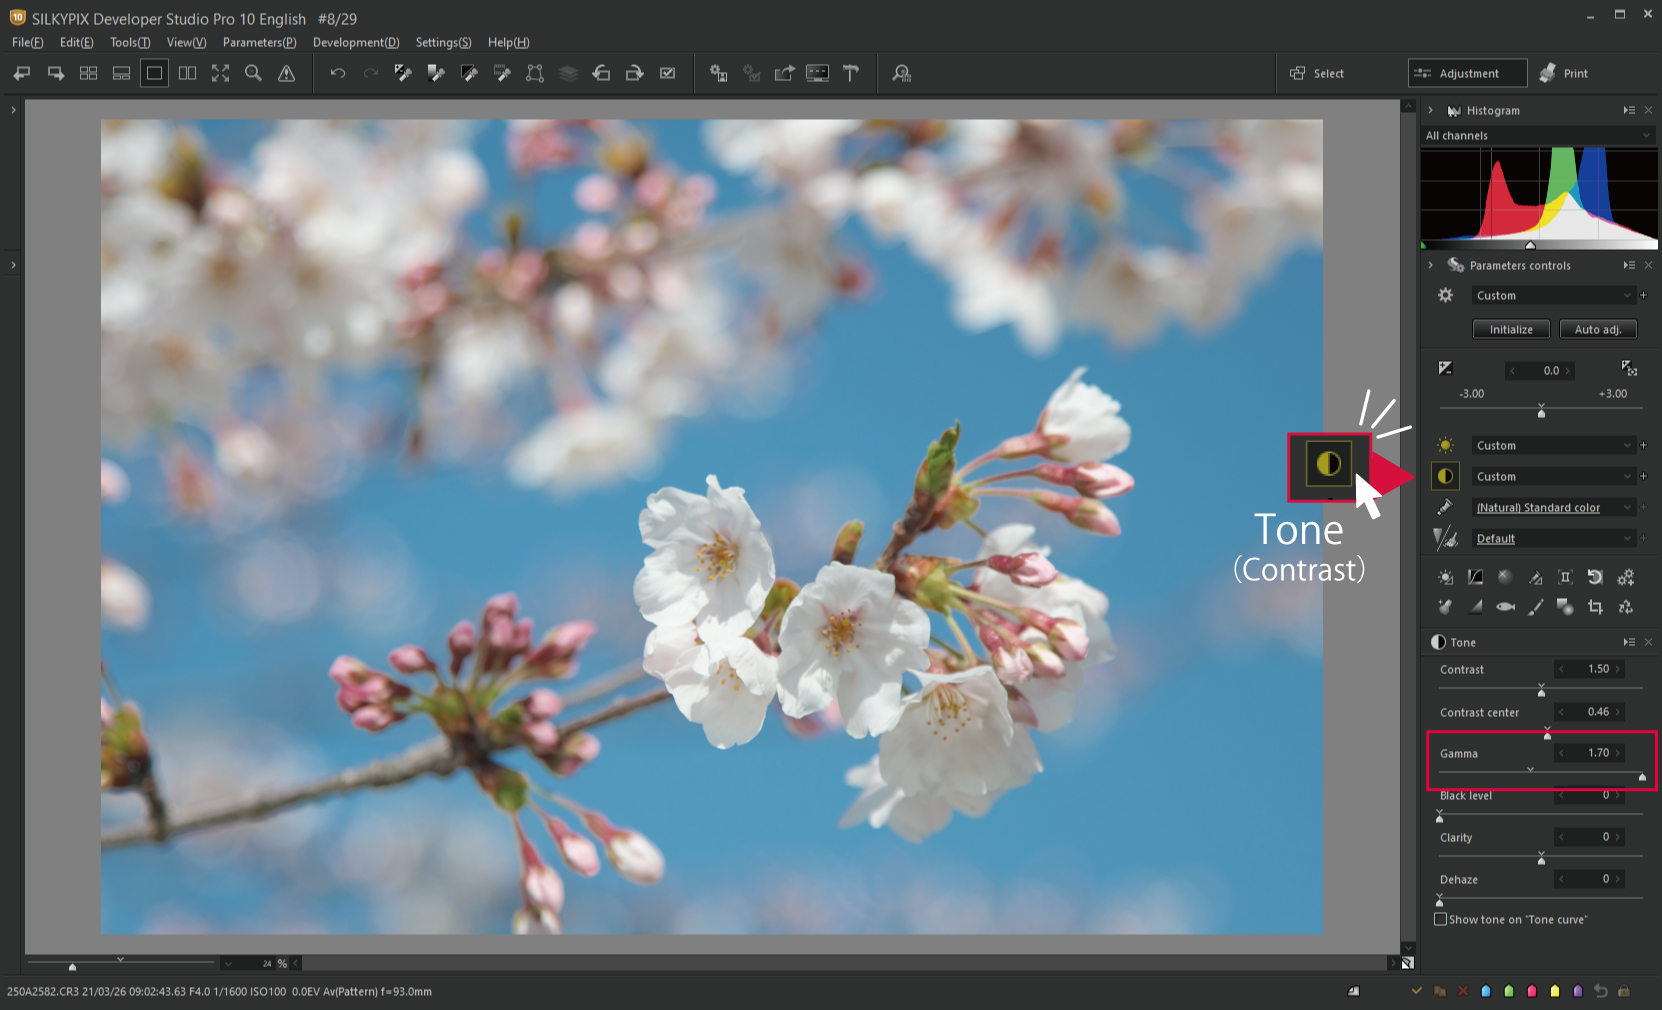
By raising the gamma in this way, you can brighten up the areas except for the highlights. Even if you look at the histogram, the blown-out highlights have been reduced than the time of Exposure +2.00EV.

This compares Exposure + 2.00EV with Exposure + 0.70EV and Gamma + 2.00 corrected image. It can be corrected brightly without blown-out highlights.
Note that 1.70 is the maximum value on the Gamma slider, but you can adjust it with a strength of 1.70 or higher by clicking > next to the number. You can adjust the adjustment value to match the image.
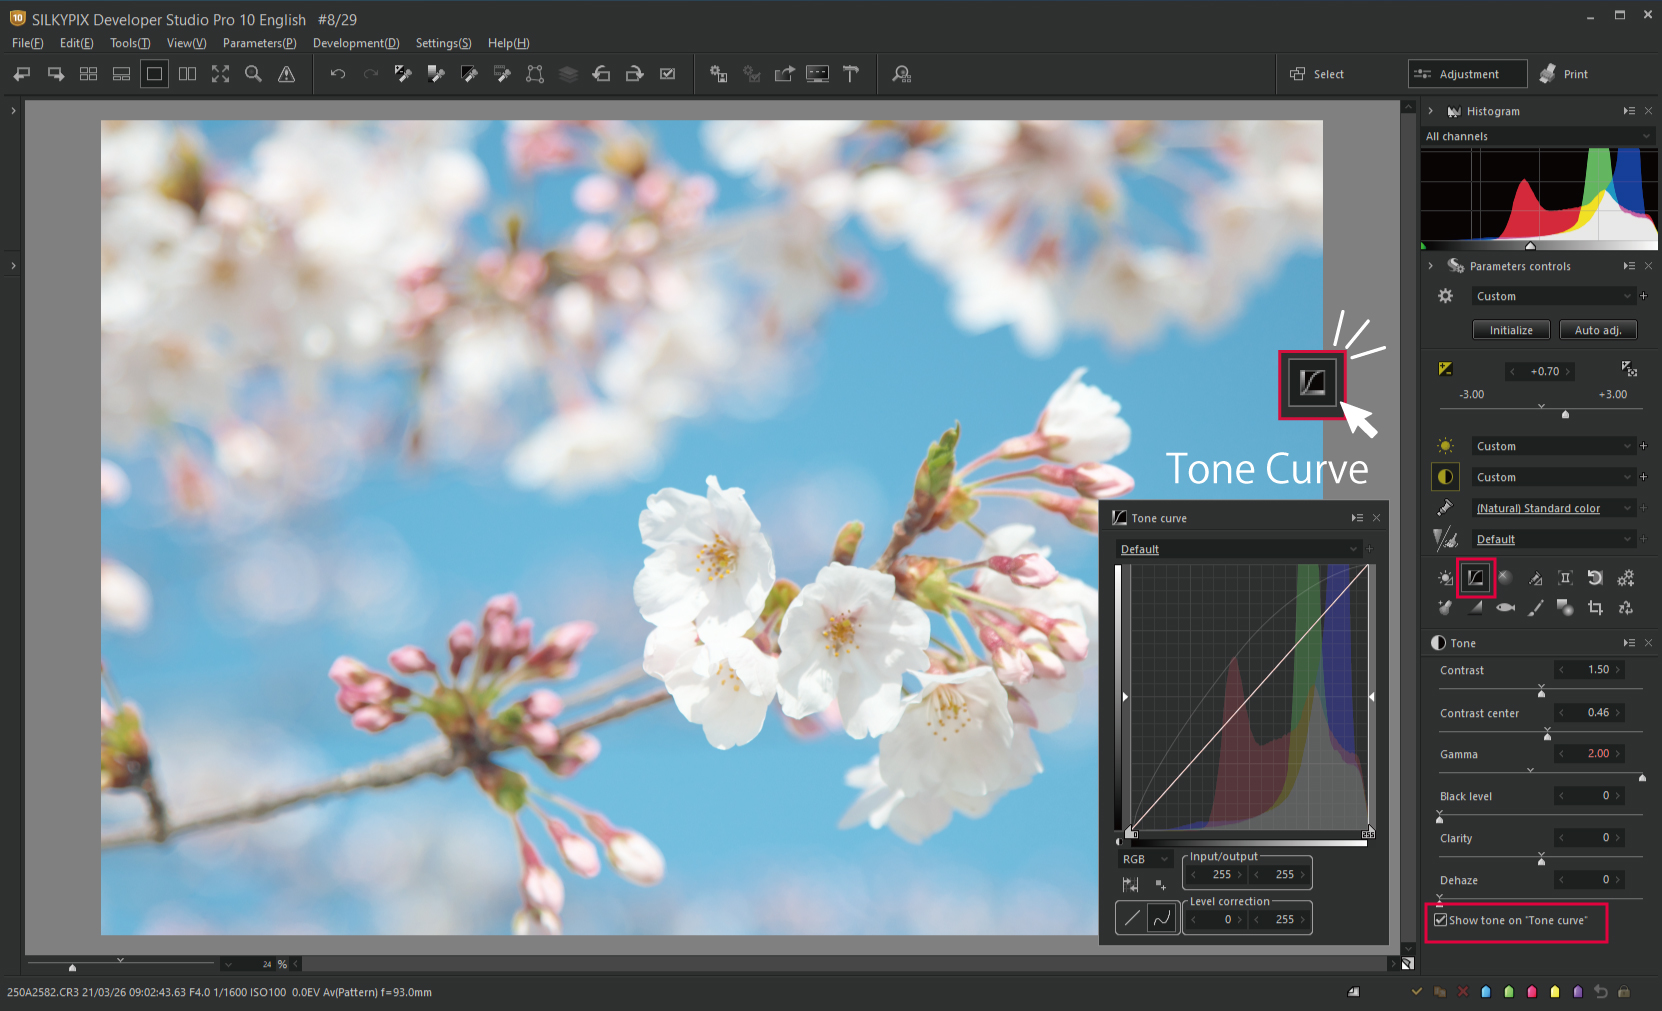
You can watch how the adjustments in this Tone tab have changed on the Tone curve by checking [Show tone on “Tone curve”].
In this photo, the middle of the tone line curves upwards. Now that the mid-tones are brightly corrected, it is drawing a Gamma curve like this.
When you want to finish the flower petal-soft, you can use the “Clarity” in the Tone tab.
Clarity is an adjustment function that allows you to reproduce a weak outline or its surroundings sharply or softly. Moving it to a minus value weakens the texture and makes the expression softer.
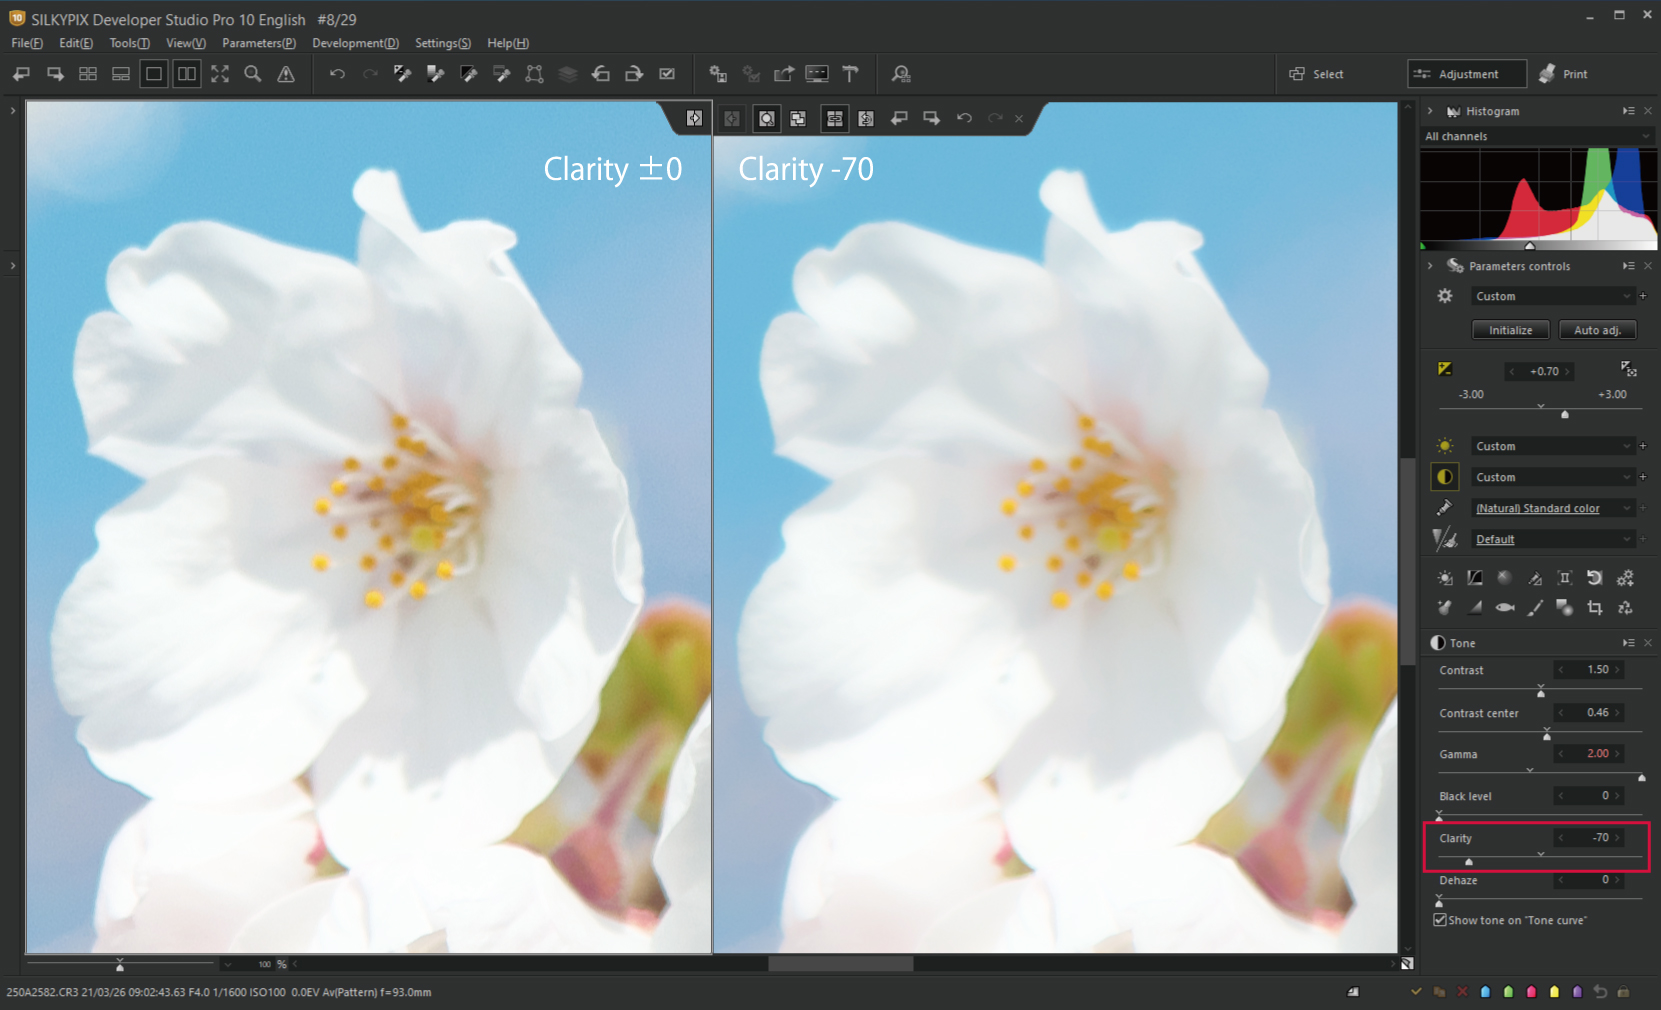
I adjusted slightly stronger to make the effect easier to understand. By reducing the Clarity, the flower petal’s texture became weaker and softer. Unlike the soft focus filter, the center of focus and resolution can be maintained as much as possible to give a softer texture.
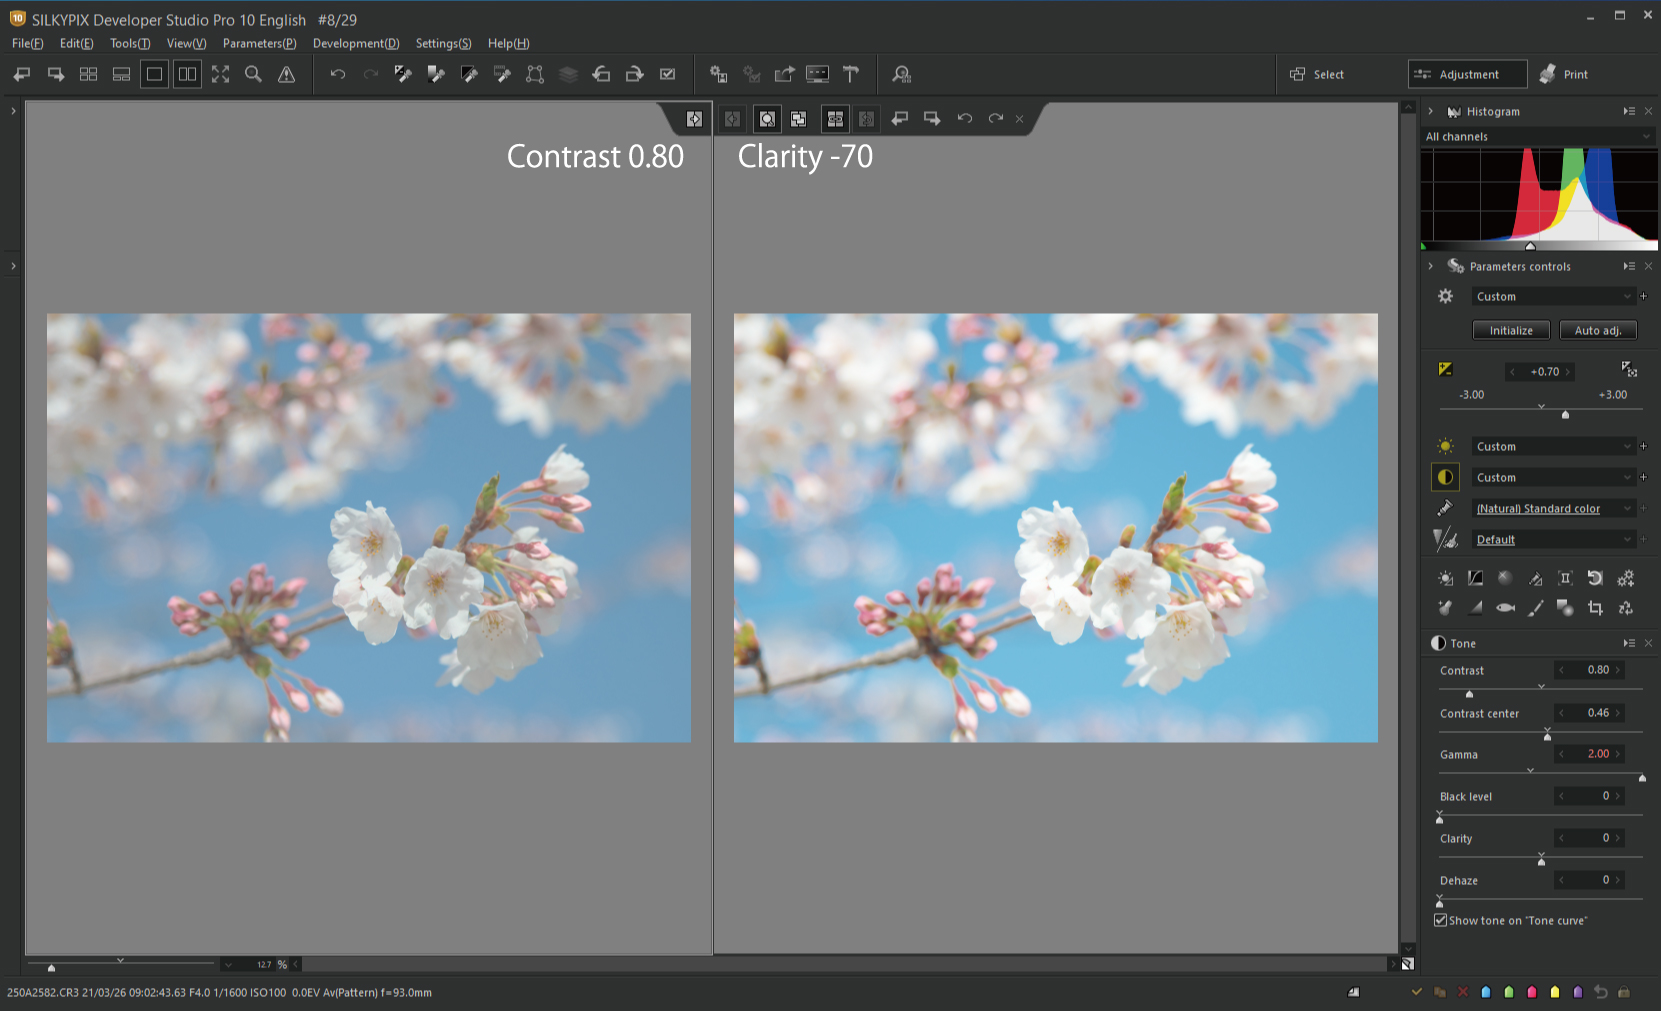
Here is a comparison with the contrast adjusted to soft. The left side of the upper image is the one with very low contrast.
Because the contrast adjustment is applied to the entire photo, the difference in brightness and darkness of the entire photo are lower and affect the color of the sky.
The Clarity can adjust the contrast partially while analyzing the information of neighboring pixels. This allows you to adjust the texture of the subject without affecting the sky or blurred areas.
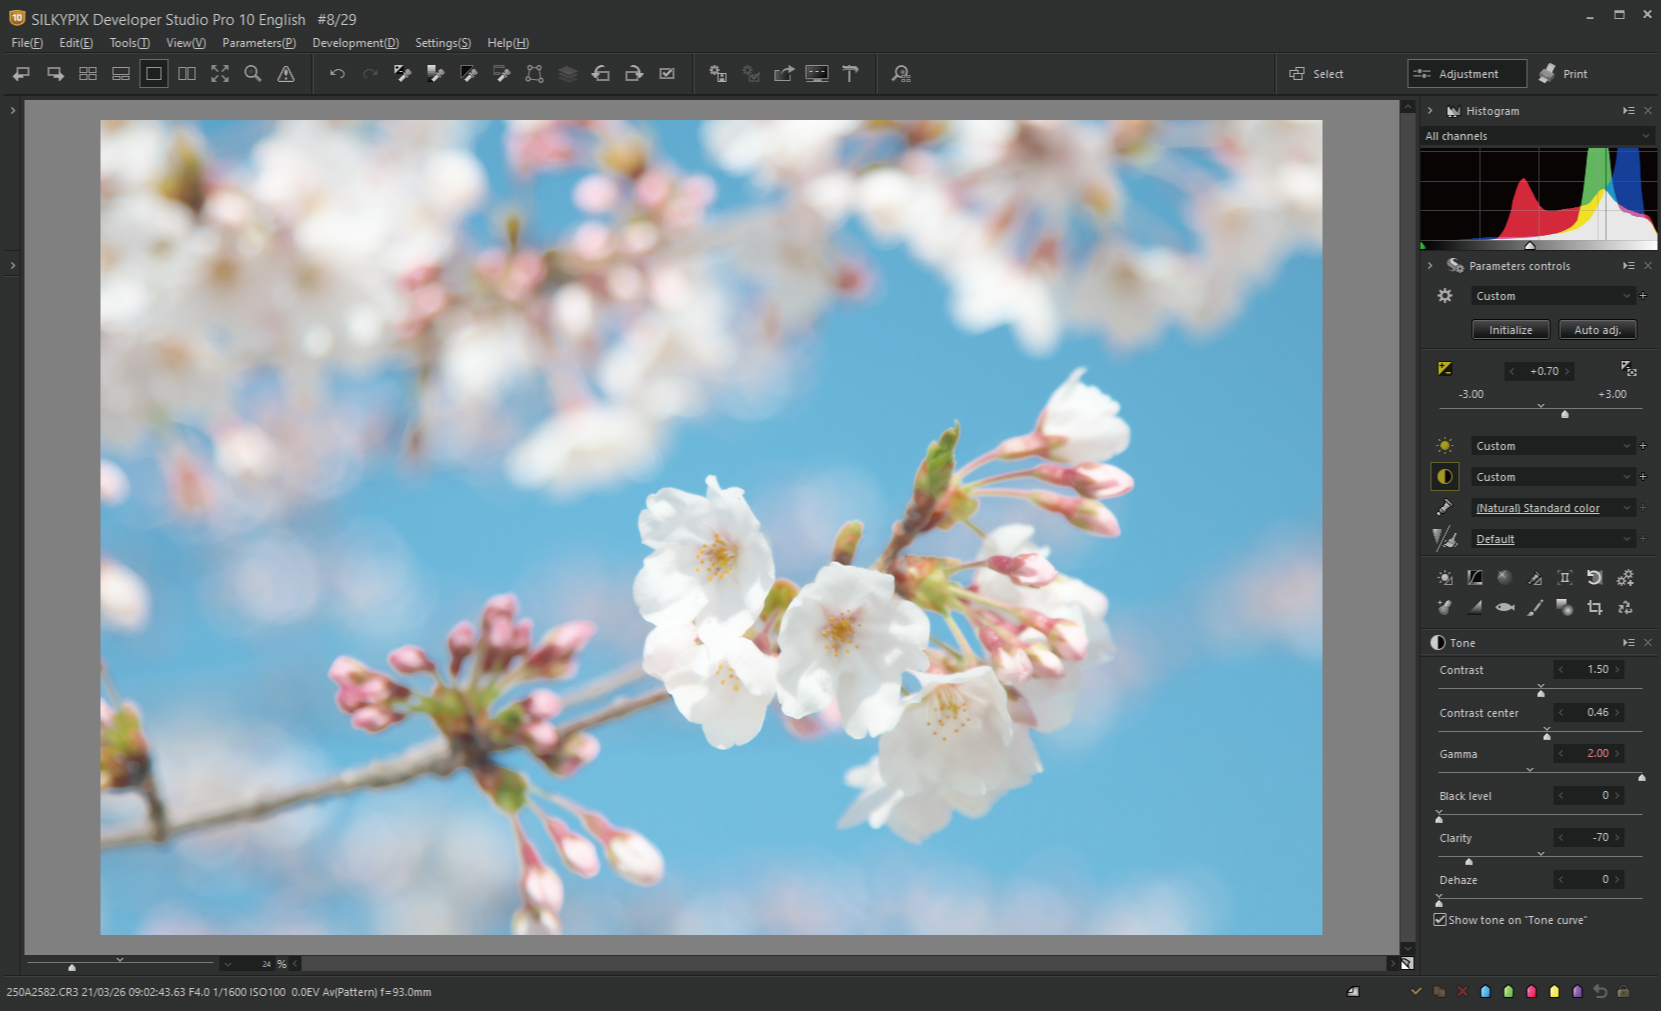
Using Gamma and Clarity, I was able to finish cherry blossom photos bright.
Adjusting a rape blossoms photo to a high-key tone
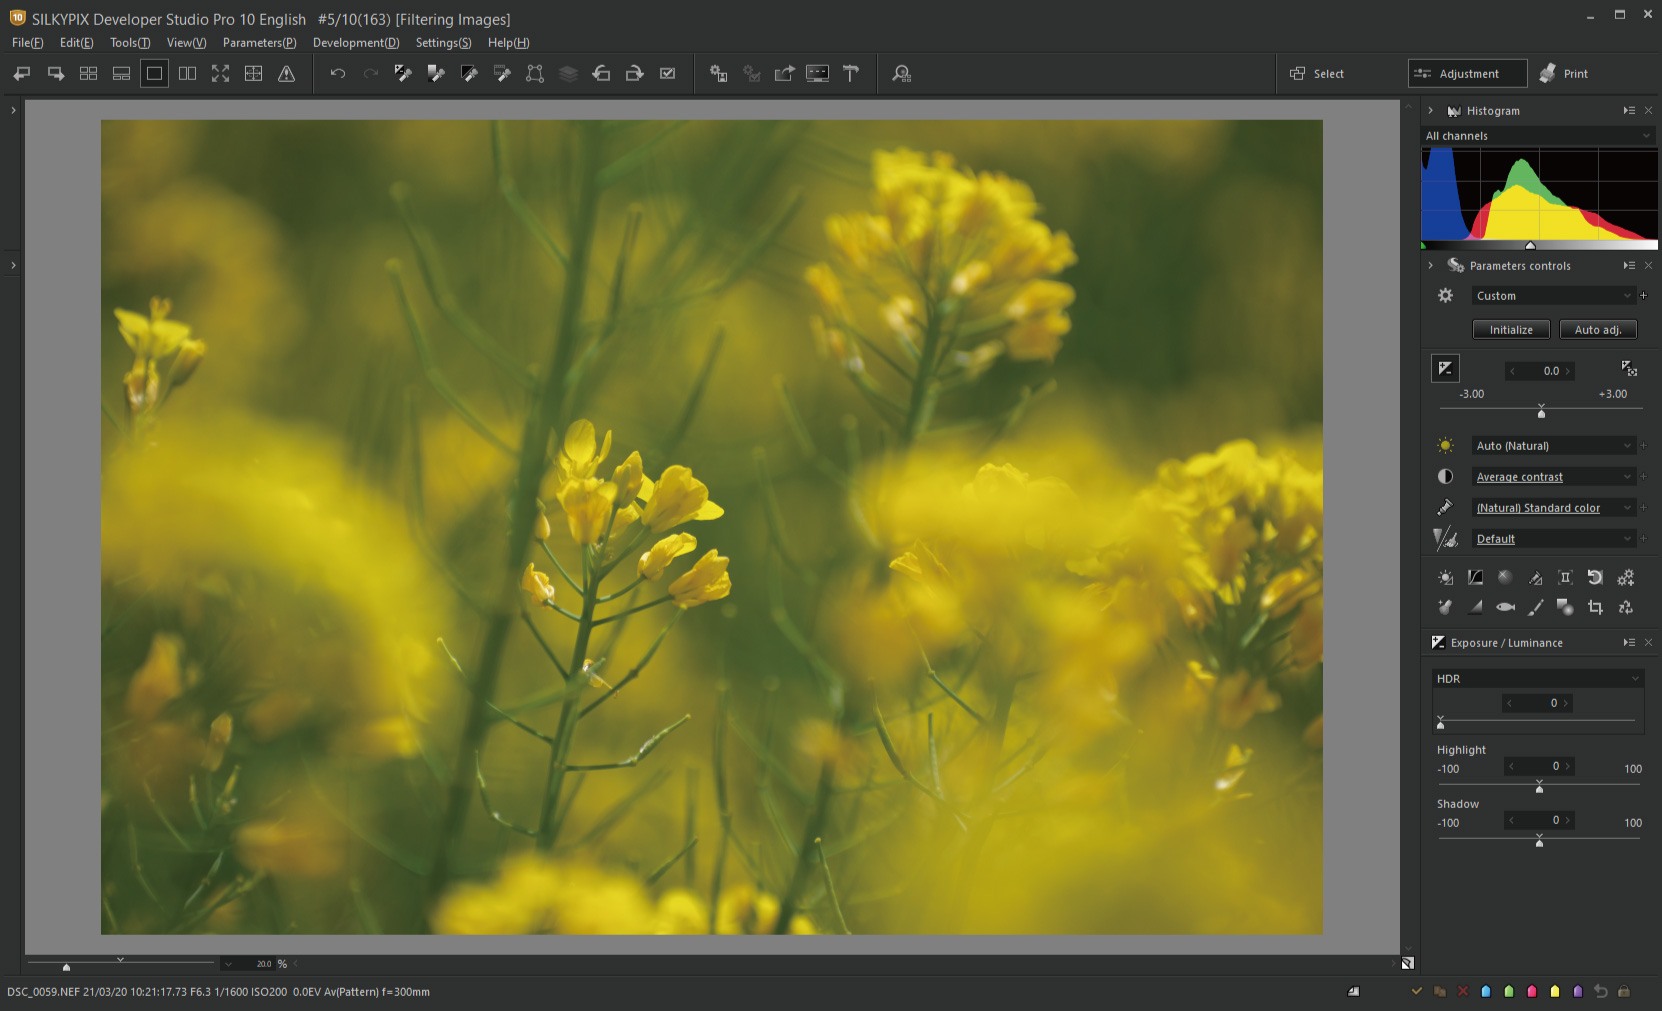
Next, I would like to use the Tone curves to finish the photo of rape blossoms.
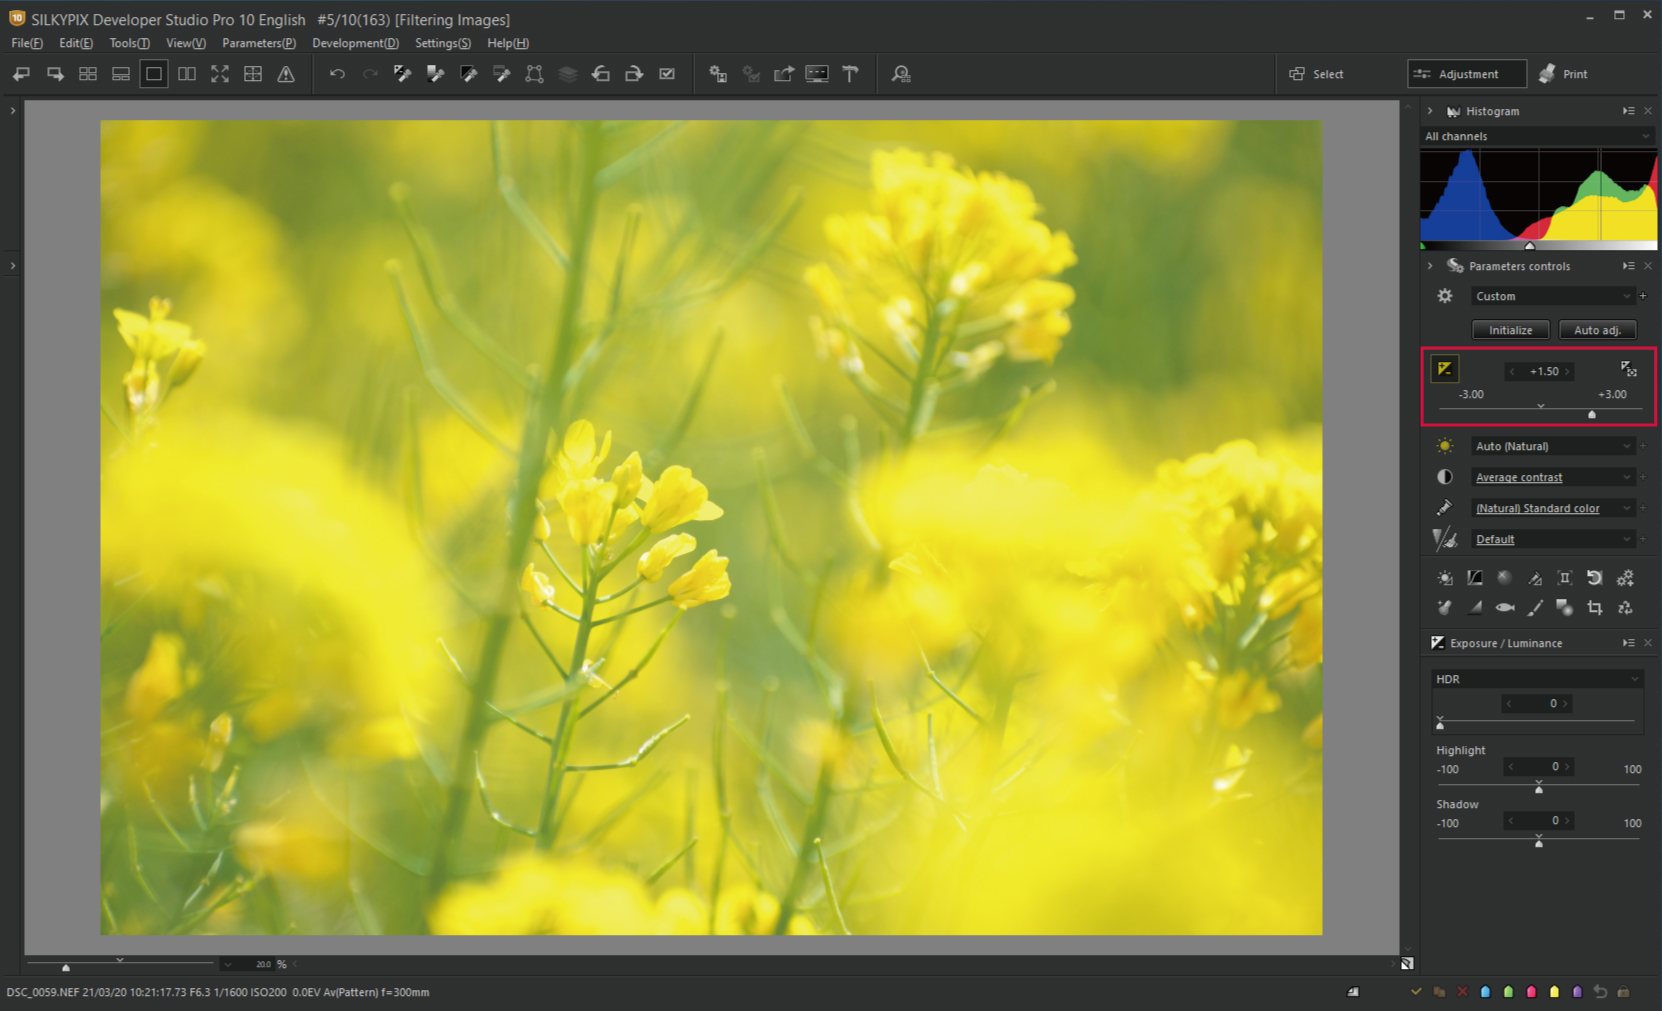
First, I tried adjusting Exposure. Because the brightness of the entire photo is evenly adjusted, the originally bright yellow petals are saturated.
So, I would like to use the L (Luminance) Tone curve to get a high key tone.
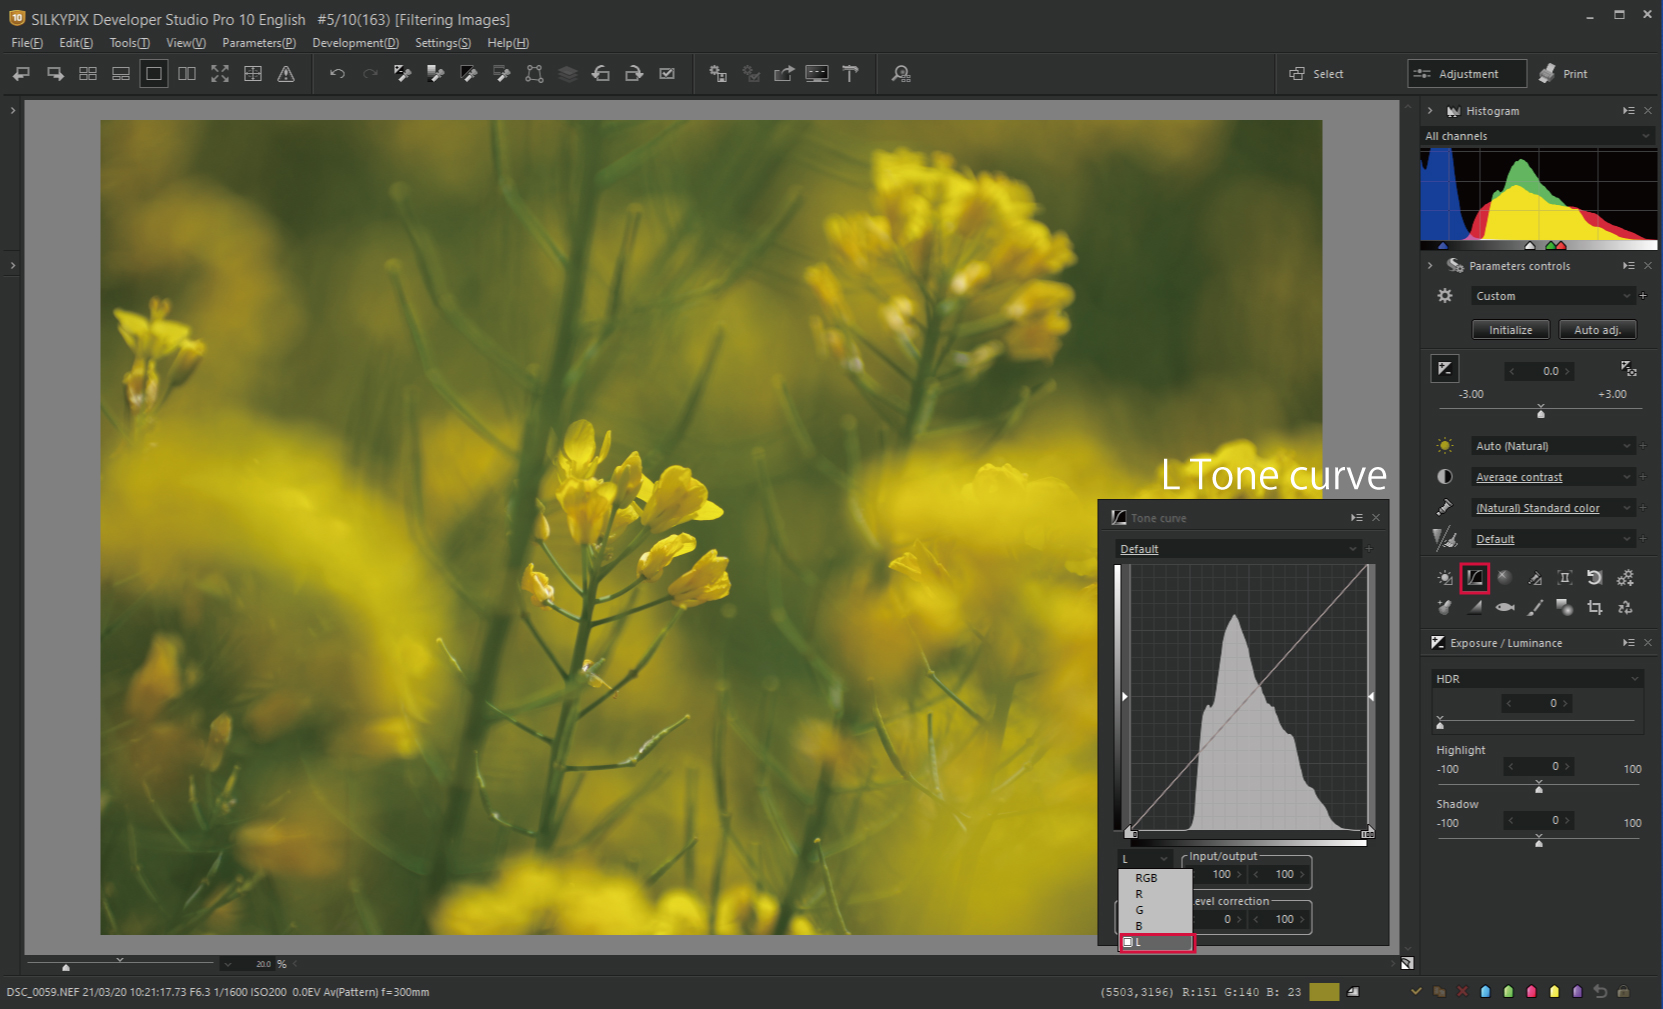
L Tone curve is a function that allows you to adjust only the luminance tone. Changing the tone has little effect on the color.
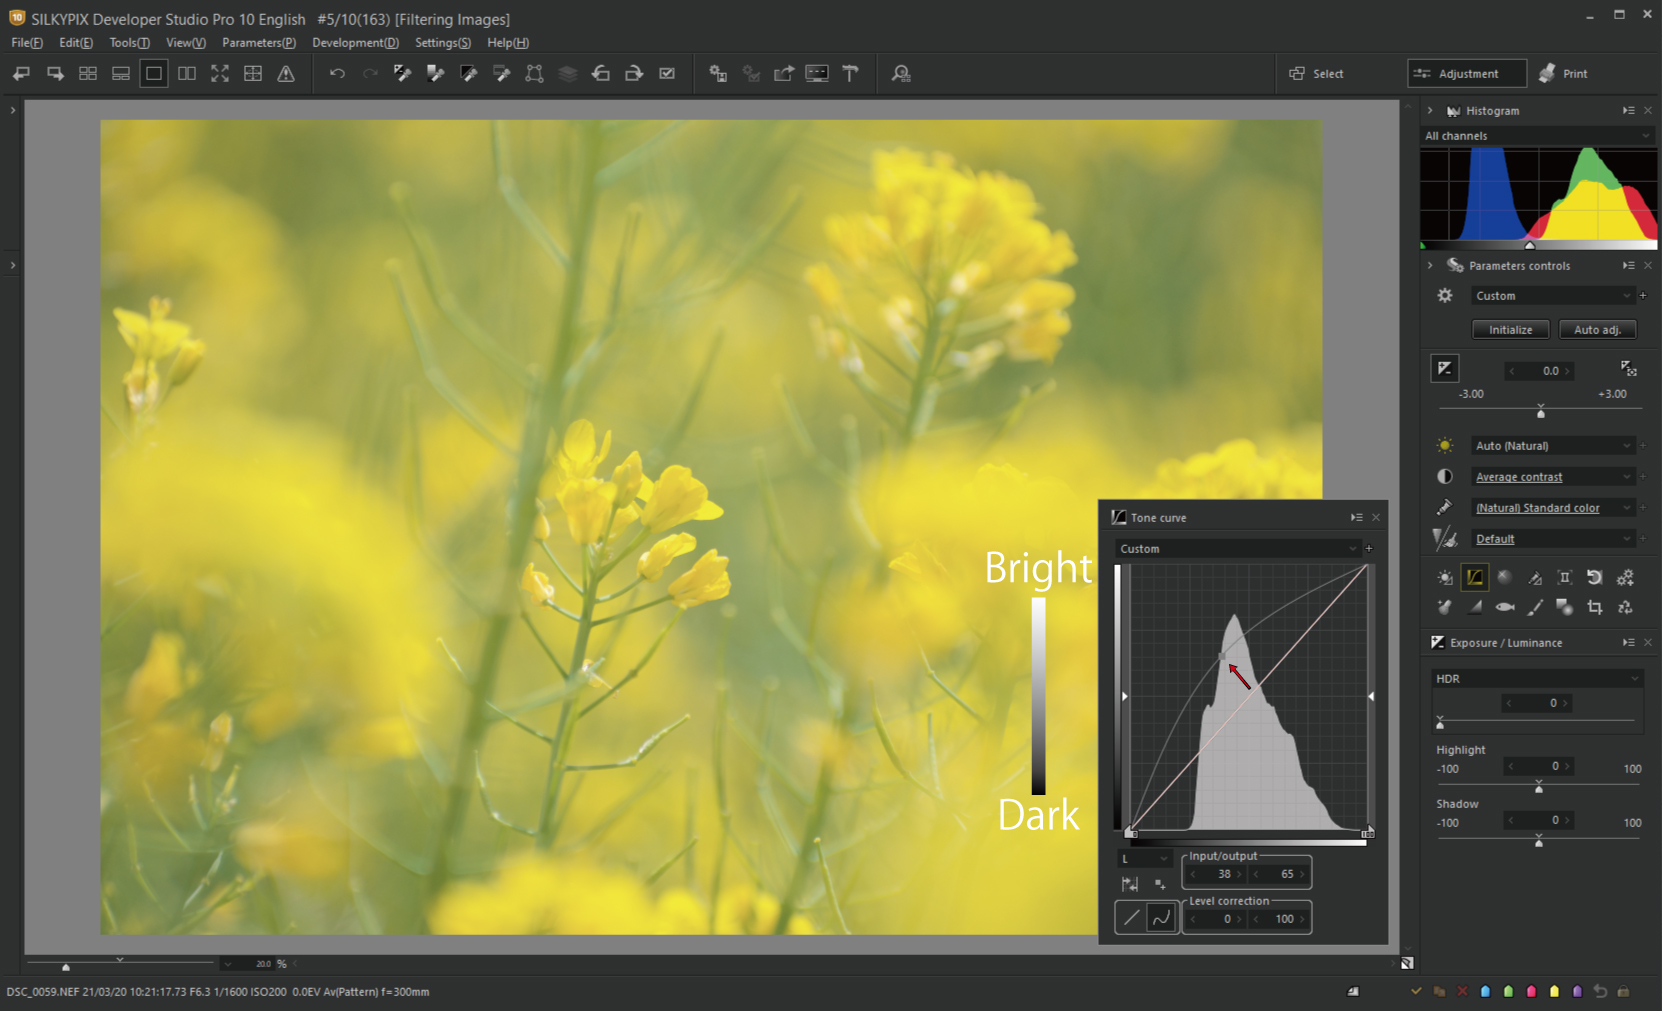
The tone curve can be corrected brighter by lifting the line upper and darker by lowering it down. Lifting the center of the line as you saw in the first photo of the cherry blossom can brighten up only the mid-tones without corrections to the highlights and shadows.
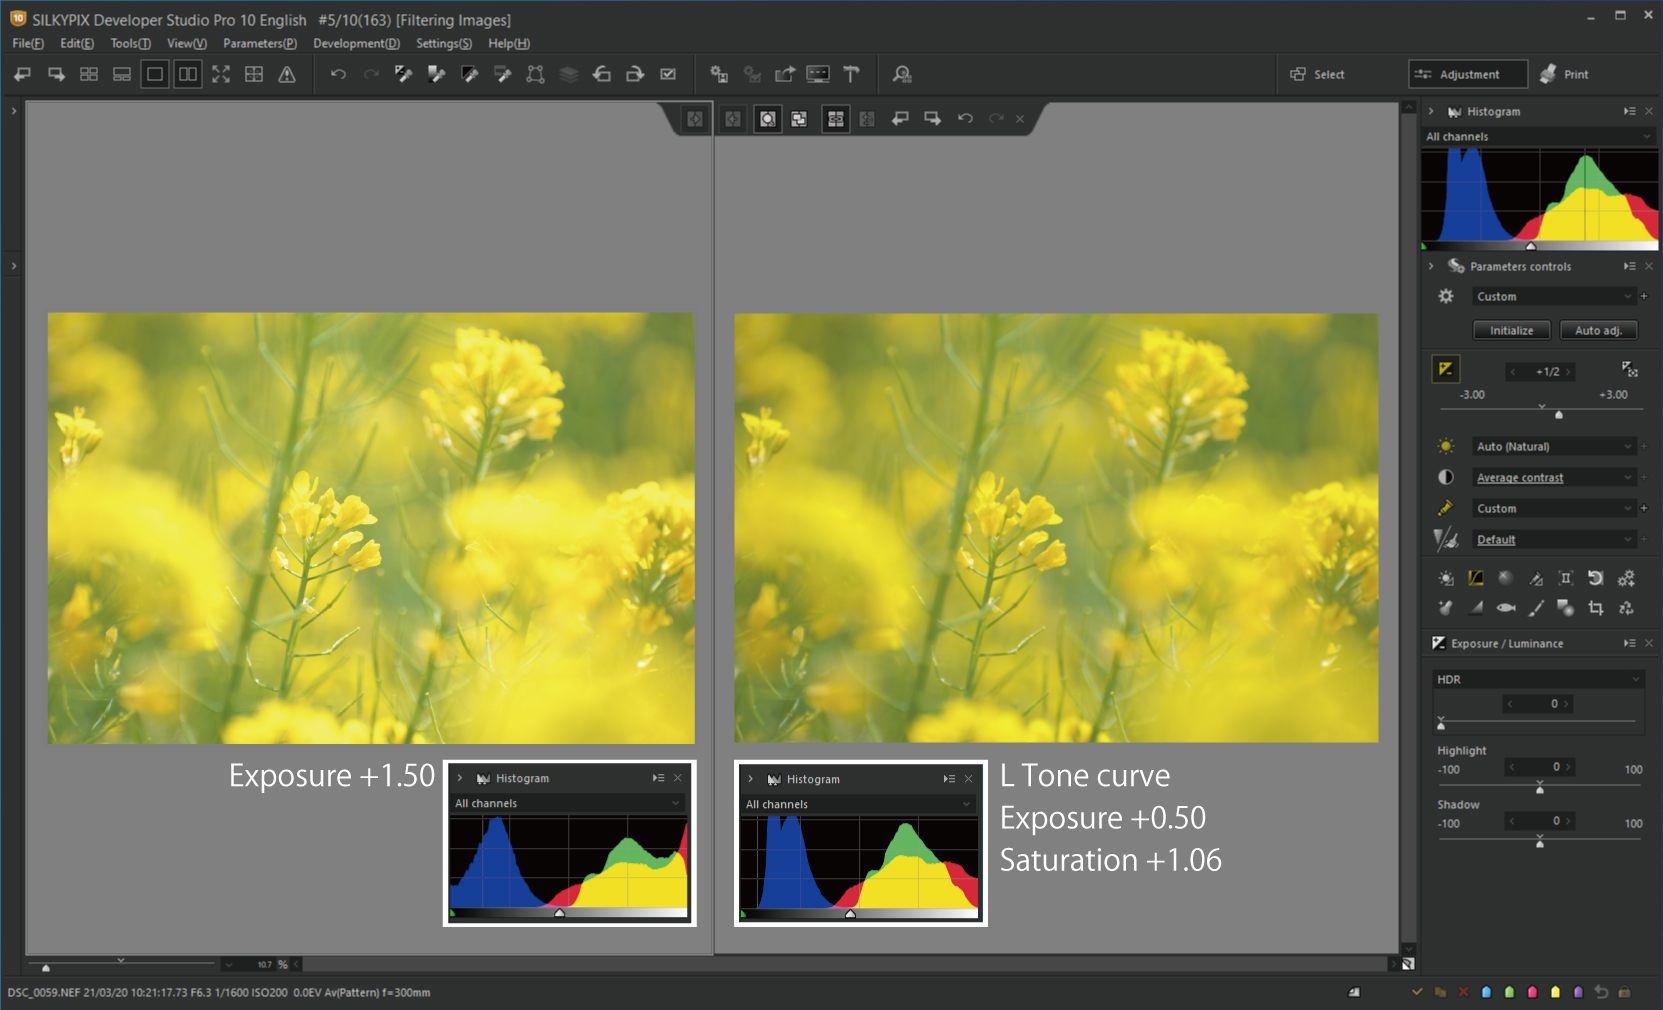
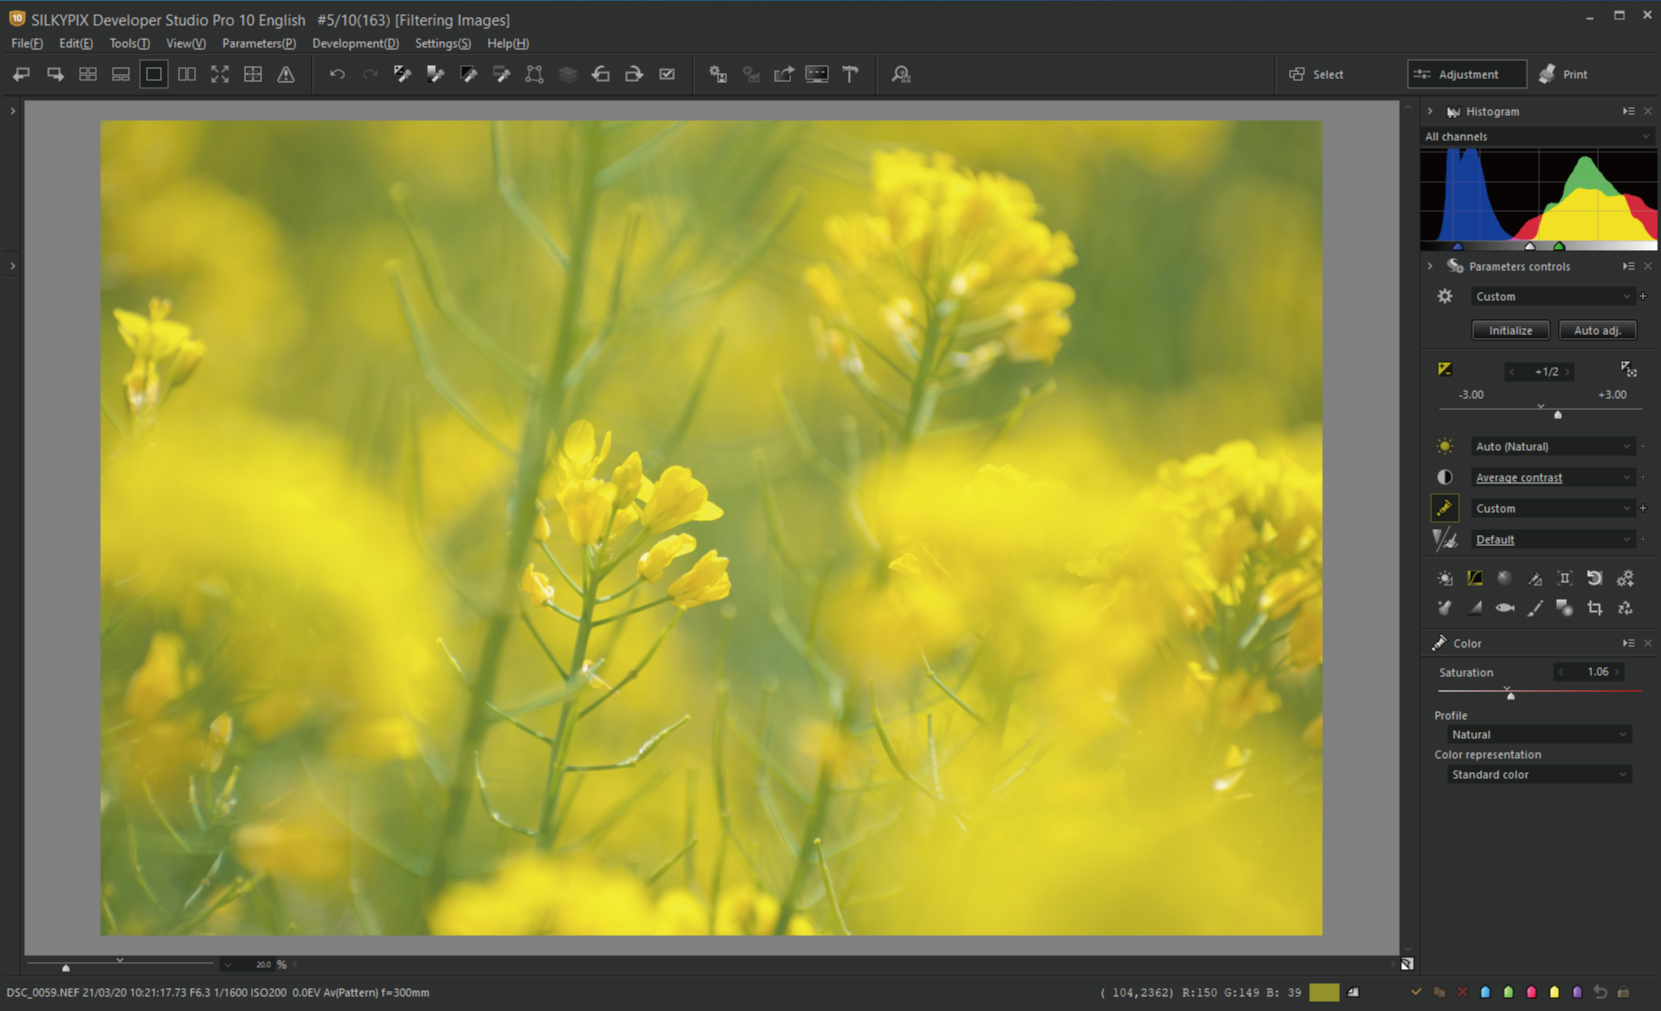
I was able to raise the Gamma curve and correct it brightly without crushing the yellow color. Because of the minimal effect on color, the L Tone curve can adjust to a naturally high key tone.
Try using also Exposure and Saturation to create your image.
If you take photos in RAW and develop them with SILKYPIX, you can finish the photos in a bright high-key tone while suppressing blown-out highlights. Please try it with your photos.
Try it first! You can try a free trial for 30 days!
RAW Development software “SILKYPIX Developer Studio Pro10” can be downloaded from the SILKYPIX website. You can use All functions as a free-of-charge trial experience for 30 days after installation.
RAW Development software used: SILKYPIX Developer Studio Pro10
![]()